
Villager V6-181 3.0L SOHC VIN 1 EFI (1997)
Valve Body Bolt Removal
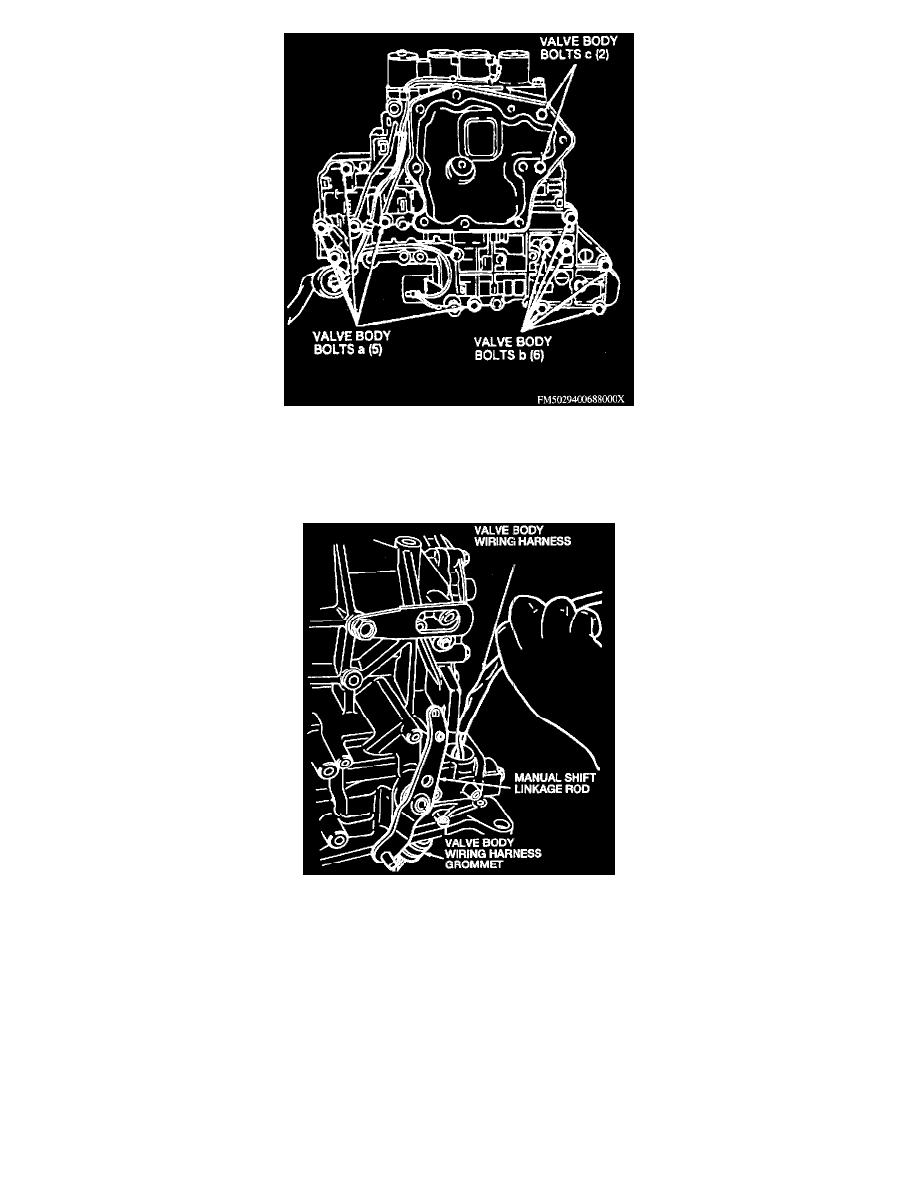
10. Remove the valve body bolts a, b, and c.
NOTE: Identify the valve body bolts for installation.
11. Slide the valve body wiring harness through the transaxle case.
12. Remove the main control valve body from the transaxle case.
NOTE: Be careful not to drop the manual valve or the accumulator piston spring when removing the main control valve body.
INSTALLATION
1. Route the valve body wiring harness through the transaxle case.
2. Install the spring clip to secure the valve body wiring harness.
3. Install the two valve body wiring harness bolts. Tighten the two valve body wiring harness bolts to 7-9 Nm (62-79 inch lbs.).
4. Set the manual shift linkage rod in the NEUTRAL (N) position.