
Zephyr L4-140 2.3L SOHC (1983)
Lower Side Moulding / Trim: Technical Service Bulletins
Bodyside Trim/Moldings - Service Procedure
Article No. 83-13-1
EXTERIOR TRIM - MOULDING - BODYSIDE - SERVICE OR REPLACEMENT (ADHESIVELY ATTACHED)
FORD ALL CAR LINES
Moulding-Bodyside protection, adhesively attached, which display loose ends, separation or fall off, may be serviced using the following procedure.
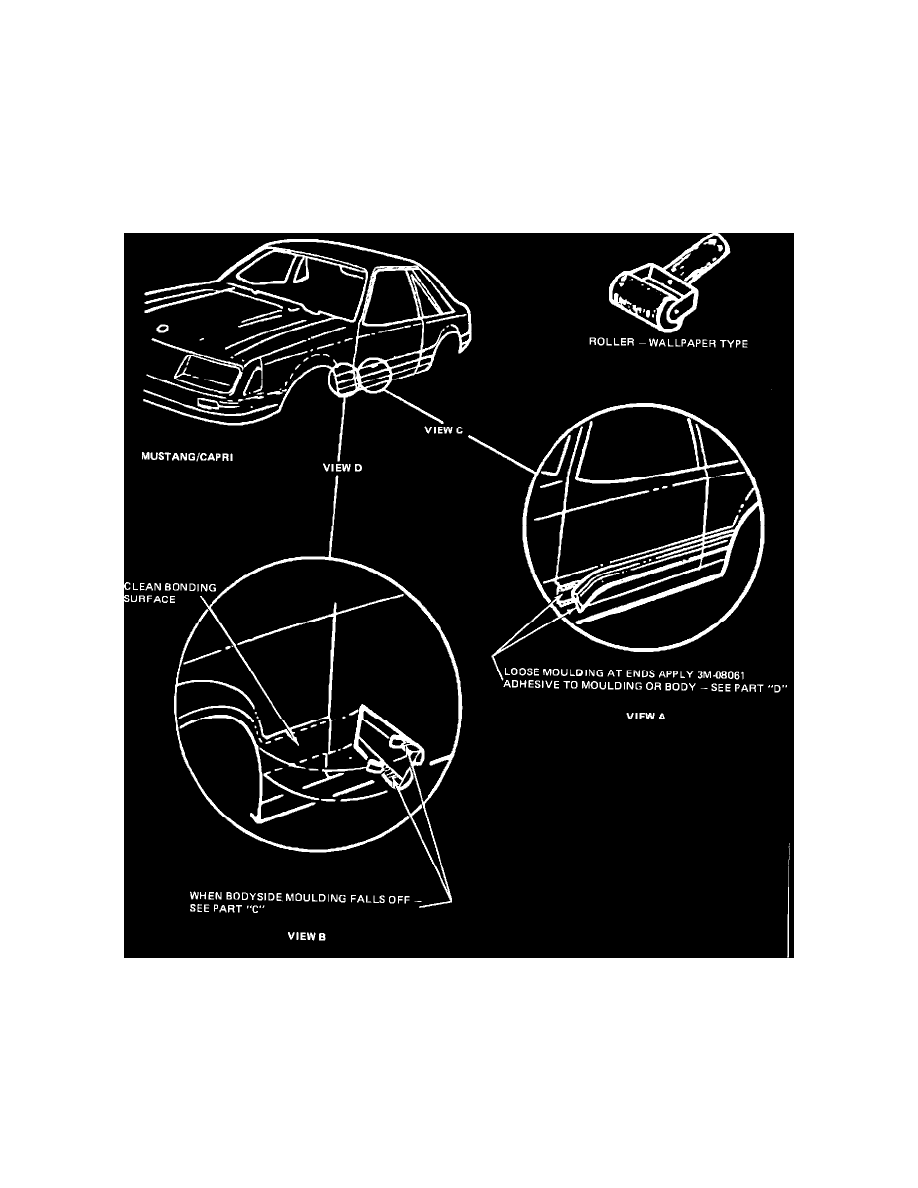
FIGURE 1
Service procedure for bodyside mouldings which become partially loose at the ends (Figure 1, View A).
1.
Pull loose end of moulding away from body just far enough to gain access for cleaning the body surface and moulding with isopropyl alcohol.
2.
Using a small, thin, flat brush or applicator, apply 3M Plastic and Emblem Adhesive, #08061 (clear) to the surface of the vehicle or moulding.
3.
Press the loose moulding to the body so that there will be adhesive transfer to both the moulding and vehicle surface. Gently pull the loose area of
the moulding slightly away from the vehicle surface and allow the adhesive transfer area to set for about 30 seconds to become tacky.
4.
Press the moulding firmly to the body and hold in place mechanically for about one hour. Remove the mechanical clamping or holding device and
inspect the serviced area(s) to ensure no air gaps exist between the moulding and car body.