
Zephyr L4-140 2.3L SOHC (1983)
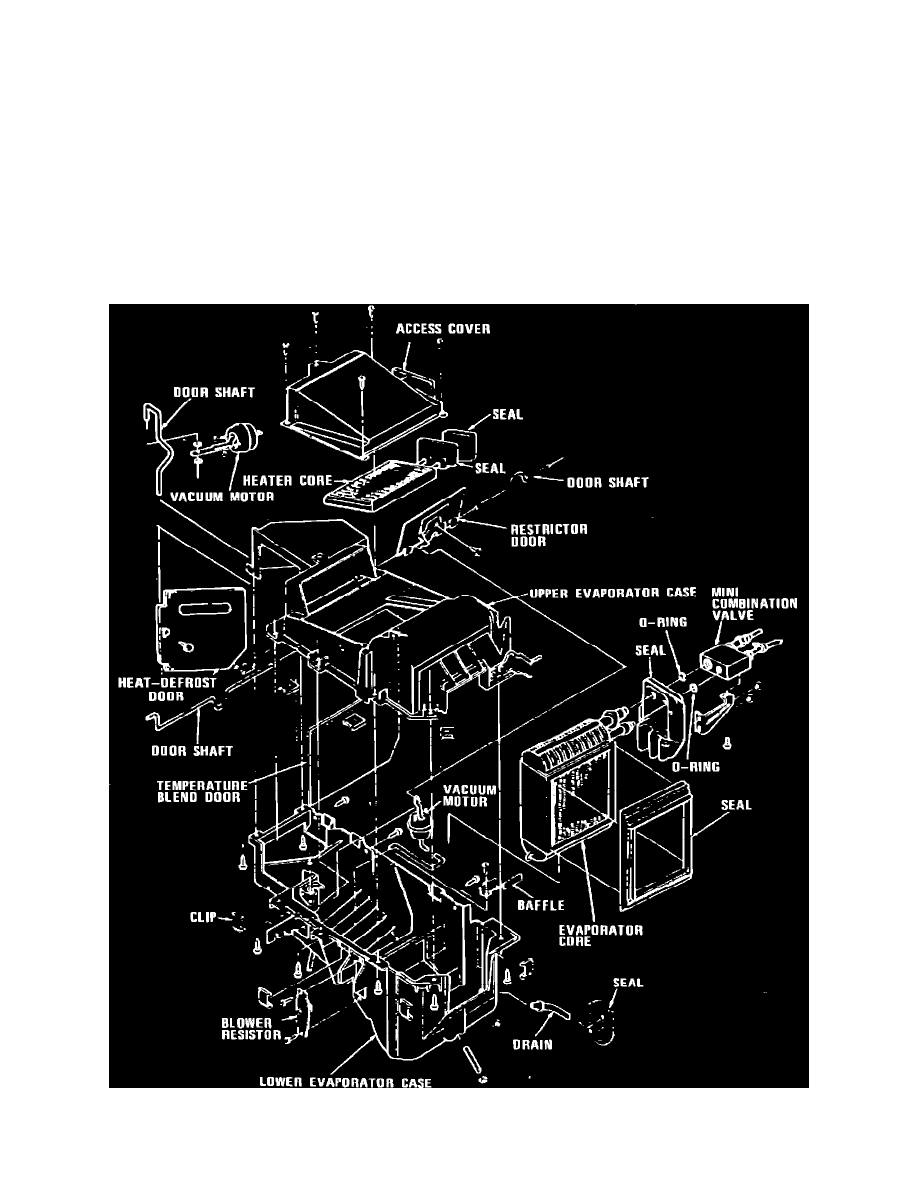
Models with heater cases built after 11-1-81 use a one piece case, Fig. 10. This type case cannot be separated and all interior case components
must be removed and installed through openings in case.
1.
Disconnect battery ground cable and drain cooling system.
2.
Disconnect heater hoses from heater core and seal the core tubes.
3.
Remove glove box liner.
4.
Remove instrument panel to cowl brace retaining screws and brace.
5.
Place temperature control lever in the warm position.
6.
Remove heater core cover retaining screws and the cover, Figs. 10 and 11.
7.
From engine compartment, remove heater case assembly mounting stud nuts.
8.
Push heater core tubes and seal toward passenger compartment to loosen heater core from case assembly.
9.
Remove heater core through glove box opening.
10.
Reverse procedure to install.
With Air Conditioning
Fig. 8 Heater core with A/C. 1982 Cougar XR-7, 1982 Granada, 1982-83 Fairmont & Zephyr, 1982-88 Thunderbird, 1983-88 Cougar & 1983-86 LTD & Marquis