
3000GT V6-2972cc 3.0L DOHC (1993)
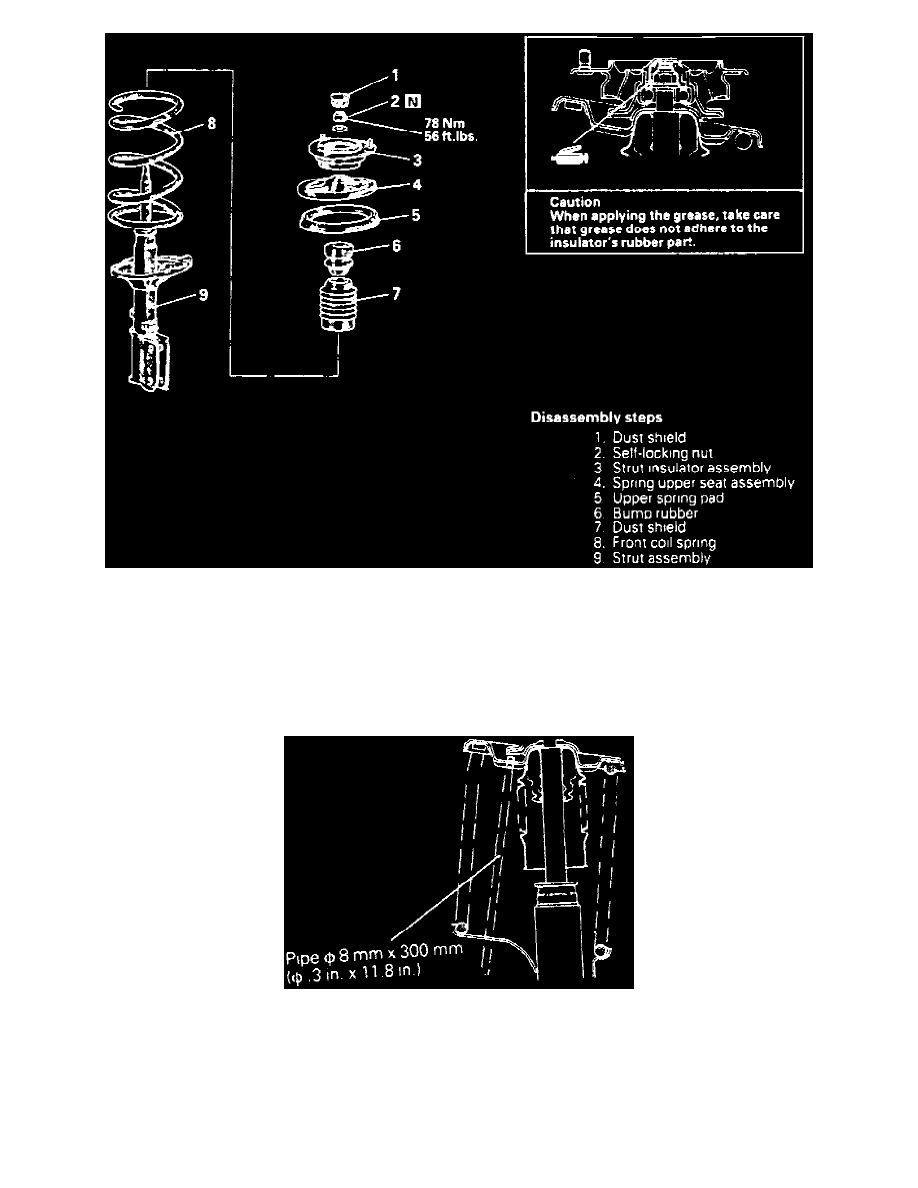
Fig. 17 Strut Assembly Removal
2. If necessary, disassemble strut assembly in numbered sequence as shown, Fig. 17, noting the following:
a. Secure upper seat using spring seat holder tool No. MB991176, or equivalent, then loosen strut self-locking nut. Loosen, but do not remove
self-locking nut until the next step is performed.
b. Compress coil spring using a suitable coil spring compression tool, then remove self-locking nut.
3. Reverse procedure to assemble and install, noting the following:
a. Assemble spring upper seat on piston rod of strut aligning notch in rod with notch in seat.
Fig. 18 Spring Upper Seat Installation
b. Install coil spring while aligning four holes in upper seat with four holes in lower seat using a 0.3 inch diameter by 11.8 inch long rod, Fig. 18.
c. With coil spring still compressed, secure upper seat and finger-tighten the self-locking nut.
d. Align both ends of the coil spring with grooves in spring seat, then slowly loosen compression tool.
e. Using seat holder tool, torque strut rod self-locking nut to 56 ft. lbs.