
3000GT AWD V6-2972cc 3.0L DOHC Turbo (1991)
Lower Control Arm: Service and Repair
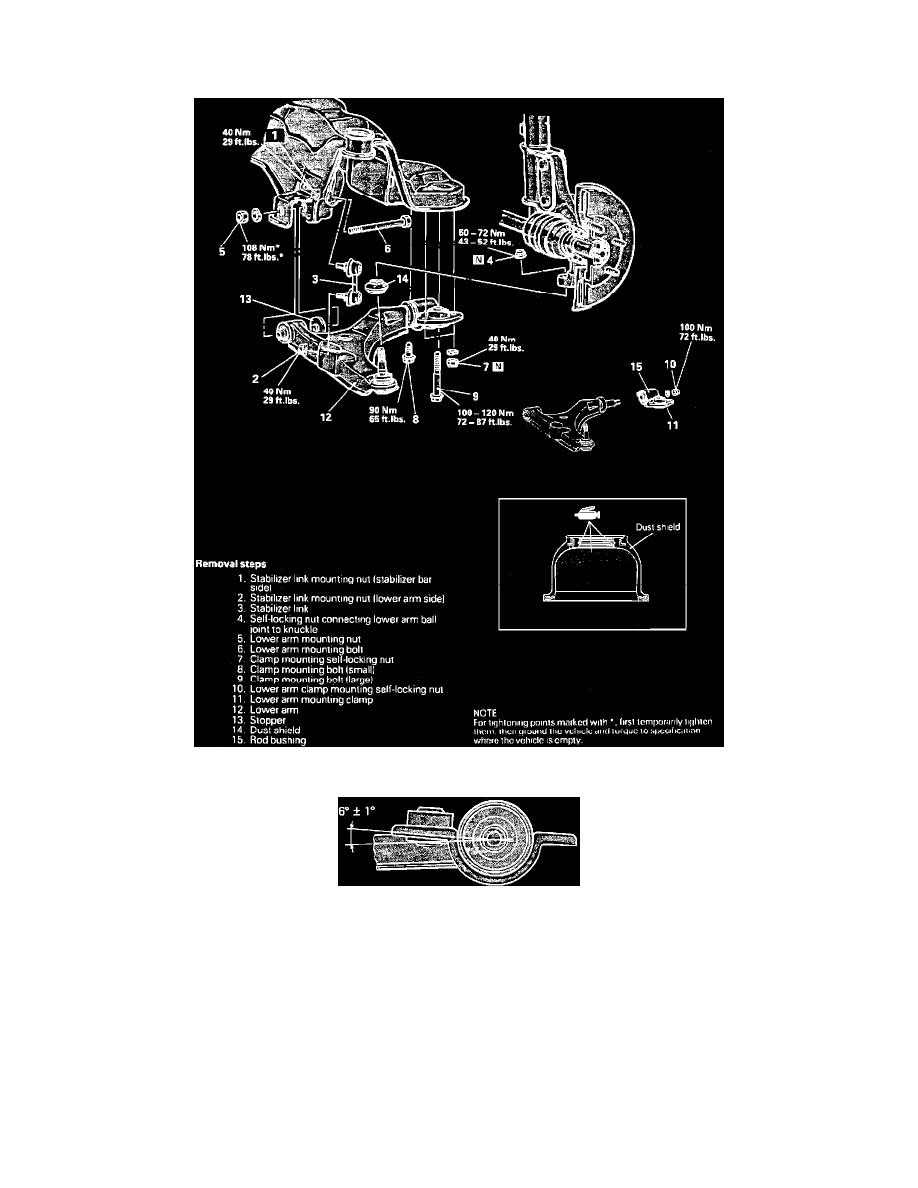
Lower Control Arm & Ball Joint
Fig. 1 Replacing Lower Control Arm & Ball Joint
Fig. 2 Installing Lower Arm Clamp Nut
1.
Replace lower control arm and ball joint in numbered sequence shown in Fig. 1, noting the following:
a. Remove ball joint using ball joint remover tool No. MB991113-01 or equivalent. Loosen but do not remove ball joint nut until lower
control arm is ready to be removed.
b. Place lower arm bushing bracket so that its mounting surface tilts 5-7° with respect to bottom surface of lower arm, then install self-locking
nut, Fig. 2.