
3000GT AWD V6-2972cc 3.0L DOHC Turbo 24 Valve (1996)
Lash Adjusters: Testing and Inspection
Lash Adjuster Leak Down Test
Caution:
-
The lash adjuster is a precision part. Keep it free from dust and other foreign matters.
-
Do not disassemble the lash adjusters.
-
When cleaning the lash adjusters, use clean diesel fuel only.
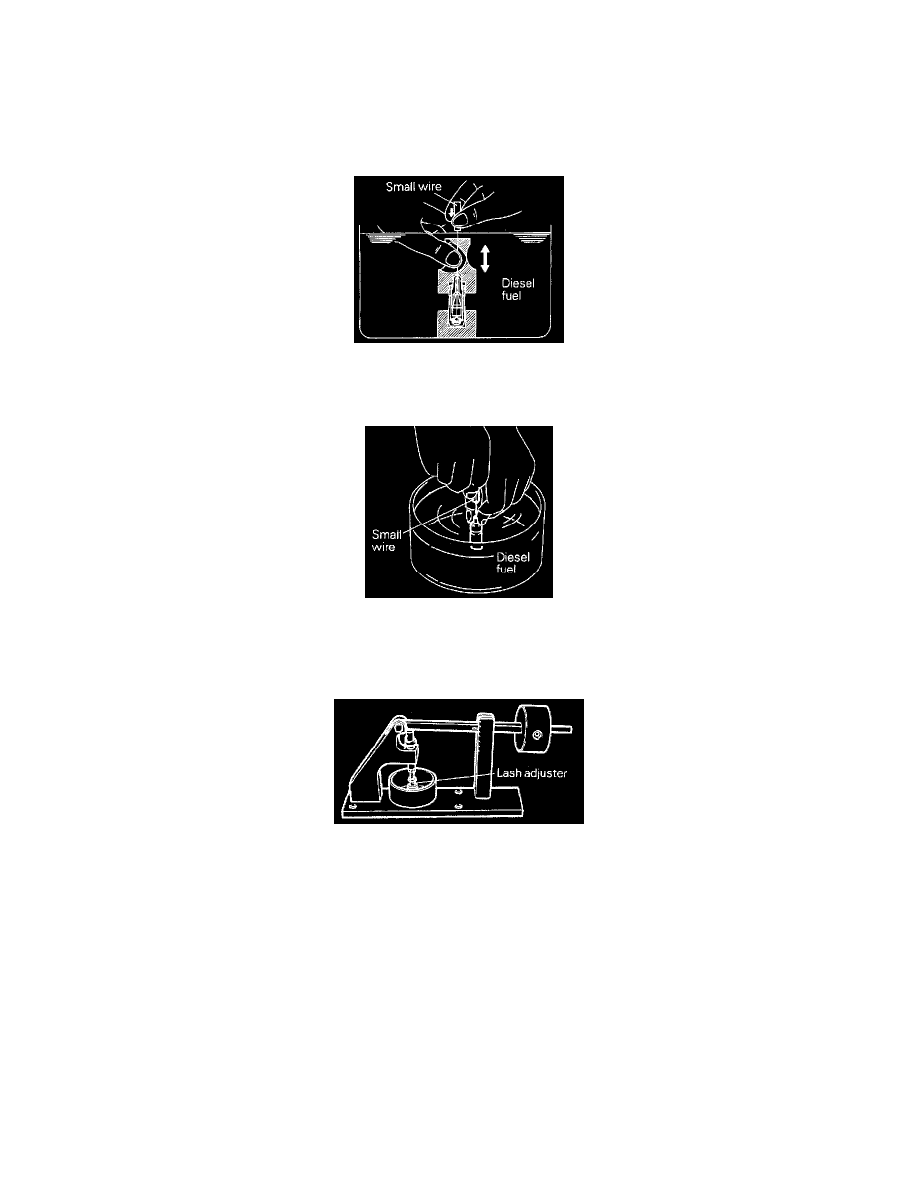
1. Immerse the lash adjuster in clean diesel fuel.
2. While lightly pushing down the inner steel ball using the small wire, move the plunger up and down four or five times to bleed air.
Use of the Retainer facilitates the air bleeding of the rocker arm mounted type lash adjuster.
3. Remove the small wire and press the plunger. If the plunger is hard to be pushed in, the lash adjuster is normal. If the plunger can be pushed in all
the way readily, bleed the lash adjuster again and test again. If the plunger is still loose, replace the lash adjuster.
Caution: Upon completion of air bleeding, hold the lash adjuster upright to prevents the inside diesel fuel from spilling.
4. After air bleeding, set the lash adjuster on the special tool (Leak down tester MD998440).
5. After the plunger has gone down somewhat 0.2 - 0.5 mm (0.008 - 0.020 in.), measure the time taken for it to go down 1.0 mm (0.04 in.).
Replace if the measured time is out of specification.
Standard value: 4 - 20 seconds / 1.0 mm (0.04 in.) [Diesel fuel at 15 - 20°C (50 - 68°F)].