
3000GT AWD V6-2972cc 3.0L DOHC Turbo 24 Valve (1996)
1. Exhaust camshaft sprocket (front bank side)2. Intake camshaft sprocket (front bank side) 3. Water pump pulley 4. Intake camshaft sprocket (rear
bank side) 5. Exhaust camshaft sprocket 6. Idler pulley 7. Crankshaft sprocket 8. Tensioner pulley
NOTE:
-
Since the camshaft sprockets turn easily, secure them with box wrenches to install the timing belt.
CAUTION:
-
Be careful, the camshaft is turned by the reaction of valve spring.
-
If the timing belt is reused, install it so that the arrow marks made at removal are in the direction of rotation.
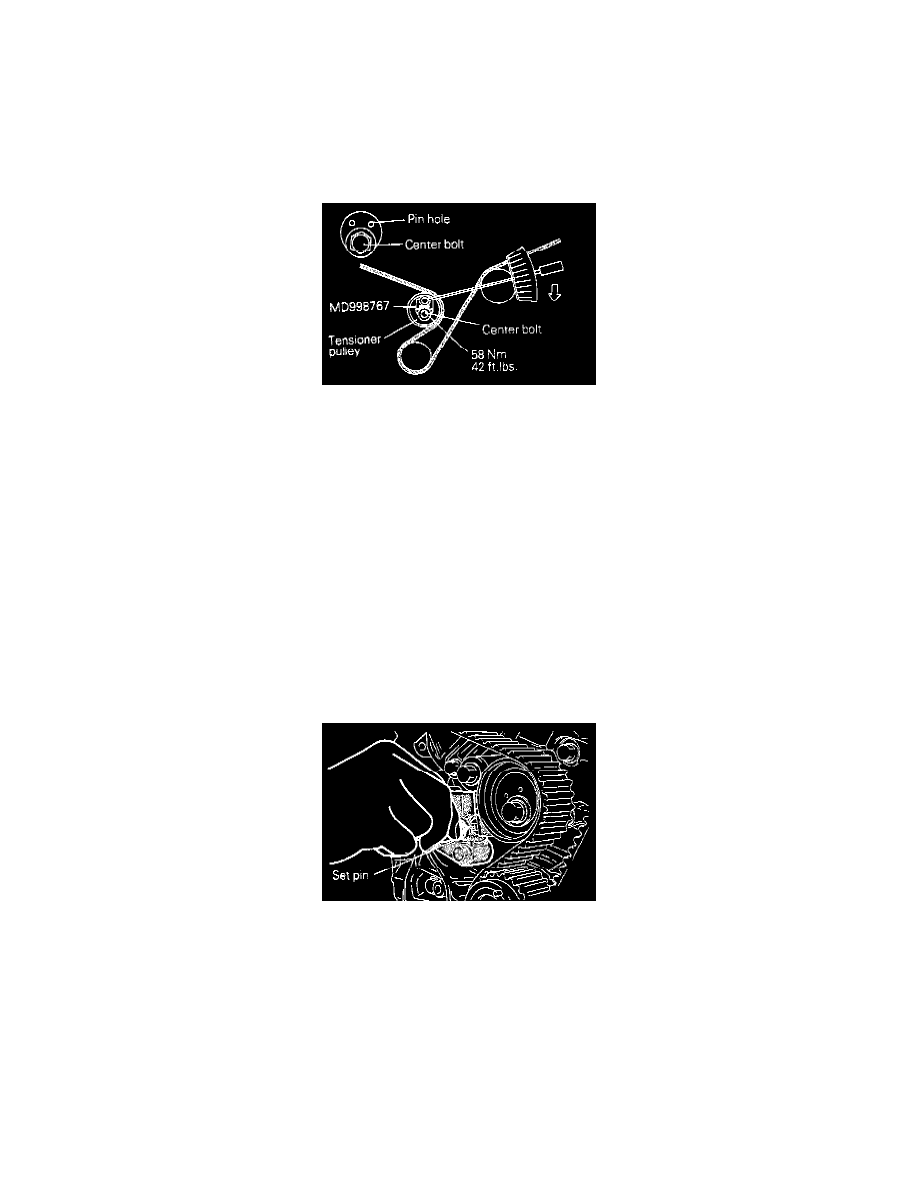
(c) Turn the tensioner pulley so that its pin holes are located above the center bolt. Then, press the tensioner pulley against the timing belt and, at the
same time, temporarily tighten the center bolt.
(d) Check that the timing marks on all sprockets are aligned properly.
(e) Remove the four clips.
ADJUSTMENT OF TIMING BELT TENSION
(a) Rotate the crankshaft 1/4 turn counterclockwise, then rotate it clockwise until the timing marks are aligned.
(b) Loosen the center bolt on the tensioner pulley. Using the special tool and torque wrench, apply tensioning torque to the timing belt and, at the same
time; tighten the center bolt to specification.
Specified torque: 10 Nm (7 ft.lbs.) [Timing belt tensioning torque]
CAUTION:
When tightening the center bolt, make sure that the tensioner pulley is not rotated together.
(c) Remove the set pin from the auto tensioner. At this time, make sure that the set pin can be easily removed.
(d) Rotate the crankshaft two turns clockwise and leave it as is for five minutes or more. Then, check again that the set pin can be easily removed
from, and installed to, the auto tensioner.
NOTE:
-
Even if the set pin cannot be easily inserted, the auto tensioner is normal if its rod protrusion is within specification.