
3000GT AWD V6-2972cc 3.0L DOHC Turbo 24 Valve (1996)
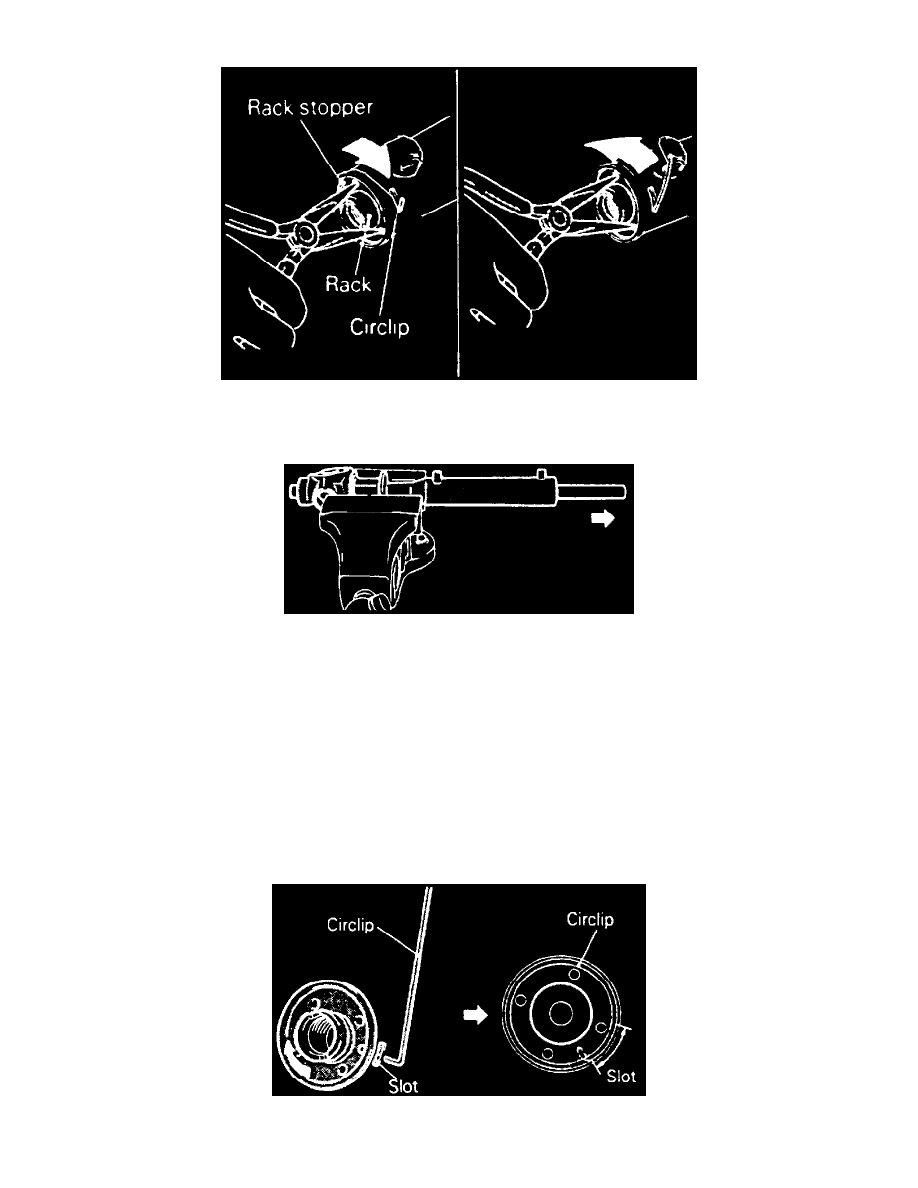
d. Turn rack stopper clockwise until end of circlip is visible.
Fig. 26 Circlip Removal
e. Turn rack stopper counterclockwise to remove circlip, Fig. 26.
Fig. 27 Rack Removal
f.
Remove rack slowly, Fig. 27.
g. Remove oil seal using suitable oil seal remover tool.
h. Remove ball bearing using brass bar tool No. MB990939, or equivalent.
i.
Remove needle roller bearing using bearing tool No. MB991120, or equivalent.
j.
Remove oil seal from housing using a piece of pipe.
2. Reverse numbered sequence shown in Fig. 25 to assemble, noting the following:
a. Using rack installer tool No. MB991212, or equivalent, press back-up washer and oil seal into rack housing.
b. Install needle roller bearing using bearing installation tool No. MB991120, or equivalent.
c. Apply a coat of multipurpose grease to rack teeth face. Do not close vent hose in rack with grease.
d. Cover rack serrations with special rack installer tool, apply Dexron II or Diamond ATF SP ATF fluid to tool.
e. Align oil seal center with rack to prevent retainer spring from slipping and slowly insert rack from power cylinder side.
f.
Wrap vinyl tape around end of rack, and install rack bushing and stopper.
Fig. 28 Circlip Installation