
3000GT AWD V6-2972cc 3.0L DOHC Turbo 24 Valve (1996)
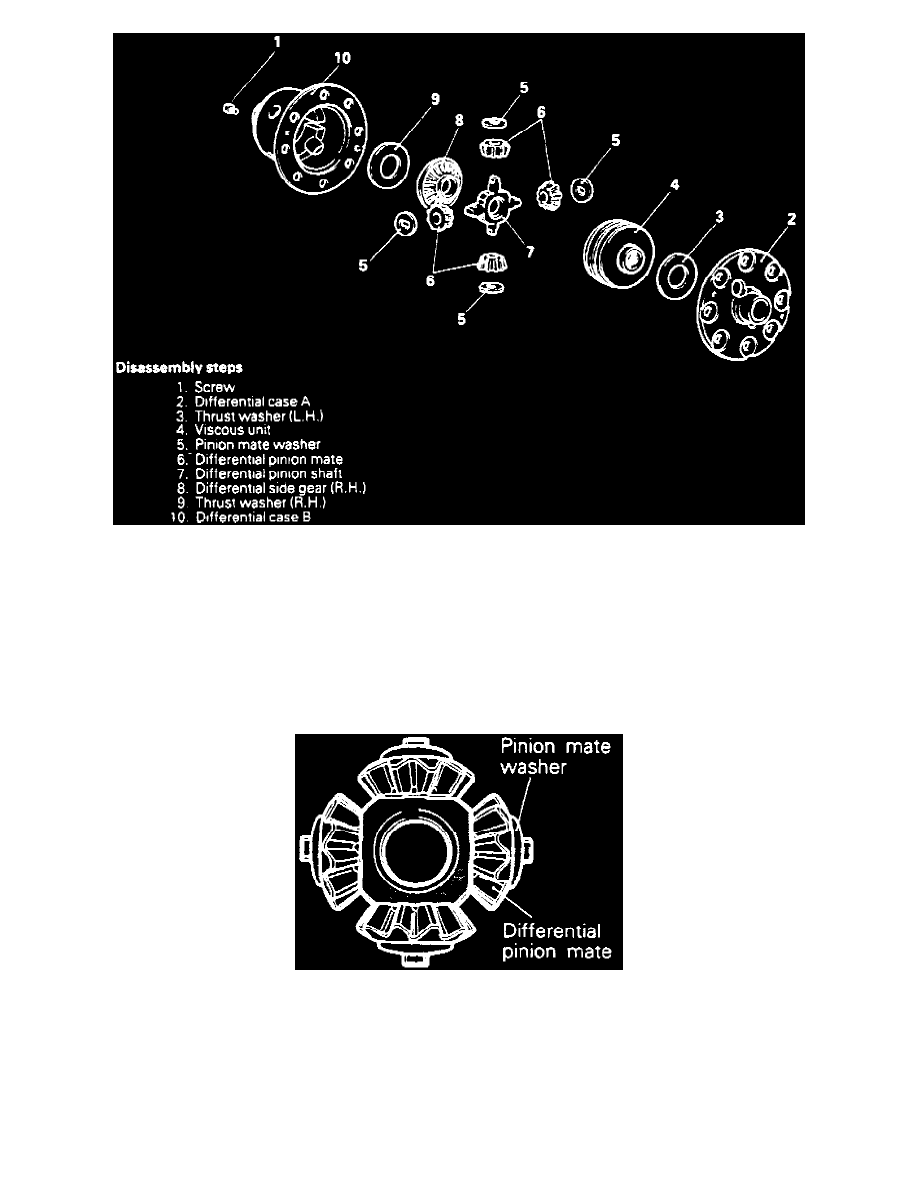
Fig. 39 Limited Slip Differential Carrier Disassembly
Disassemble limited slip differential carrier in numbered sequence shown in Fig. 39. Right and left thrust washers are of different thickness, and should
be identified in some way for reference during assemble.
Assemble
Assemble limited slip differential carrier in reverse numbered sequence shown in Fig. 39, noting the following:
1. Align mating marks of differential case A and B when assembling.
Fig. 40 Differential Pinion Mate Installation
2. With pinion mate washers in position, install to differential pinion shaft, then to differential case B, Fig. 40.
3. If differential side gear and pinion mate gear have been replaced, select left thrust washer as follows:
a. Wash differential gear and pinion mate gears in unleaded gasoline.
b. Install old thrust washer together with gears, viscous unit, pinion mate washer and pinion shaft into differential cases A and B then temporarily
tighten screws.
c. Perform Inspection Before Disassemble procedure.