
3000GT Convertible V6-2972cc 3.0L DOHC Turbo 24 Valve (1996)
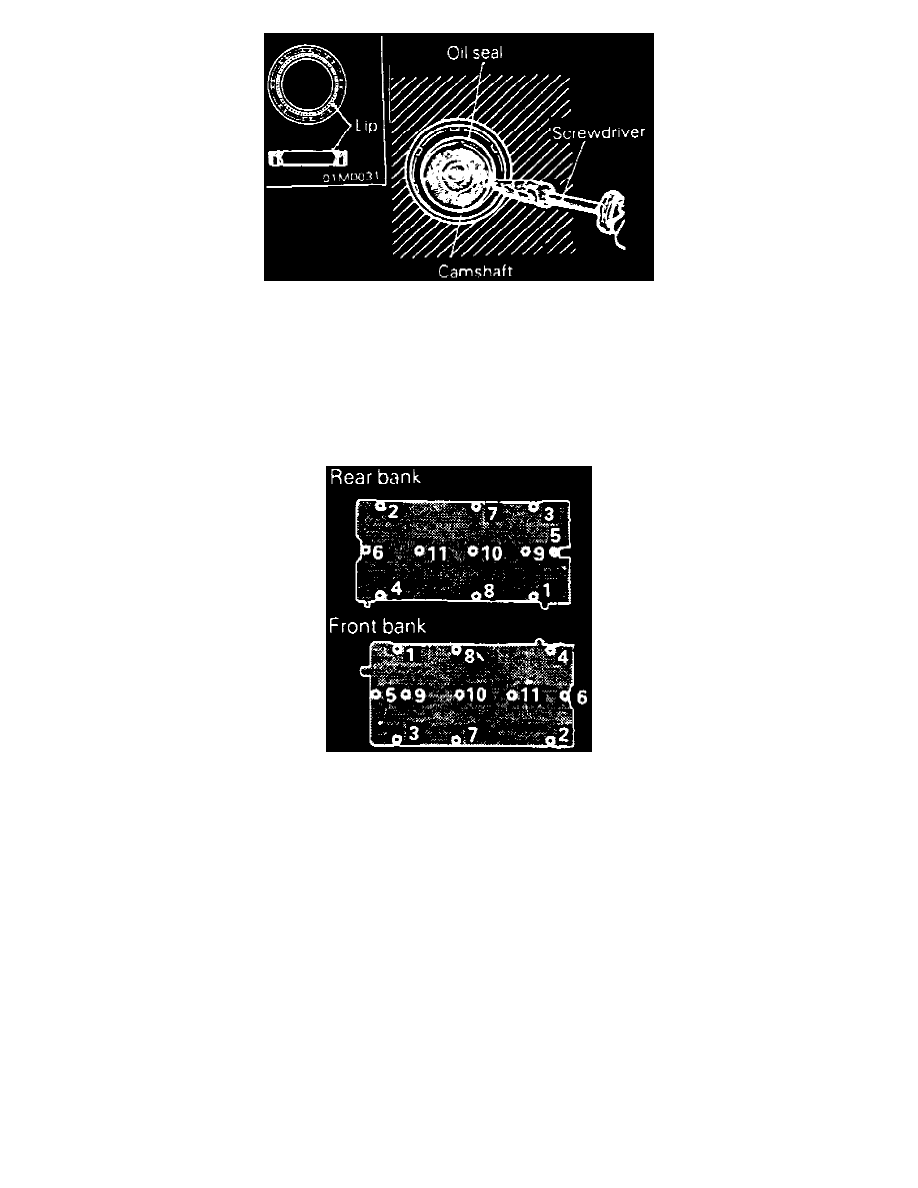
Fig. 21 Oil Seal Removal
b. Cut out a portion in camshaft oil seal lip, Fig. 21.
c. Cover tip of a suitable screwdriver with a clean soft cloth and pry out seal at cut out portion of seal. Use care not to damage camshaft or
cylinder head.
4. Reverse procedure to install, Fig. 20, noting the following:
a. Apply small amount of engine oil to seal lip.
b. Using camshaft oil seal installer tool No. MD998761, or equivalent, insert oil seal.
c. Using a suitable wrench on hexagonal part of camshaft, tighten camshaft sprocket pulley bolt to specifications.
Fig. 22 Valve Cover Tightening Sequence
d. Tighten valve cover bolts in order as shown, Fig. 22. No. 5 bolt (0.79 inch) in rear bank differs from other bolts in length. Remaining
bolts in rear bank are 0.39 inch long. Bolts are color coded for installation, front bank bolts are black and rear bank bolts are green.
When rocker cover gasket has been replaced, tighten bolts in this order and then torque bolts 1 through 6 to 2.9 ft. lbs.