
3000GT Convertible AWD V6-2972cc 3.0L DOHC Turbo (1995)
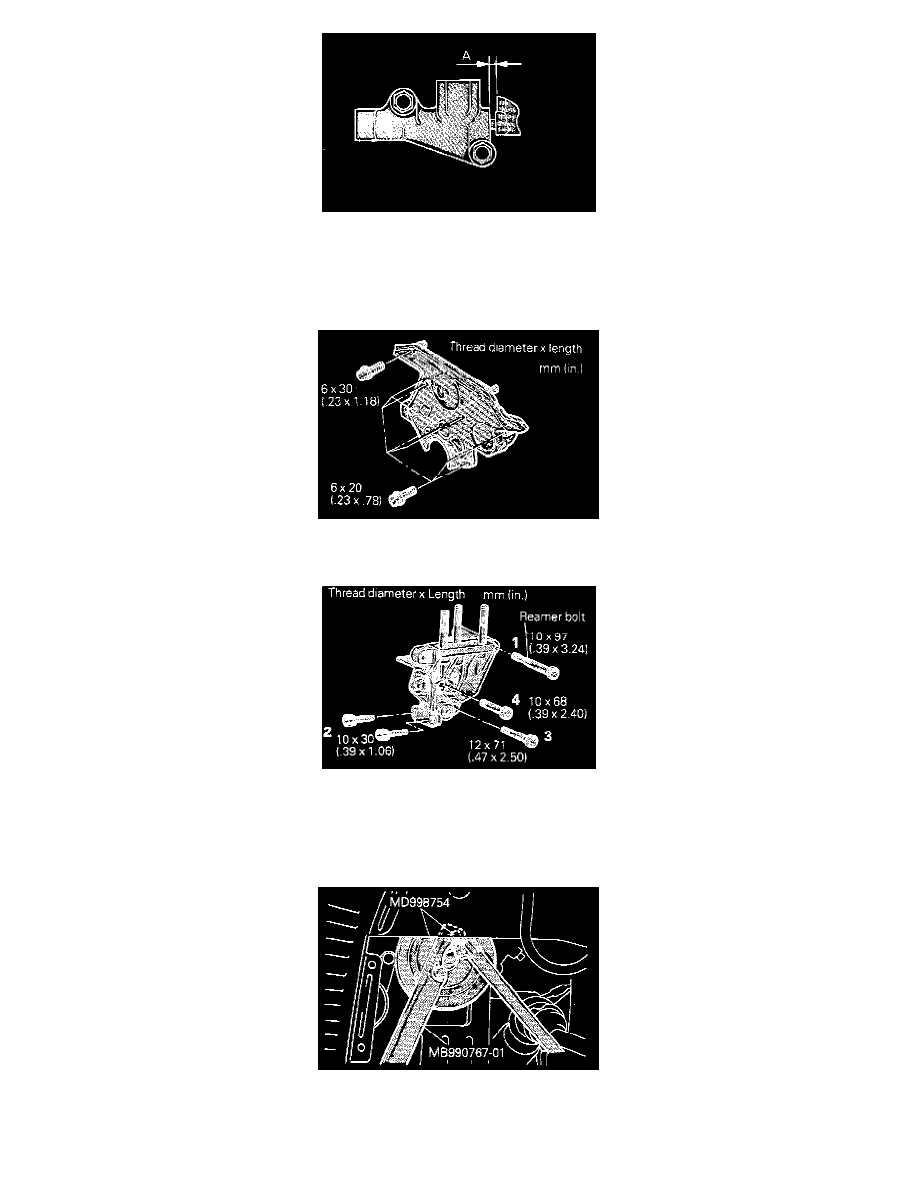
Standard value (A): 3.8 - 4.5 mm (0.149 - 0.177 in.)
It the protrusion is out of specification, repeat steps (1) to (4).
(e) Check again that timing marks on all sprockets are aligned properly.
11. Installation of timing belt front cover. (LOWER)
Since the mounting bolts of timing cover are different size depending on location, insert them with care.
10. Installation of engine support bracket.
Since the mounting bolts of engine support bracket are different in size depending on location, insert them in numbered sequence.
CAUTION:
-
When installing the reamer bolt, tighten it, slowly spraying lubricant on the reamer area.
5. Installation of crankshaft pulley.
Using the special tool, attach the crankshaft pulley to the crankshaft.