
3000GT Convertible AWD V6-2972cc 3.0L DOHC Turbo (1995)
Drive/Propeller Shaft: Testing and Inspection
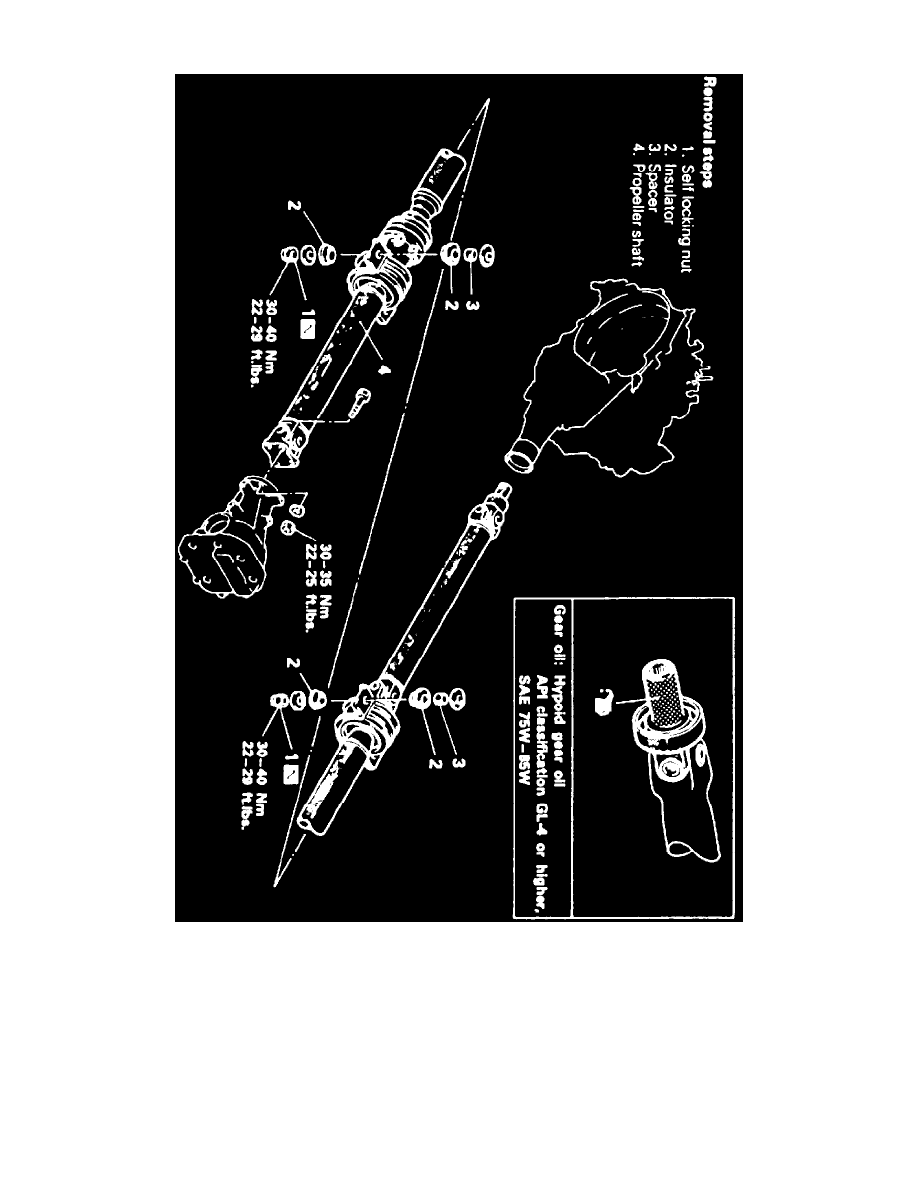
Fig. 4 Propeller Shaft Removal
1. Remove spacers, Fig. 4. Number of spacers differs on each vehicle. Note number of spacers and use for reference during installation.
2. Remove propeller shaft. Make mating marks on differential companion flange and flange yoke for reference during installation.
3. Insert piece of cloth or rag into boot opening, then remove propeller shaft in a straight and level manner ensuring boot is not damaged through
pinching.
4. Do not lower rear end of vehicle as the oil will flow out of the transfer case and be cautious to avoid damage to the oil seal lip of the
transfer case.
5. Use special tool provided as a cover to prevent the entry of foreign materials into the transfer case.
6. Inspect sleeve yoke, center yoke, flange yoke and propeller shaft yokes for wear damage or cracks and replace as necessary.
7. Using a suitable dial indicator, measure propeller shaft runout. Runout for the front, center and rear propeller shafts should be 0.024 inch (0.6
mm).