
3000GT SL V6-2972cc 3.0L DOHC MFI (1997)
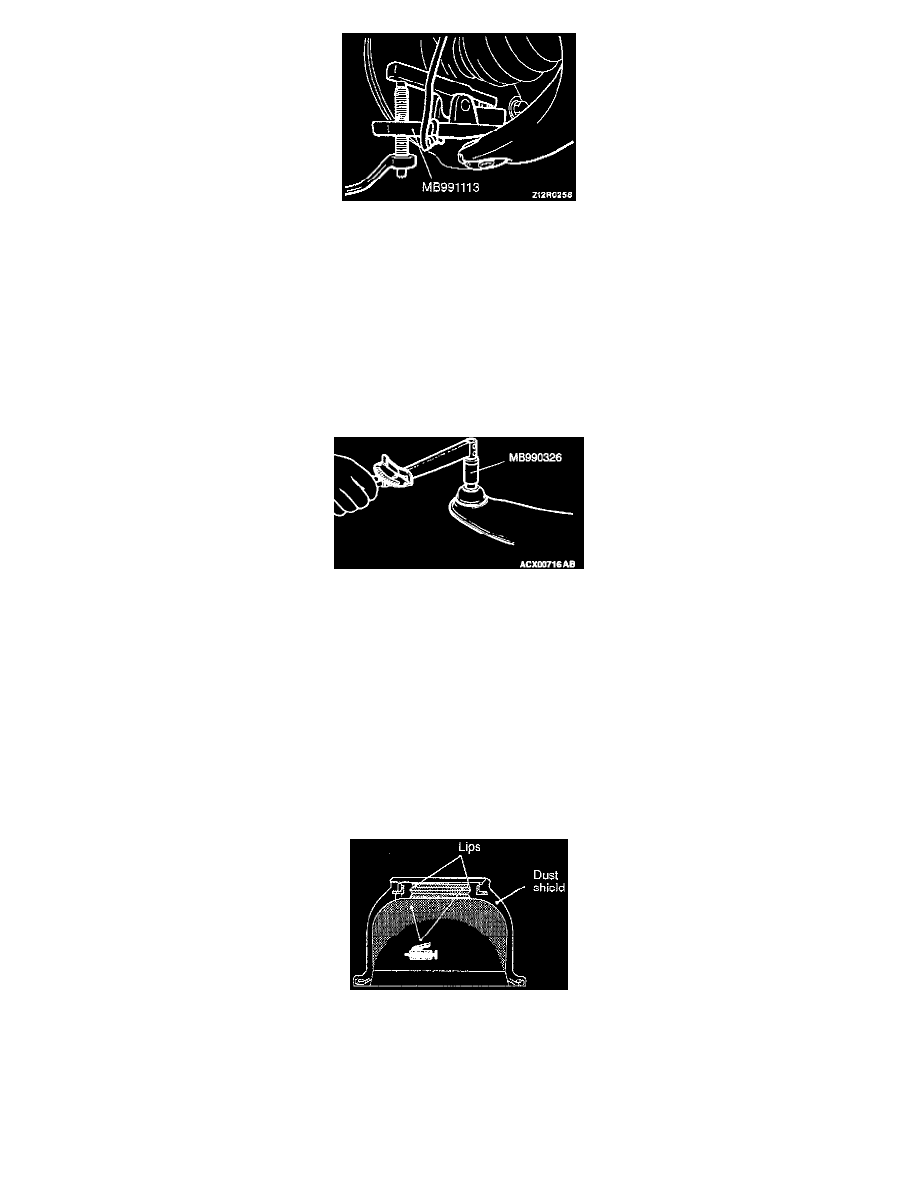
a. Lower arm ball joint disconnection (4).
Use the special tool to disconnect the lower arm ball joint from the knuckle.
CAUTION:
-
Be sure to tie the cord of the special tool to a nearby part.
-
Loosen the nut but do not remove it.
INSPECTION
1. Check the bushing for wear and deterioration.
2. Check the lower arm for bend or breakage.
3. Check the clamp for deterioration or damage.
4. Check all bolts for condition and straightness.
5. Ball joint for breakaway torque check.
a. After shaking the ball joint stud several times, install the nut to the stud and use the special tool to measure the breakaway torque of the ball
joint.
Standard value: 10-22 Nm (86-191 inch lbs.)
b. When the measured value exceeds the standard value, replace the lower arm assembly.
c. When the measured value is lower than the standard value, check that the ball joint turns smoothly without excessive play. If so, it is possible
to use that ball joint.
6. Dust shield inspection.
If a dust shield is cracked or damaged, replace the lower arm assembly.
NOTE: Only the case that a dust shield is damaged by mistake during servicing, replace it as follows:
BALL JOINT DUST SHIELD REPLACEMENT
1. Remove the dust shield.
2. Apply multipurpose grease to the lip and inside of the dust shield.