
Diamante V6-3.5L SOHC (2003)
CAUTION: Be sure to tie the cord of the special tool to the nearby part.
CAUTION: Loosen the nut but do not remove it.
INSTALLATION SERVICE POINT
>>A<< DRIVE SHAFT NUT INSTALLATION
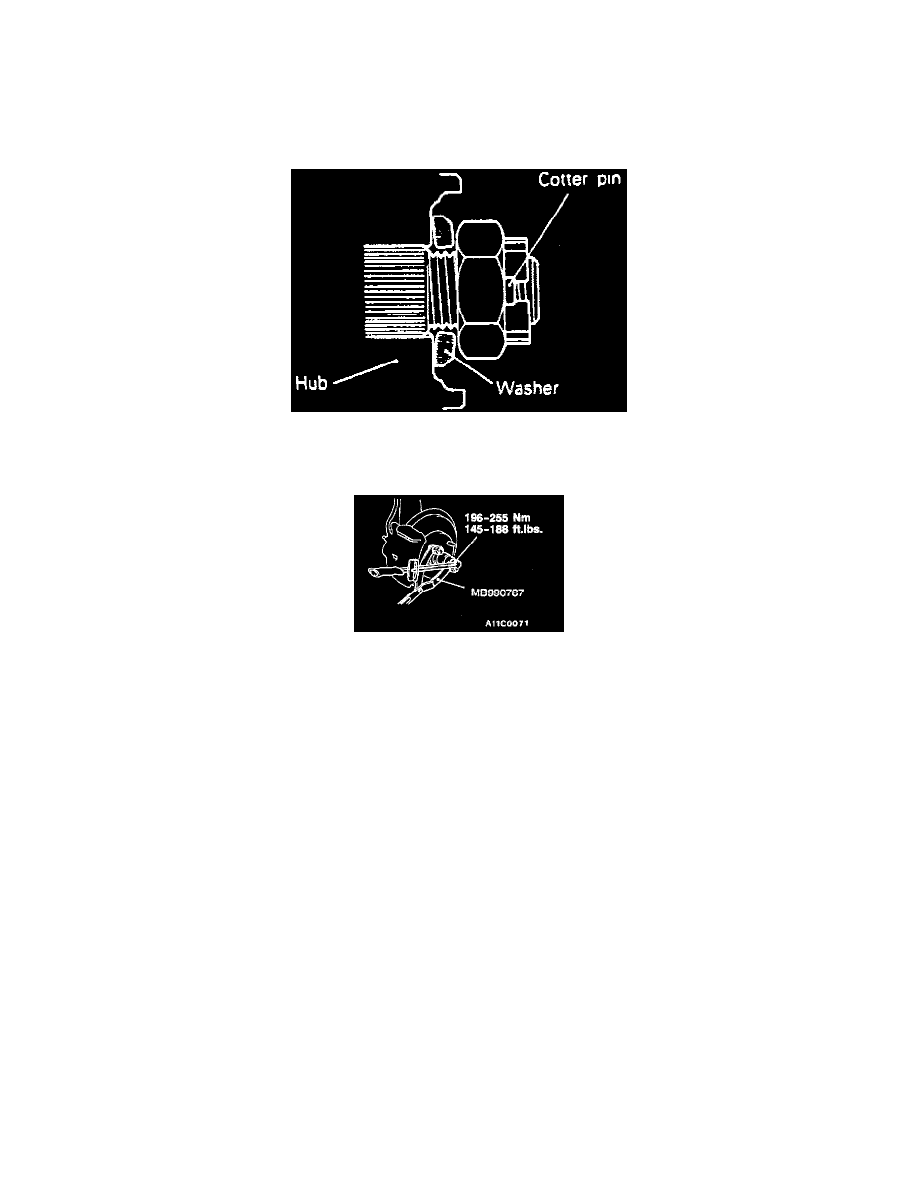
Fig. 3 Washer Installation
1. Be sure to install the drive shaft washer in the specified direction.
2. Using the special tool, tighten the drive shaft nut to the lower end of the specified torque range.
CAUTION: There should be no load on the wheel bearings when the drive shaft nut is tightened.
3. If the position of the cotter pin holes does not match, tighten the nut up to a maximum of 255 Nm (188 ft. lbs.).
4. Install the cotter pin in the first matching holes and bend it securely.
Disassembly and Assembly