
Diamante Sedan V6-3.5L SOHC (1999)
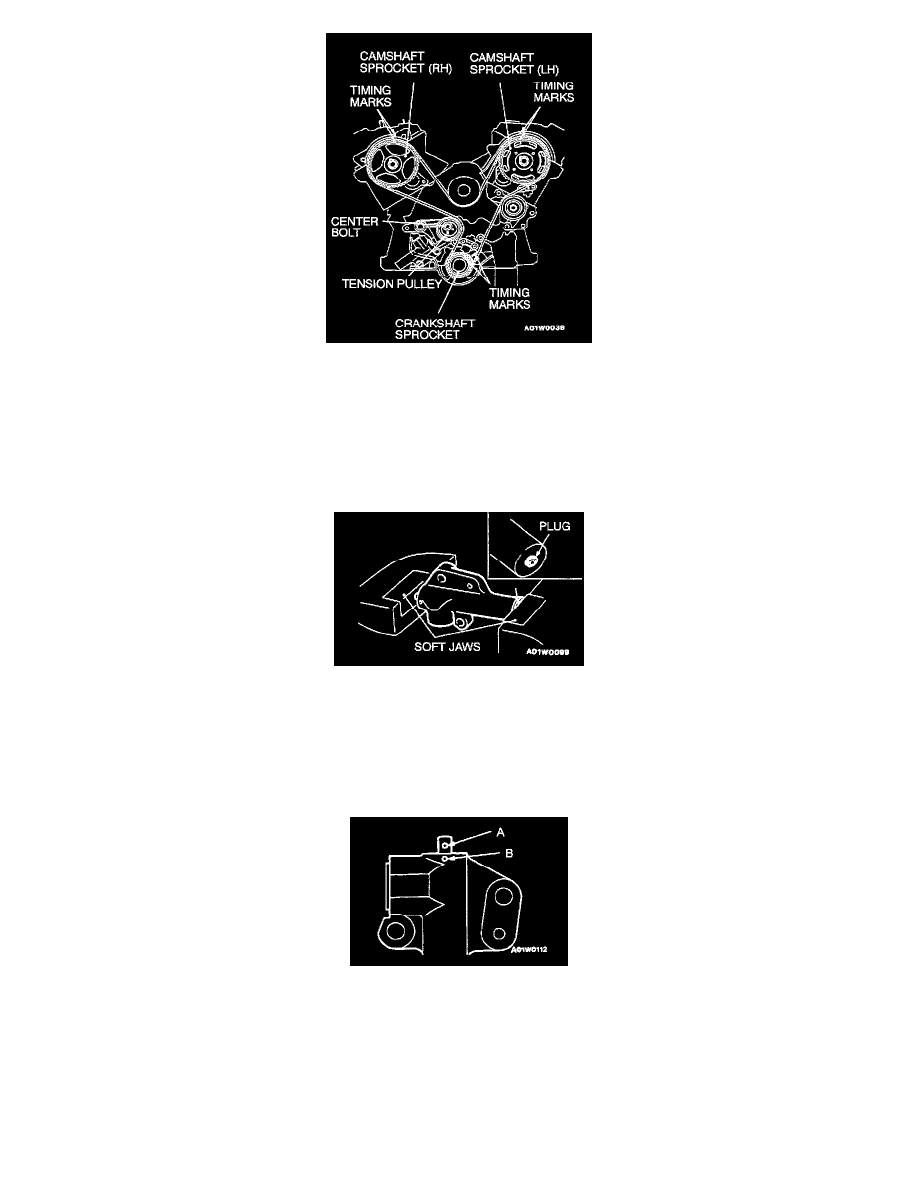
1. Align the timing marks.
2. Loosen the center bolt on the tension pulley to remove the timing belt.
CAUTION: Make a mark on the back of the timing belt, indicating the direction of rotation, so it may be reassembled in the same direction, if
it is to be reused.
Installation Service Points
>A< Auto Tensioner Installation
1. If the auto tensioner rod is in its fully extended position, reset it as follows.
1. Keep the auto tensioner level and, in that position, clamp it in the vise with soft jaws.
2. Push in the rod little by little with the vise until the set hole A in the rod is aligned with that B in the cylinder.
CAUTION: The auto tensioner must be placed at a right angle to the pressing surface of press or vise.
CAUTION: Push in the rod slowly to prevent the push rod from being damaged.
3. Insert a wire [1.4 mm (0.055 inch) in diameter] into the set holes.
NOTE: The wire should be as stiff as possible (such as piano wire, etc.), and should be bent into the shape of an "L".
4. Unclamp the auto tensioner from the vise.
2. Install the auto tensioner.
CAUTION: Leave the wire installed in the auto tensioner.