
Diamante Sedan V6-3.5L SOHC (1999)
2. Using the special tools, compress the coil spring, and then remove the self-locking nut.
NOTE: Extend the special tool to the maximum length to which it is able to be fitted to the spring. Ensure that the special tool is installed
evenly.
CAUTION: Never use an air tool to tighten the special tool.
Reassembly Service Points
>A< Self-Locking Nut Installation
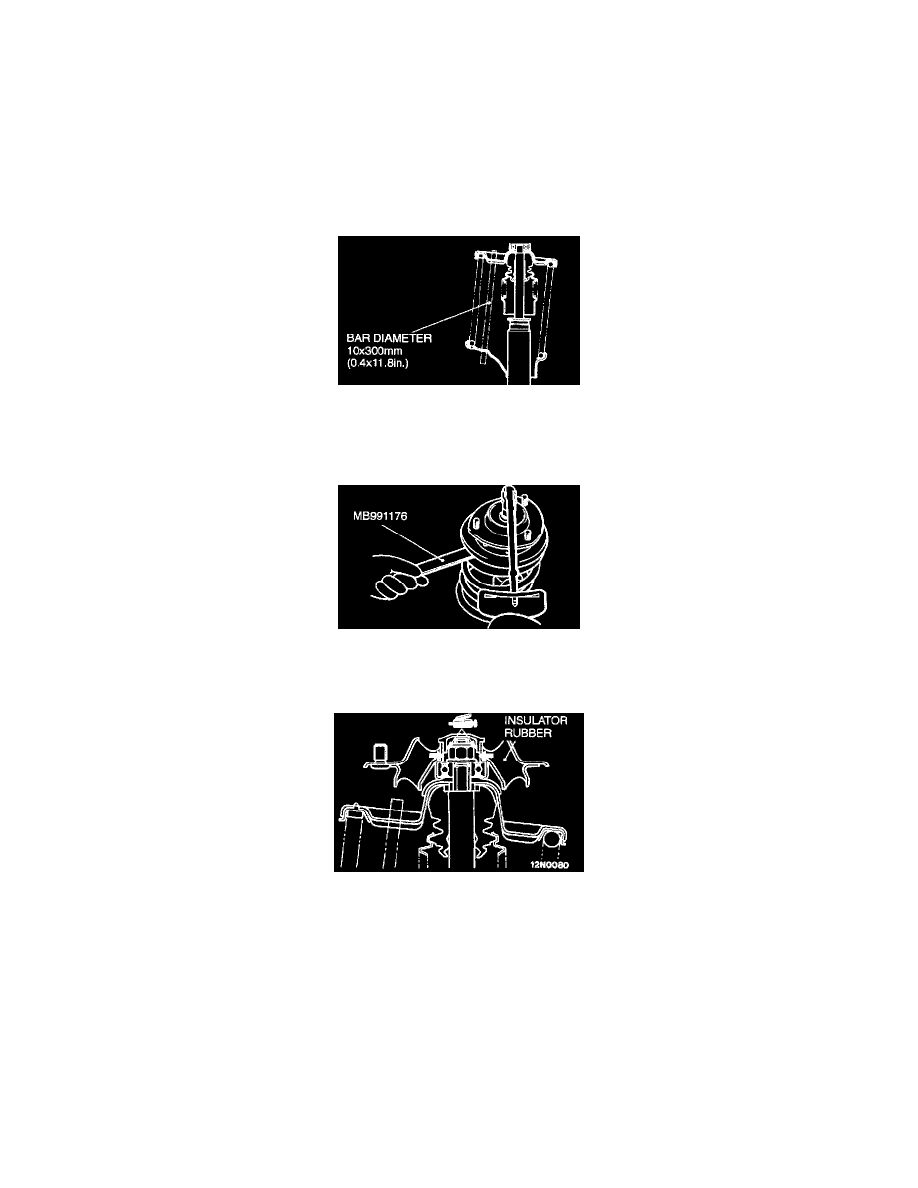
1. Line up the holes in the strut assembly spring lower seat with the holes in the spring upper seat.
NOTE: Aligning of the holes in the strut assembly can be easily achieved by using a steel bar 10mm x 300mm (0.4 inch x 11.8 inch).
2. With the coil spring held compressed by the special tools (MB991237 and MB991238), temporarily tighten the self-locking nut.
3. Correctly align both ends of the coil spring with grooves in the spring seat, and then loosen the special tools MB991237 and MB991238.
4. Using the special tool, tighten the strut insulator to the specified torque.
NOTE: Do not use an air tool to tighten the strut insulator.
5. Apply multipurpose grease to the bearing part of the strut insulator, and install the insulator cap.
CAUTION: When applying the grease, take care that grease does not come into contact with the insulator's rubber components as this will
cause the rubber to deteriorate.