
Eclipse L4-1795cc 1.8L SOHC (1990)
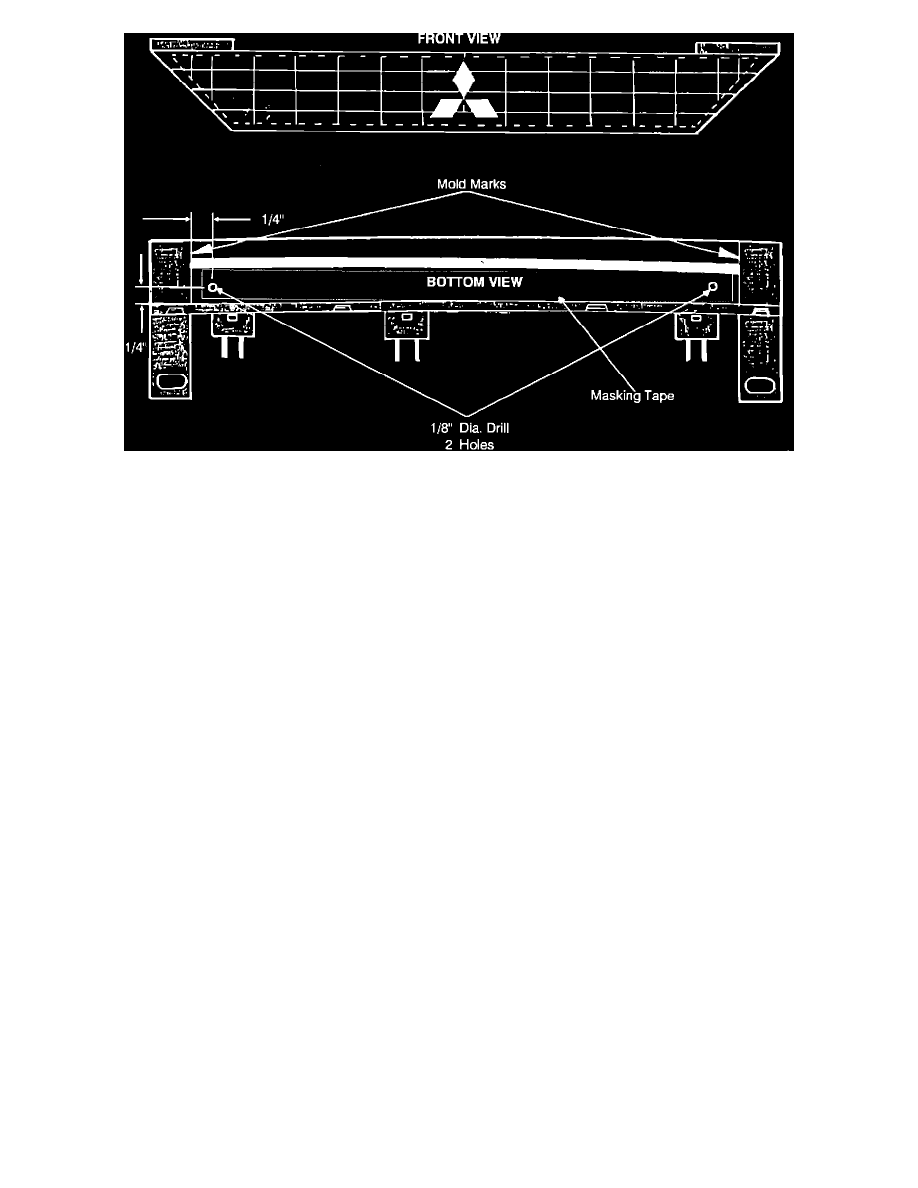
Figure 3
MODIFICATION
Place the top of the garnish on a soft covered surface to prevent marring and scratching. Apply a strip of masking tape to the bottom of the garnish. Refer
to figure 3 to locate the position of the two 1/8" dia. holes that must be drilled. Mark hole locations on the masking tape. The masking tape will help to
prevent drill wandering. Make certain that the hole locations are on the bottom side of the garnish.
Caution:
Do not allow plastic drilling chips to enter the garnish center cavity. Do not drill at an angle so as to allow the drill bit to contact the inside surface of the
lens.
Place a length of masking tape on the drill bit approximately 1/4 inch from the cutting end. This will act as a stop to prevent the drill from entering the
cavity excessively.
Apply very light pressure to the drill and drill the two 1/8" diameter holes in the base of the garnish as shown.
When completed reverse the removal procedure to reinstall the garnish.