
Eclipse L4-1996cc 2.0L DOHC (1995)
Connecting Rod Bearing: Testing and Inspection
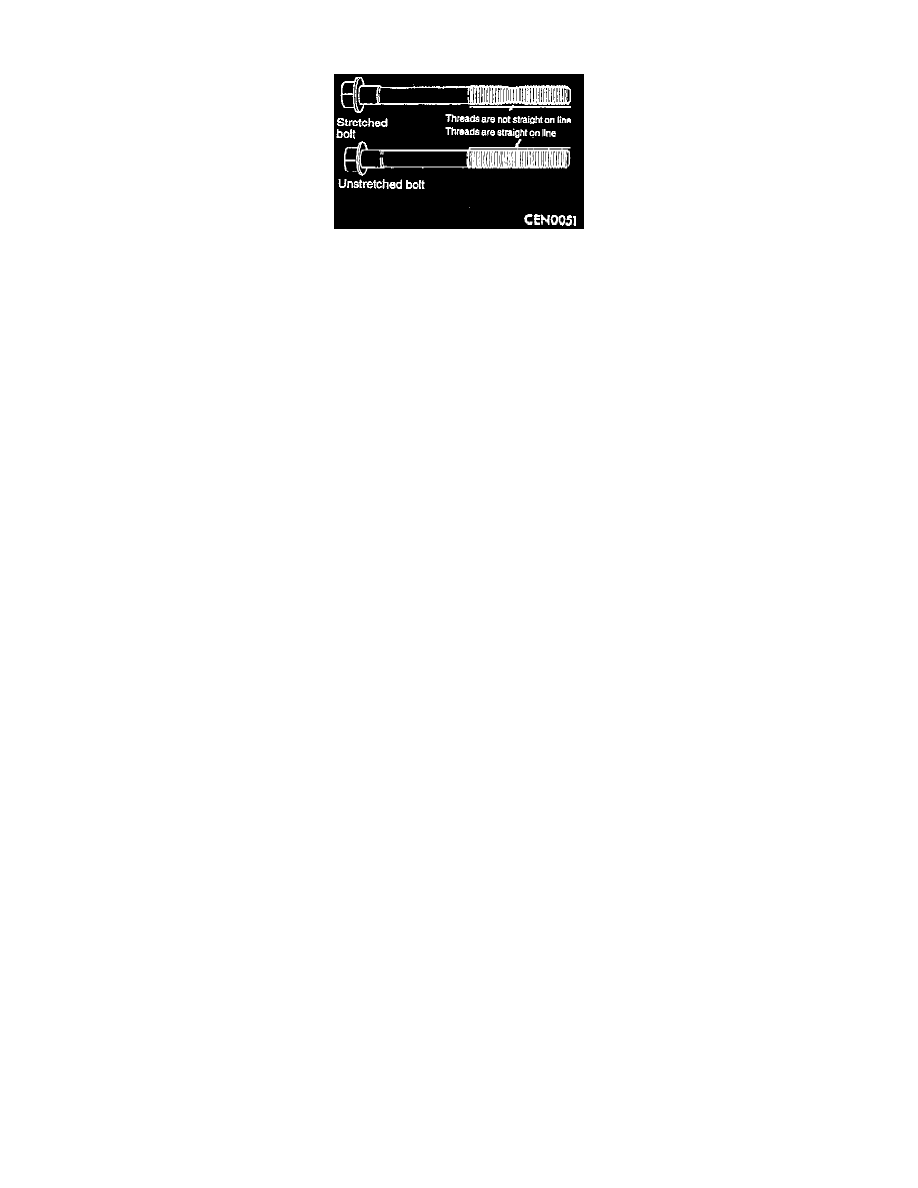
BEARING CAP BOLT
1. The connecting rod bearing cap bolts should be examined before reuse. If the threads are necked down, replace the bolts.
2. Necking can be checked by holding a scale or straight edge against the threads. If all the threads do not contact the scale, the bolt should be
replaced.
BEARING CLEARANCE
1. Place a piece of Plastigage across the entire width of the bearing shell in the bearing cap approximately 6.35 mm off center and away from the oil
hole. In addition, suspect areas can be checked by placing Plastigage in the those areas.
2. Before assembling the rod cap with Plastigage in place, the crankshaft must be rotated until the connecting rod being checked starts moving toward
the top of the engine. Only then should the cap be assembled and torqued to the specification.
NOTE: Do not rotate the crankshaft while assembling the cap or the Plastigage may be smeared, giving inaccurate results.
3. Remove the bearing cap and compare the width of the flattened Plastigage with the metric scale provided on the package.
Standard value: 0.026 - 0.059 mm (0.001 - 0.0023 inch).
Limit: 0.075 mm (0.003 inch).