
Eclipse L4-1996cc 2.0L DOHC (1995)
b.
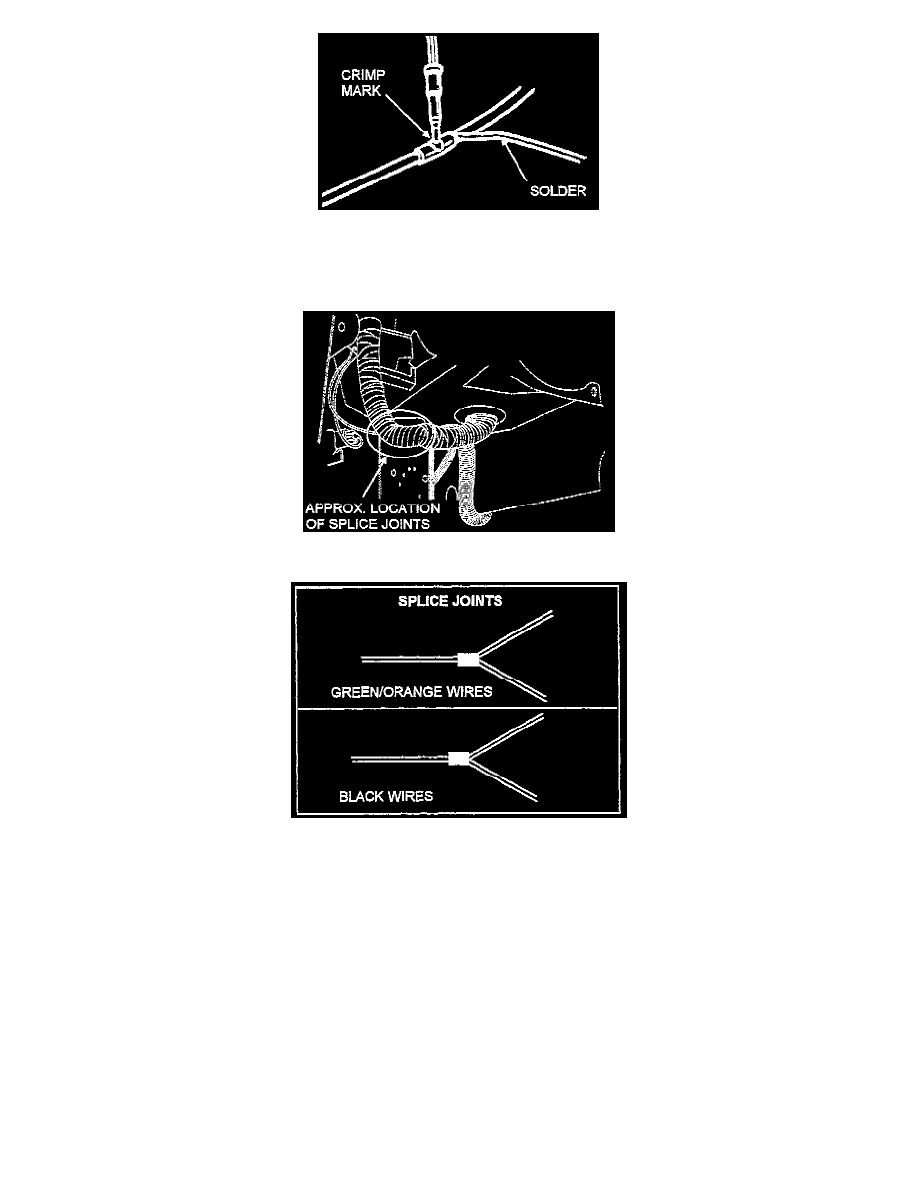
Apply solder to the joint at the crimp mark, using only enough solder to achieve a good connection.
c.
Apply 3M 6149 Electrical Moisture Sealant (or 3M AUTOTECH Moisture Resistant Wrap p/n 054007-03748 available in auto parts stores)
around the solder joints. Proceed with Step 8.
8.
Locate the two splice joints. You must remove some corrugated tubing and electrical tape from the harness in order to locate the splice joints.
9.
Inspect for corrosion at the splice joints. If there is evidence of corrosion, remove the corroded portion. Proceed with Step 10, even if no corrosion
is evident.
10.
Solder both splice joint wires and apply 3M 6149 Electrical Moisture Sealant (or 3M AUTOTECH Moisture Resistant Wrap p/n 054007-03748
available in auto parts stores) around the solder joints.
11.
Reinstall the splice joints inside the corrugated tubing. Wrap electrical tape around the tubing to prevent the wires from protruding.
12.
Reinstall the left front wheel and wheel well splash shield.
a.
On automatic transmission models, reinstall the left side engine room cover (transmission splash shield).
13.
Reconnect the battery and reset the radio stations.
WARRANTY INFORMATION
Front End Harness Repair
Nature Code: 99D
Cause Code: 990