
Eclipse L4-1997cc 2.0L DOHC Turbo 16 Valve (1996)
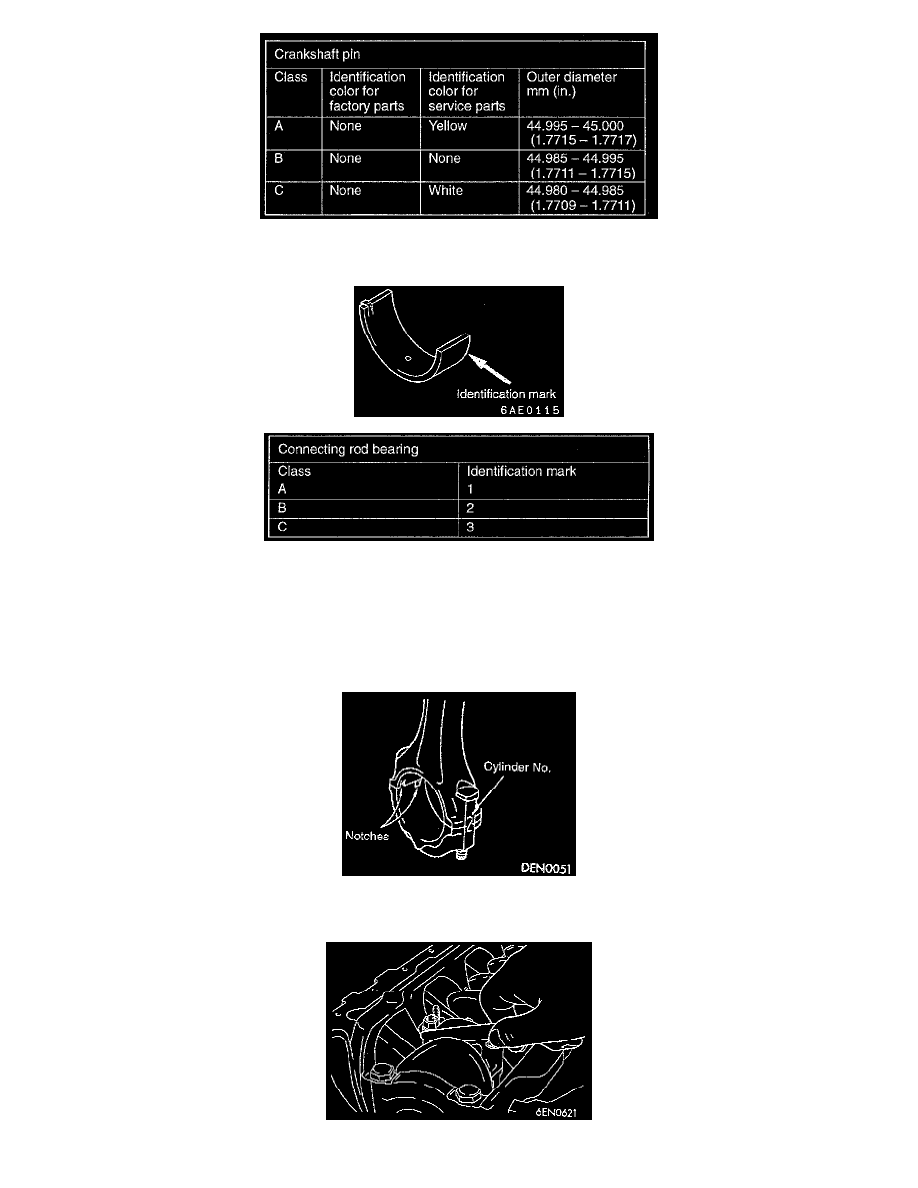
a. Measure the diameter of the crankshaft pin and then understand which class the pin belongs to in the illustration. In addition, a service part has
its own identification color as shown in the illustration.
b. The illustration shows an identification mark of a connecting rod bearing.
c. Choose a bearing according to the illustration.
Example
If the measured value of a crankshaft pin outer diameter is between 44.995 - 45.000 mm (1.7715 - 1.7717 inch), the pin is classified as "A" in
the table. In case the crankshaft is also replaced by a spare part, check the identification colors of the pins painted on the new crankshaft. For
example, if the color is yellow, the pin is classified as "A". In the above cases, select the connecting rod bearing having identification mark"1".
8. Mate the correct bearing cap with the correct connecting rod by checking with the alignment marks marked during disassembly. If a new
connecting rod is used which has no alignment mark, position the notches for locking the bearing on the same side.