
Eclipse L4-1997cc 2.0L DOHC Turbo 16 Valve (1996)
2. Immerse the lash adjuster in clean diesel fuel.
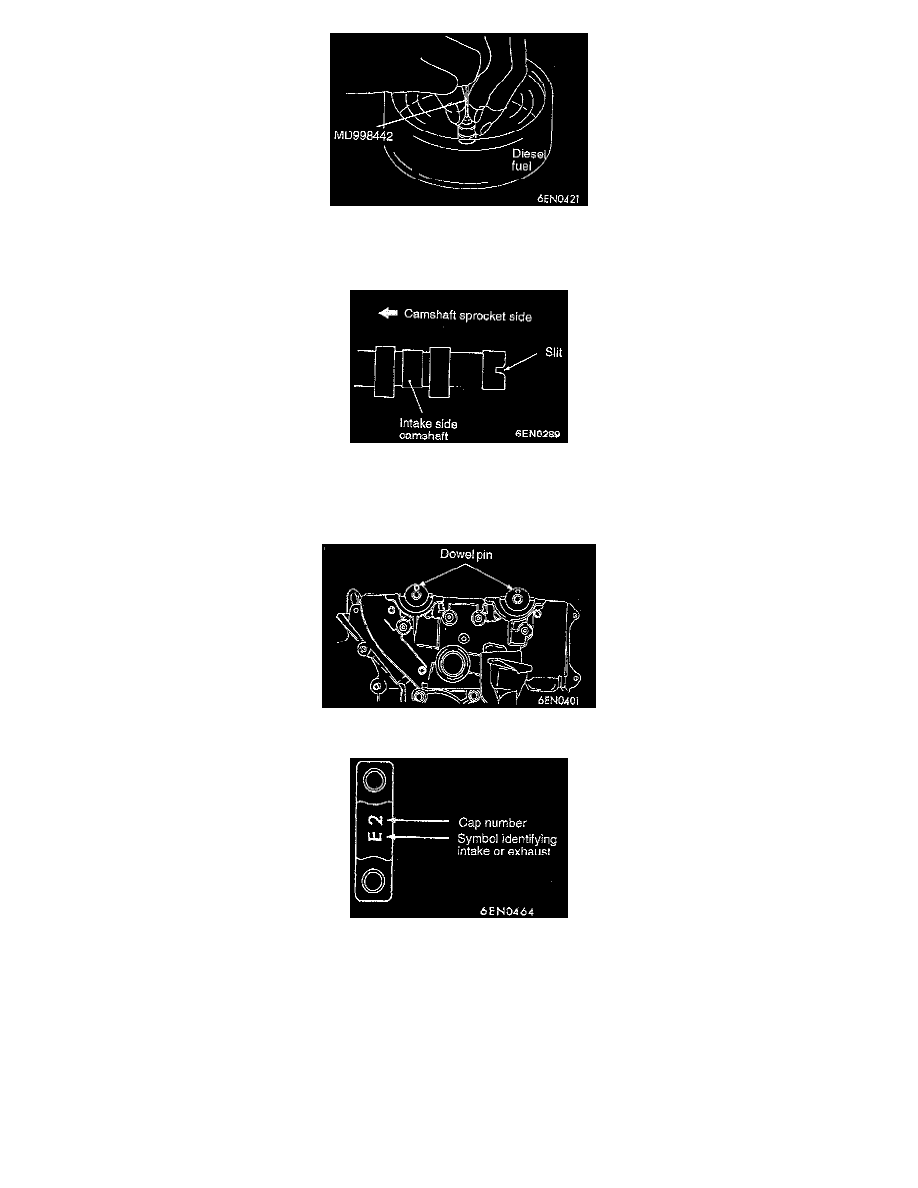
3. Using the special tool (MD998442), move the plunger up and down 4 or 5 times while pushing down lightly on the check ball to bleed out the air.
4. Apply engine oil to journals and cams of the camshafts.
5. Install the camshafts on the cylinder head. Do not confuse the intake camshaft with the exhaust. The intake camshaft has a slit on its rear end for
driving the crankshaft position sensor.
6. Install the crankshaft sprocket B or spacer and flange to an end of the crankshaft. Then turn the crankshaft until the timing marks are lined up to set
No.1 cylinder to the TDC.
7. Set the camshafts so that their dowel pins are positioned at top.
8. According to the identification mark stamped on top of each bearing cap, install the caps to the cylinder head. Only "L" or "R" is stamped on No.
1 bearing cap. Cap No. is stamped on No. 2 to No. 5 bearing caps, No. 6 bearing cap has no stamping.
I: For intake camshaft side.
E: For exhaust camshaft side.