
Eclipse L4-1997cc 2.0L DOHC Turbo 16 Valve (1996)
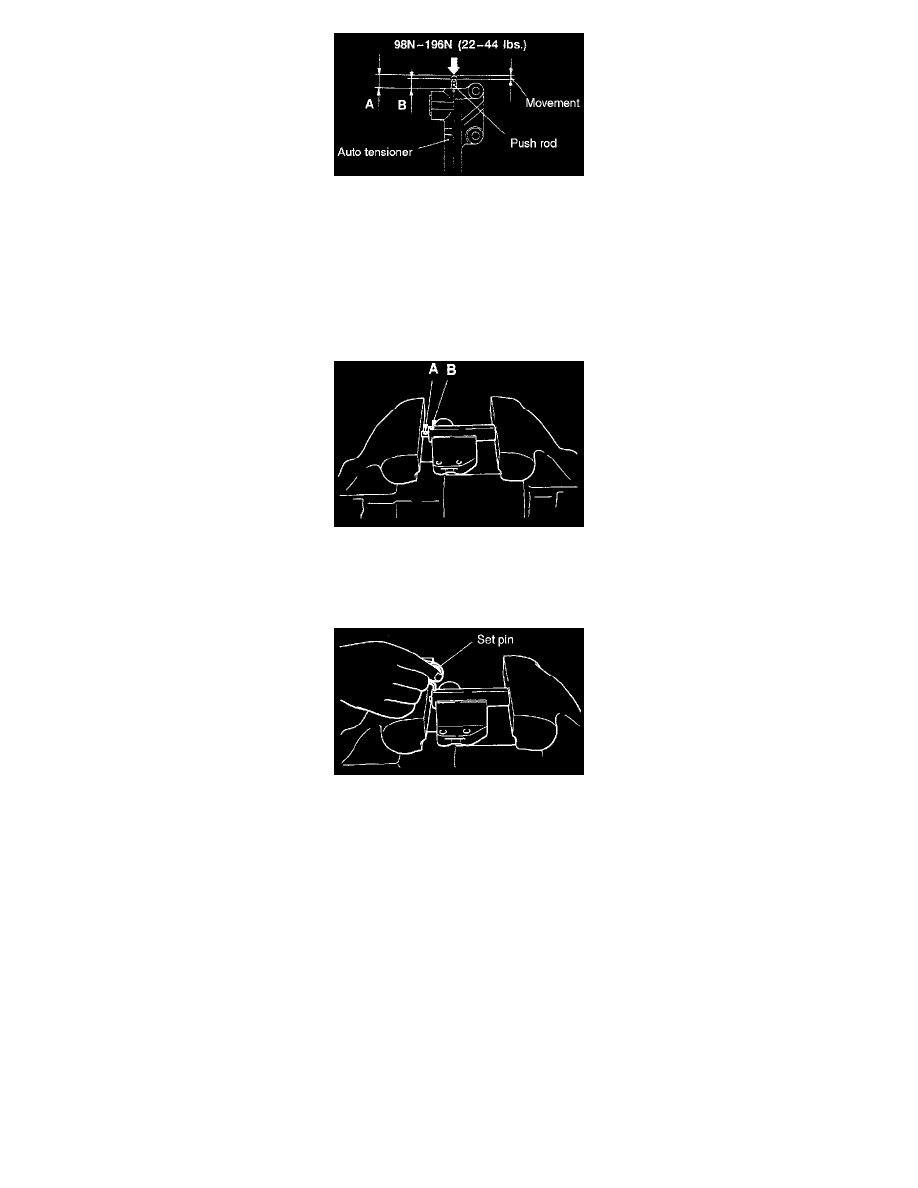
1. Apply 98-196 N (22-44 lbs) force to the auto tensioner by pressing it against a metal object (cylinder block,..etc.), and measure the movement
of the push rod.
Standard value: (Within 1 mm (0.040 in.))
A: Length when it is free (not pressed)
B: Length when it is pressed
A-B: Movement
2. If it is out of the standard value, replace the auto tensioner.
3. Use a press or vise to gently compress the auto tensioner push rod until pin hole A of the push rod and pin hole B of the tensioner cylinder are
aligned.
Caution: If the compression speed is too fast, the rod may become damaged, so be sure to carry out this operation slowly.
4. Once the holes are aligned, insert the set pin.
NOTE: When replacing the auto tensioner with a new part, the pin will be in the auto tensioner.
5. Install the auto tensioner to the engine.
B. TIMING BELT INSTALLATION