
Eclipse L4-1997cc 2.0L DOHC Turbo 16 Valve (1996)
Differential Carrier: Service and Repair
1. Drain differential fluid, then drain brake fluid into an appropriate container.
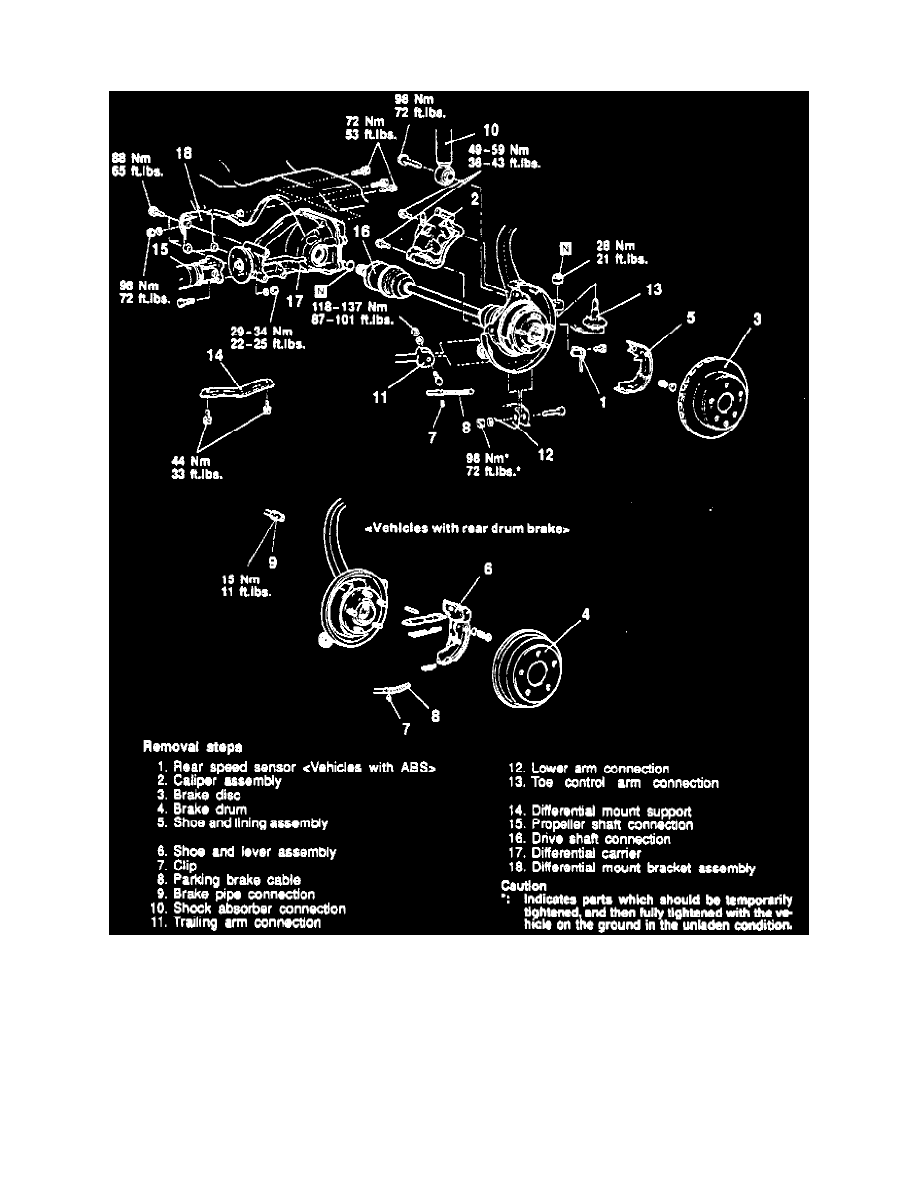
Fig. 3 Differential Carrier Replacement
2. Remove differential carrier in numbered sequence as shown, Fig. 3, noting the following:
a. Scribe marks on differential companion flange and flange yoke for installation reference, then separate differential carrier and propeller shaft.
Suspend propeller shaft from vehicle body with wire ensuring there are no sharp bends in shaft assembly.
b. Push lower part of knuckle to outside of vehicle, then separate driveshaft from differential carrier. Suspend driveshaft from vehicle body with
wire so as not to damage driveshaft joint.
c. Removal differential carrier, then cover openings to prevent entry of foreign objects.
3. Reverse procedure to install.