
Eclipse L4-2.4L SOHC (2004)
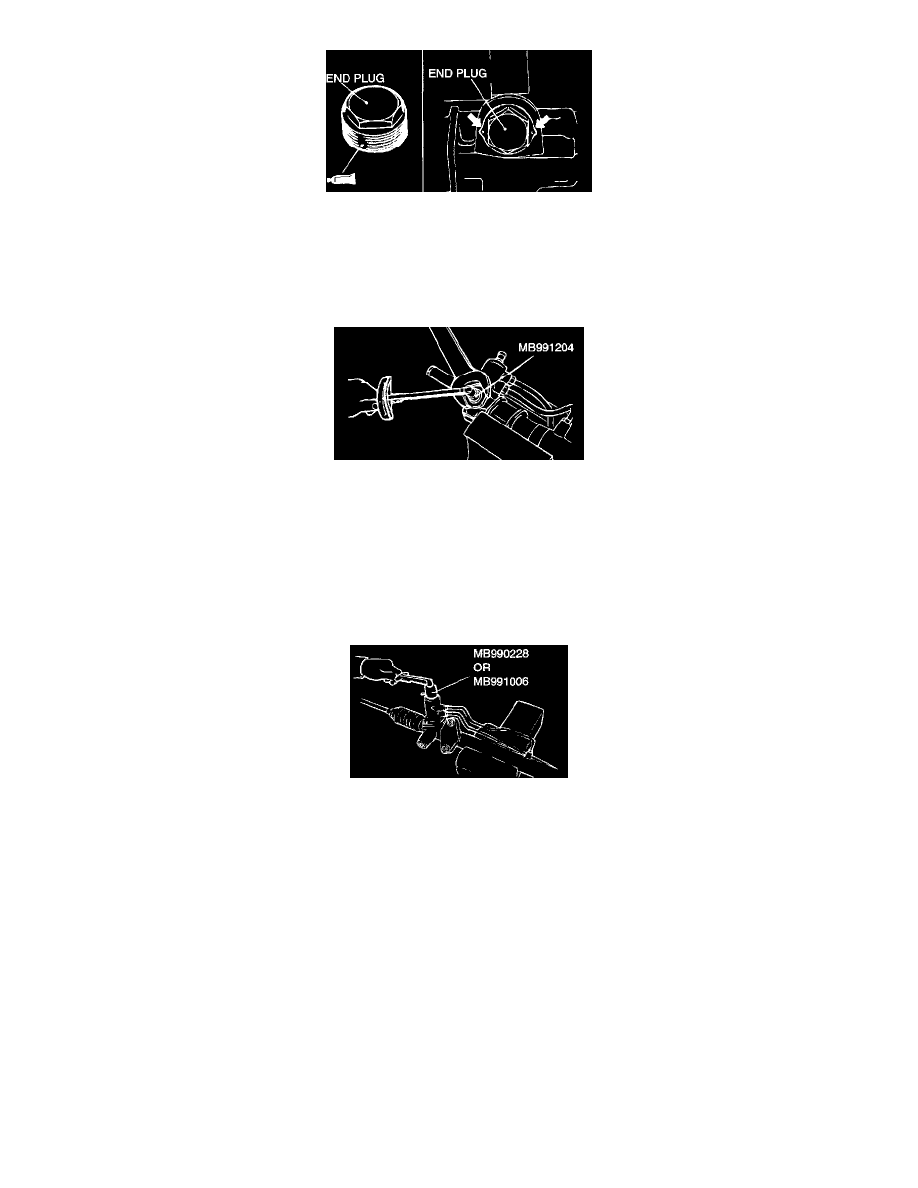
1. Apply 3M AAD Part number 8672, 8679, 8678, 8661, 8663 or equivalent to the threaded part of the end plug.
2. Secure the threaded portion of the end plug at two places by using a punch.
>>K<< RACK SUPPORT COVER/JAM NUT INSTALLATION
1. Position rack at its center.
2. Apply 3M AAD Part number 8672, 8679, 8678, 8661, 8663 or equivalent to the threaded part of the rack support cover.
3. Use special tool MB991204 to tighten the rack support cover to 13 ± 2 Nm (109 ± 21 inch lbs.).
4. Turn the rack support cover 10 degree angle counterclockwise.
5. Use special tool MB991204 to hold the rack support cover, and then tighten the jam nut to 59 ± 10 Nm (44 ± 7 ft. lbs.).
>>L<< TOTAL PINION TORQUE ADJUSTMENT
CAUTION:
^
Be sure there is no ratcheting or catching when operating the rack towards the shaft.
^
Measure the total pinion torque through the whole stroke of the rack.
1. Using special tool MB990228 or MB991006, rotate the pinion shaft at the rate of one rotation in four to six seconds to check the total pinion
torque and the change in torque.
Standard value:
Total pinion torque: 0.8 - 1.9 mm (6.9 - 16.5 inch lbs.)
[Change in torque: 0.7 Nm (6.1 inch lbs.) or less]
CAUTION: When adjusting, set at the highest value of the standard value range.
2. If the total pinion torque or the change in torque is outside the standard value, move the rack support cover 0 - 30 degree angle, and adjust the
pinion torque again.
NOTE: If the total pinion toque cannot be adjusted to the standard value within the specified return angle, check the rack support cover
components and replace any parts if necessary.
>>M<< TAB WASHER/TIE ROD INSTALLATION