
Eclipse V6-3.0L SOHC (2003)
Clockspring Assembly / Spiral Cable: Testing and Inspection
CLOCK SPRING CHECK
If any malfunction is found in steps 1 through 4, replace the clock spring with a new one.
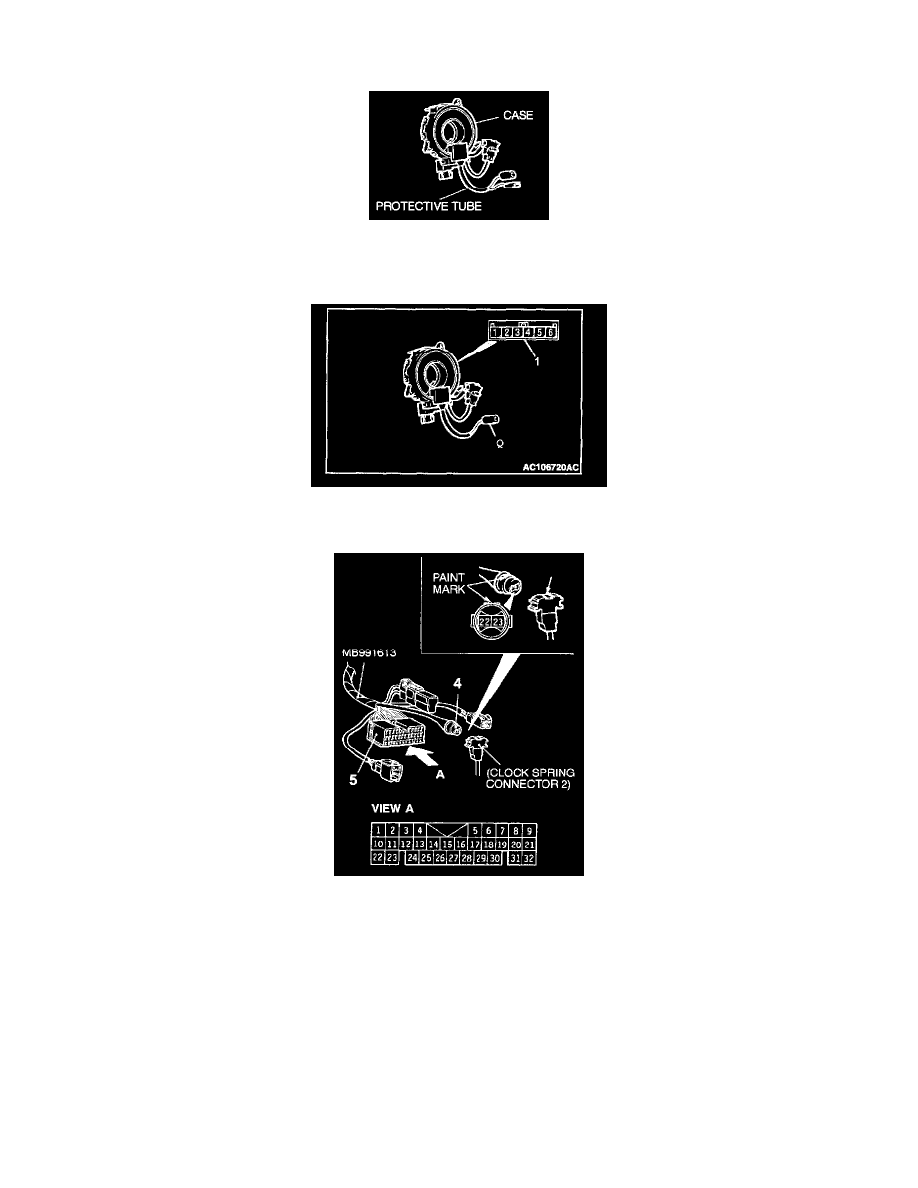
1. Check the connectors and protective tube for damage, and the terminals for deformation.
2. Visually check the case for damage.
3. Check that there is continuity among the clock spring connectors number 1 and number 2. Connect terminal 1 of the connector number 1 and
connector number 2.
4. Align the paint mark of special tool MB991613 connector number 4 with the notch in clock spring connector number 2 (arrow in the illustration)
to connect the connectors number 2 and 4.
5. Measure the resistance between the terminals 22 and 23 of special tool MB991613 connector number 5.
Standard value: less than 0.4 Ohm