
Eclipse V6-3.0L SOHC (2003)
Trailing Arm: Service and Repair
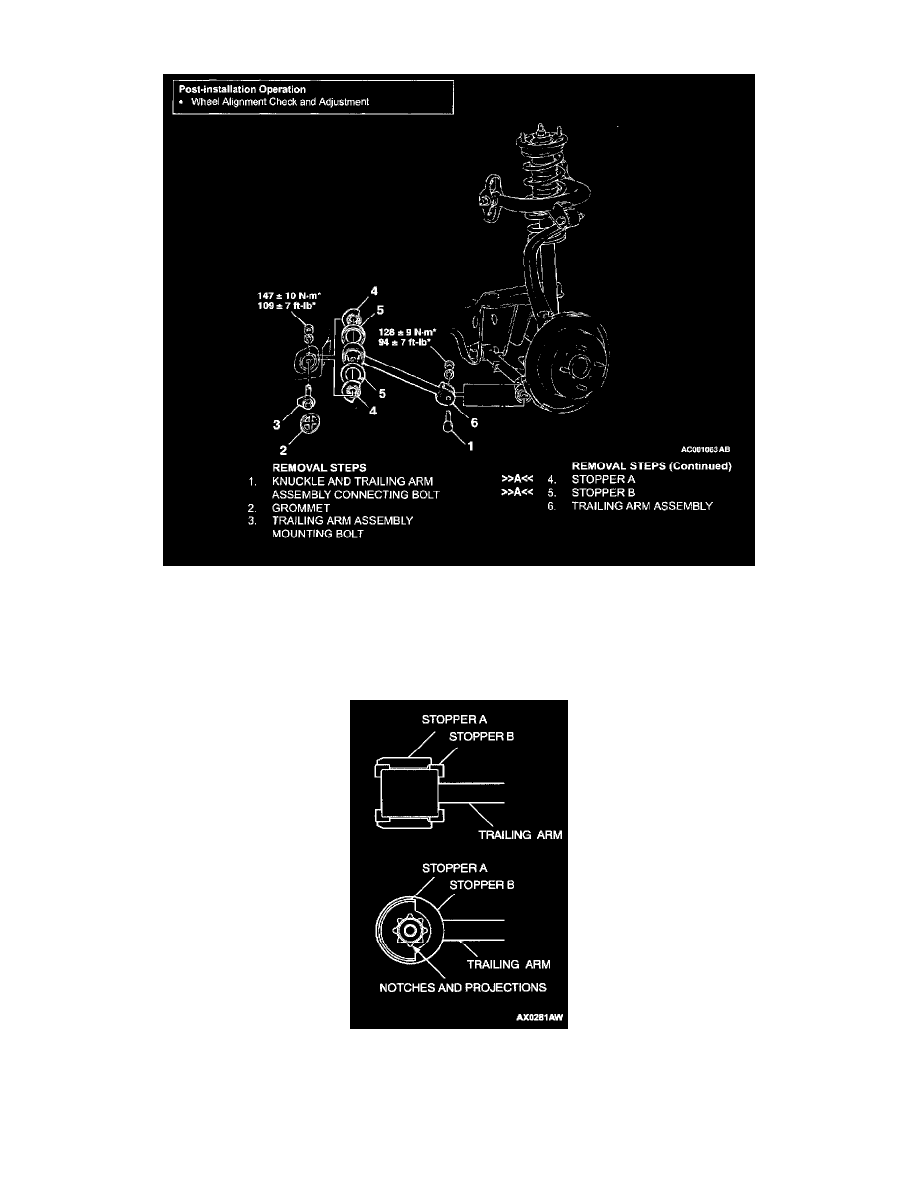
REMOVAL AND INSTALLATION
CAUTION: * Indicates parts which should be temporarily tightened, and then fully tightened with the vehicle on the ground in the unladen condition.
INSTALLATION SERVICE POINT
>>A<< STOPPER B/STOPPER A INSTALLATION
1. Install stopper B in the shown direction.
2. Install stopper A in the shown direction while checking that the notches on stopper A are engaged with the projections on the trailing arm
bushing.
INSPECTION
^
Check the bushings for wear and deterioration.