
Eclipse FWD L4-1997cc 2.0L DOHC MFI (1997)
Hydraulic Assembly: Testing and Inspection
CAUTION:
-
The roller of the braking force tester and the tire should be dry during testing.
-
When testing the front brakes, apply the parking brake, and when testing the rear brakes, stop the front wheels by chocking them.
-
Connection and disconnection of the scan tool should always be made with the ignition switch in the "OFF" position.
1. Jack up the vehicle and support the vehicle with rigid racks placed at the specified jack-up points or place the wheels which are checked on the
rollers of the braking force tester.
2. Release the parking brake, and feel the drag force (drag torque) on each road wheel. When using the braking force tester, take a reading of the
brake drag force.
3. Turn the ignition key to the "OFF" position and set the scan tool as shown in the diagram.
4. After checking that the selector lever is in neutral, start the engine.
5. Use the scan tool to force-drive the actuator.
NOTE:
-
At this time, the ABS system will switch to the scan tool mode, ABS warning light will illuminate and the ABS control will be cancelled.
-
When the ABS has been interrupted by the fail-safe function, the scan tool actuator testing cannot be used.
6. Turn the wheel by hand and check the change in braking force when the brake pedal is depressed. Use a braking force tester to check the braking
force. When the actuator is force-driven with the brake pedal depressed the braing force must change. The results should be as shown.
Front wheel braking force 785 - 981 N (176 - 220 lbs.)
Rear wheel braking force 588 - 785 N (132 - 176 lbs.)
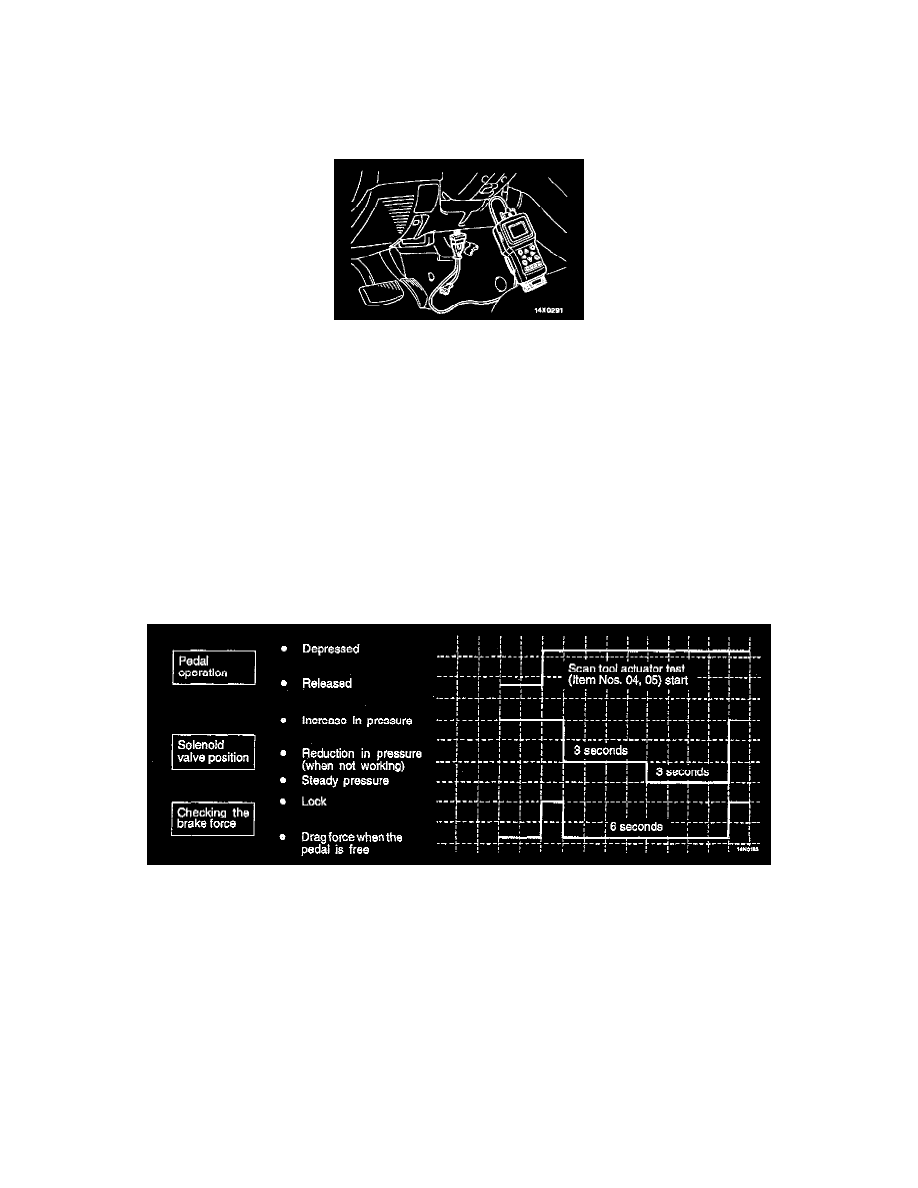
Braking Force Diagram
The result should be as shown in the diagram.