
Eclipse FWD L4-1997cc 2.0L DOHC MFI (1997)
Brake Pad: Service and Repair
Front
REPLACEMENT
CAUTION:
- When the limit is exceeded, the brake pads on both the left and right wheels must be replaced as a set.
- If there is a significant difference in the thicknesses of the pads on the left and right sides, check the sliding condition of the piston, lock pin and guide
pin.
Do not wipe off the special grease that is on the slide pin or allow it to contaminate the friction surface of the pads.
Remove Guide Pin
-
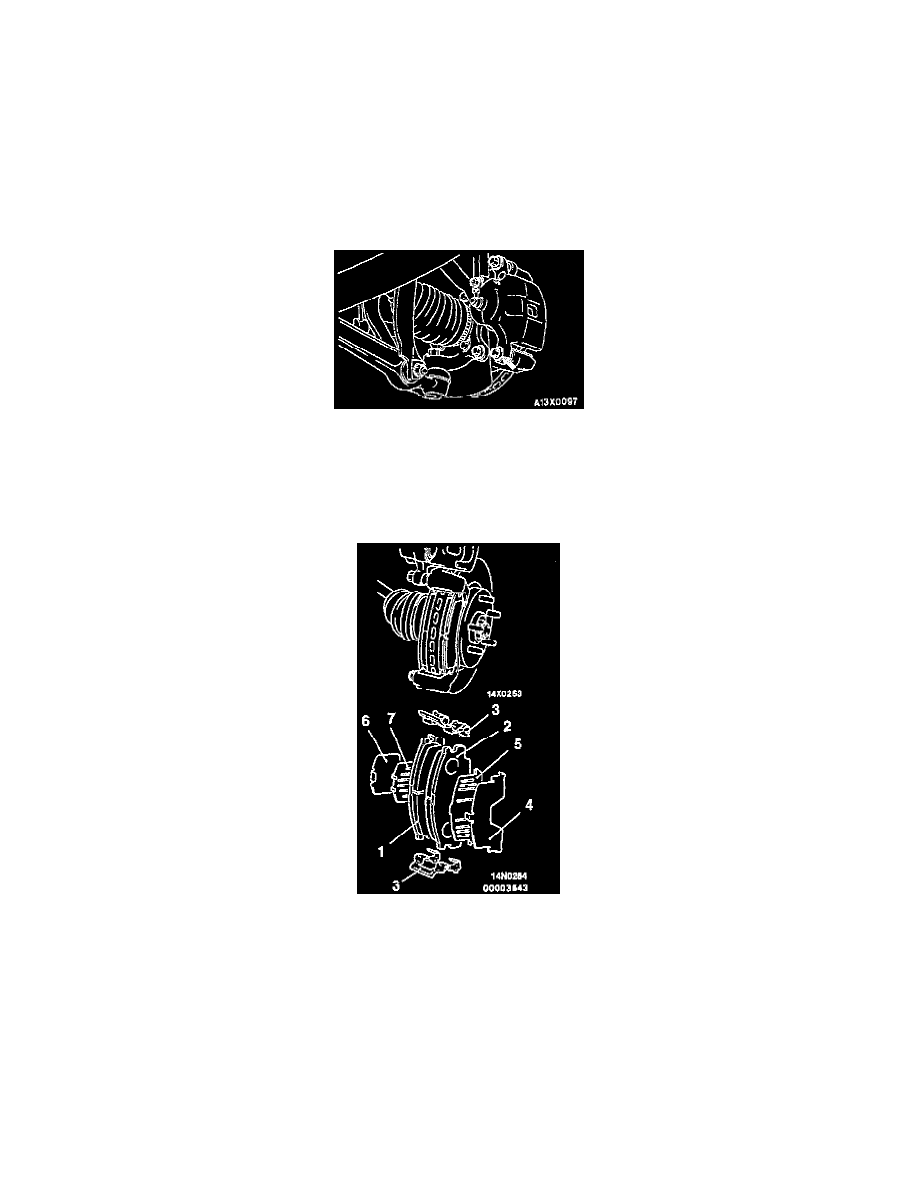
Refer to the illustration when servicing the pads.
1. Remove the guide pin and rotate the caliper assembly upwards.
2. Support the assembly with wire.
3. Remove the pad and wear indicator assembly.
Caliper Support
4. Remove the pad assembly, clip and outer shim (stainless).
5. Remove the outer shim (coated with rubber), inner shim (stainless).
6. Remove the inner shim (coated with rubber).
-
Reverse procedure to install, noting the following:
-
Measure the brake drag force. If the drag force of the disc brake exceeds the standard value, disassemble piston and clean piston. Check for
corrosion or worn piston seal, and check the sliding condition of the slide pins. Replace as necessary.