
Eclipse FWD L4-1997cc 2.0L DOHC MFI (1997)
Hydraulic Assembly: Service and Repair
REMOVAL
1. Drain the brake fluid and remove the LH splash shield.
2. Remove the LH headlight assembly.
3. Remove the air cleaner assembly.
4. Remove the Engine Control Module (ECM).
5. Remove the relay box bracket.
Hydraulic Unit Assembly
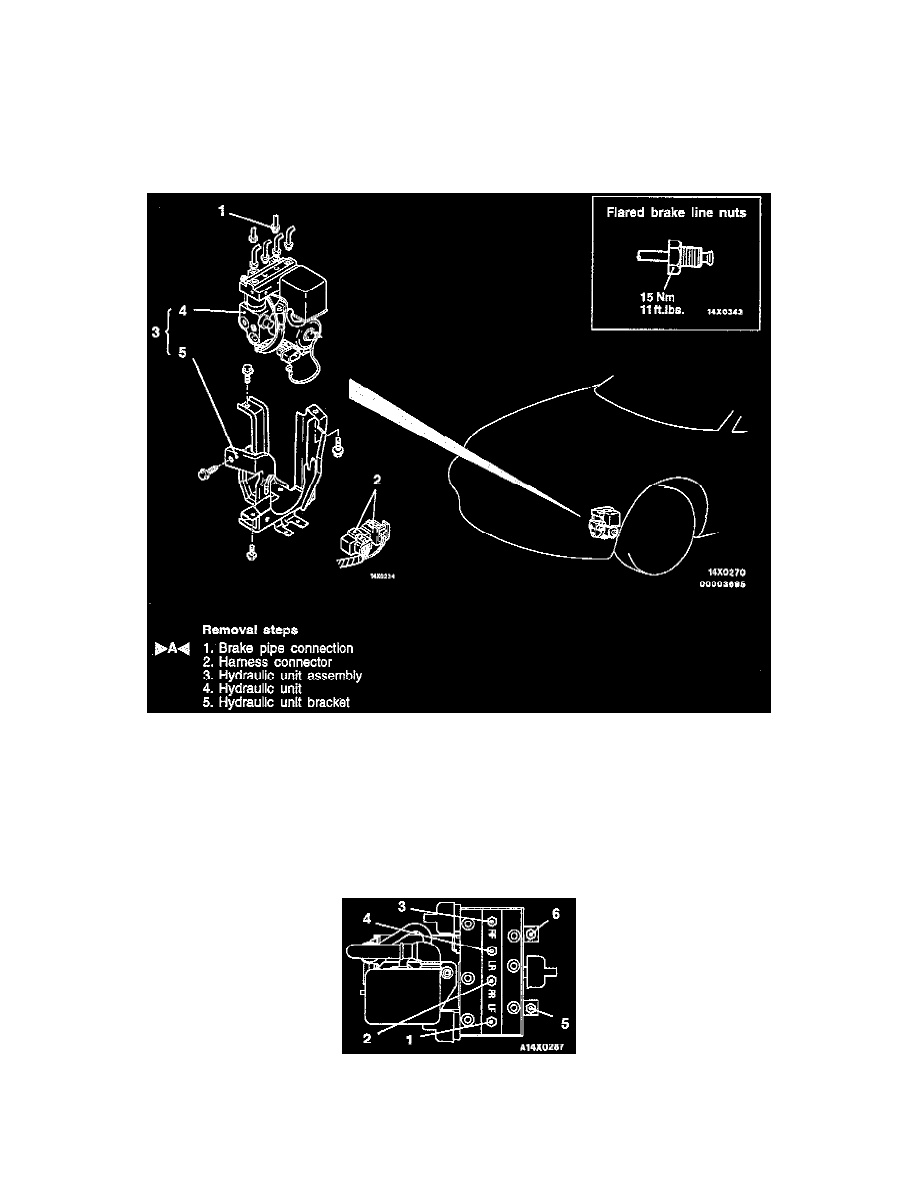
6. Remove the brake pipe connection and the harness connector.
7. Remove the Hydraulic Unit (HU) assembly.
8. Remove the HU and the bracket.
INSTALLATION
-
Reverse removal procedure to install, connecting the pipes to the hydraulic unit as shown in the illustration.
Brake Pipe Connection
1. HU to front brake (LH).
2. HU to rear brake (RH).