
Eclipse FWD L4-1997cc 2.0L DOHC MFI (1997)
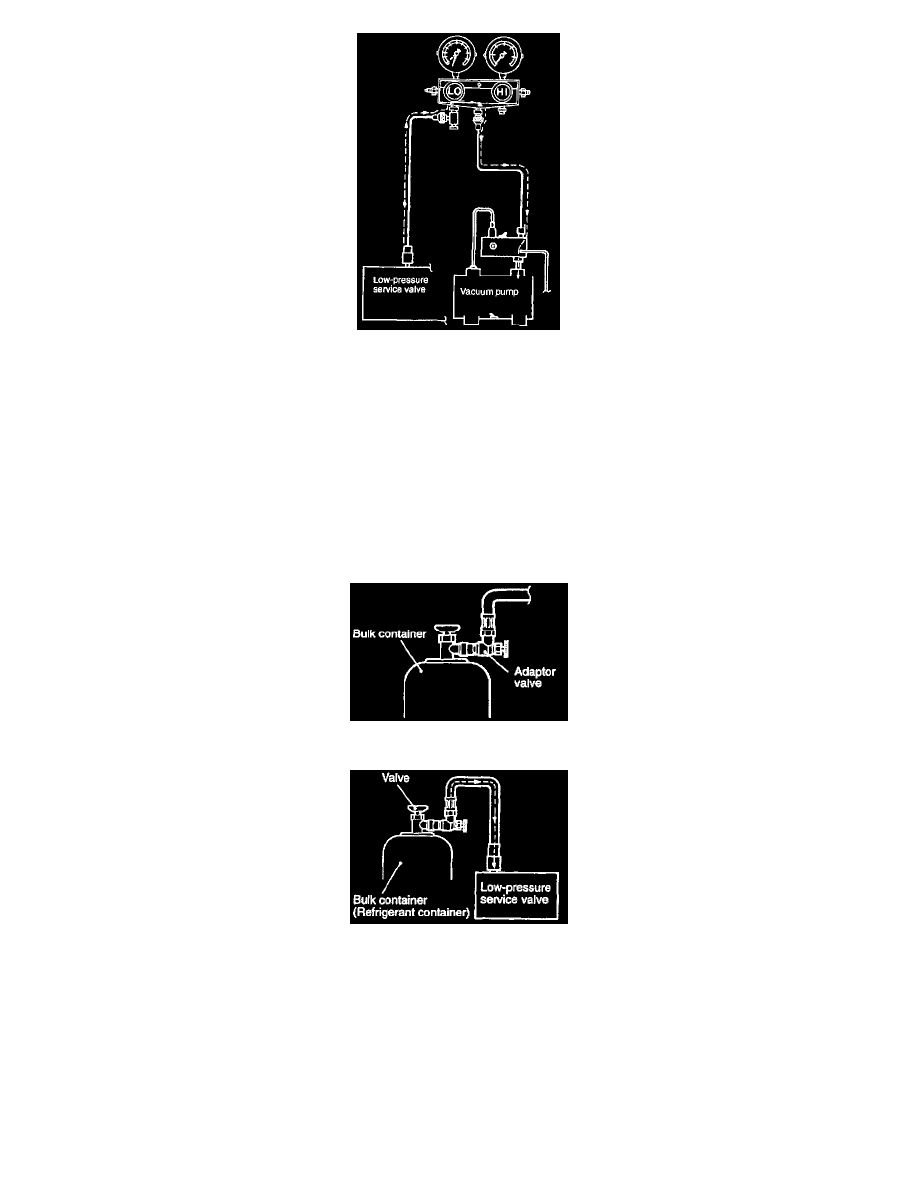
12. Turn the vacuum pump adaptor switch to the R-134a side to start the vacuum pump.
CAUTION: Do not operate the A/C compressor during evacuation.
13. Evacuate to a vacuum reading of 100 kPa (29.5 in.Hg) or higher (takes approx. 10 minutes).
14. Turn the vacuum pump adaptor switch OFF and allow to stand it for 5 minutes.
CAUTION: Do not operate the compressor in the vacuum condition; damage may occur.
15. Carry out a leak test. (Good if the negative pressure does not drop.)
CAUTION: If the negative pressure (vacuum) is lost, check for loose connections. Then, repeat the evacuation procedure from step 12. if
negative pressure (vacuum) is still lost, add 1 lb of refrigerant and check system using an R-134a compatible leak detector.
16. Turn the handle of the adaptor valve back all the way (valve closed), remove it from the gauge manifold and install the bulk container.
17. Open the valve of the bulk container.
18. Tighten the handle of the adaptor valve (valve open) to charge the system with refrigerant.
CAUTION: If the bulk container is inverted, liquid refrigerant may be drawn into the compressor damaging it by hydraulic lock. Keep the bulk
container upright to ensure that refrigerant is charged in gas state.
19. If the refrigerant is not drawn in, turn the handle of the adaptor valve back all the way (valve closed).
20. Check for gas leaks using a leak detector.
If a gas leak is detected, re-tighten the connections and then repeat the charging procedure from evacuation in step (12).
CAUTION: A leak detector designed for R-134a should be used.