
Eclipse FWD L4-1997cc 2.0L DOHC MFI (1997)
1.
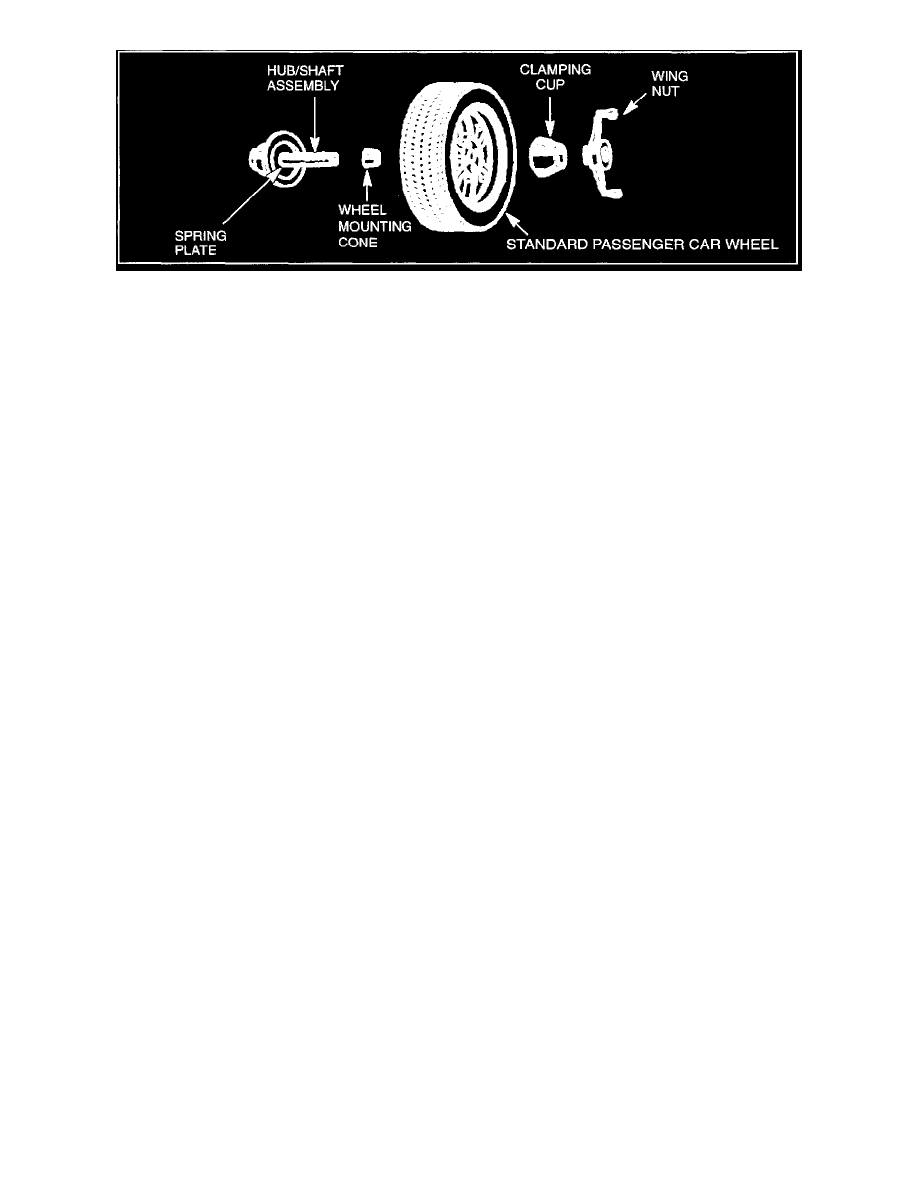
Confirm that the balancer's cone and the wheel mounting cone are undamaged and free of dirt and rust.
2.
On Mitsubishi passenger cars, the wheel's center hole on the hub side has a chamfered edge. Use a back-mounting cone on your wheel balancer to
center the wheel on the balancer shaft.
3.
Install a wheel mounting cone. The appropriate size cone for Mitsubishi passenger cars is 67.0 mm (2.64 in.).
4.
Before balancing the wheel, remove any wheel weights from both sides. Also check both sides for any damage.
5.
When installing wheel weights, hammer them at a straight (not diagonal) angle.
Confirming Proper Balance
1.
After balancing the wheel, loosen the wing nut and turn the wheel 180° against the balancer's hub. Then re-tighten the wing nut and check the
balance again. Repeat wheel balance if necessary.
2.
Turn the wheel again 180° against the balancer's hub. If the wheel becomes out-of-balance each time it is turned against the balancer's hub, the
wheel balancer may require calibration.
Wheel Balancer Calibration Checks
1.
Mount an undamaged original-equipment alloy rim and tire assembly (wheel) onto your off-the-car wheel balancer. Balance the wheel.
2.
Zero Calibration Check. Loosen the balancer wing nut, rotate the wheel a half-turn (180°), and retighten the nut. Recheck the balance.
a.
If the imbalance is 5 grams or less, the zero calibration is OK. Rebalance the wheel, then go to Step 4 to check the static balance.
b.
If the imbalance is more than 5 grams, go to Step 3.
3.
Loosen the balancer wing nut, rotate the wheel 1/4 turn (90°), and retighten the nut. Recheck the wheel balance.
a.
If the imbalance is 5 grams or less, the wheel may not be centered on the balancer, or the balancing cones, the cup, and/or wing nut are
damaged, dirty, or inappropriate for the wheel. You may need to refer to the balancer manufacturer's instructions to verify the correct
attachments. After making the necessary corrections, recheck the wheel balance. If OK, then go to Step 4.
b.
If the imbalance is more than 5 grams, the balancer requires calibration. Contact the balancer manufacturer for calibration by their repair
representative.
4.
Static Balance Check. Attach a 5-gram weight to the outer rim. Recheck the balancer. The balancer should detect 5 +/- 2 grams of imbalance 170°
to 190° away from the 5-gram weight.
a.
If the imbalance is within specification, the static balance calibration is correct. Go to Step 5 to check the dynamic balance.
b.
If the imbalance is out of specification, the balancer requires calibration. Contact the balancer manufacturer for calibration by their repair
representative.
5.
Dynamic Balance Check. Attach a 5-gram weight to the inner rim at 180° opposite the 5-gram weight that was added in Step 4. Recheck the
balance. The balancer should detect 5 +/- 2 grams of imbalance 170° to 190° away from both the inner and outer 5-gram weights.
a.
If the imbalance is within specification, the dynamic balance calibration is correct. The balancer calibration checks are complete.