
Eclipse FWD L4-1997cc 2.0L DOHC MFI (1997)
Clockspring Assembly / Spiral Cable: Service and Repair
CAUTION:
1. Never attempt to disassemble or repair the air bag module or clock spring. If faulty, replace it.
2. Do not drop the air bag module or clock spring or allow contact with water, grease or oil. Replace it if a dent, cracks, deformation or rust are
detected.
3. The air bag modules should be stored on a flat surface and placed so that the pad surface is facing upward.
Do not place anything on top of the air bag modules.
4. Do not expose the air bag module to temperature over 93°C (200°F).
5. After deployment of an air bag, replace the clock spring.
6. Wear gloves and safety goggles when handling an air bag that has deployed.
7. An undeployed air bag module should only be disposed of in accordance with the specified procedures.
REMOVAL AND INSTALLATION
Air Bag Module (Driver's Side), Clock Spring
Pre-removal Operation
-
Set the steering wheel and the front wheels to the straight ahead position, and then remove the ignition key.
Air Bag Module And Clock Spring
Clock Spring Removal Steps
-
Post-installation inspection
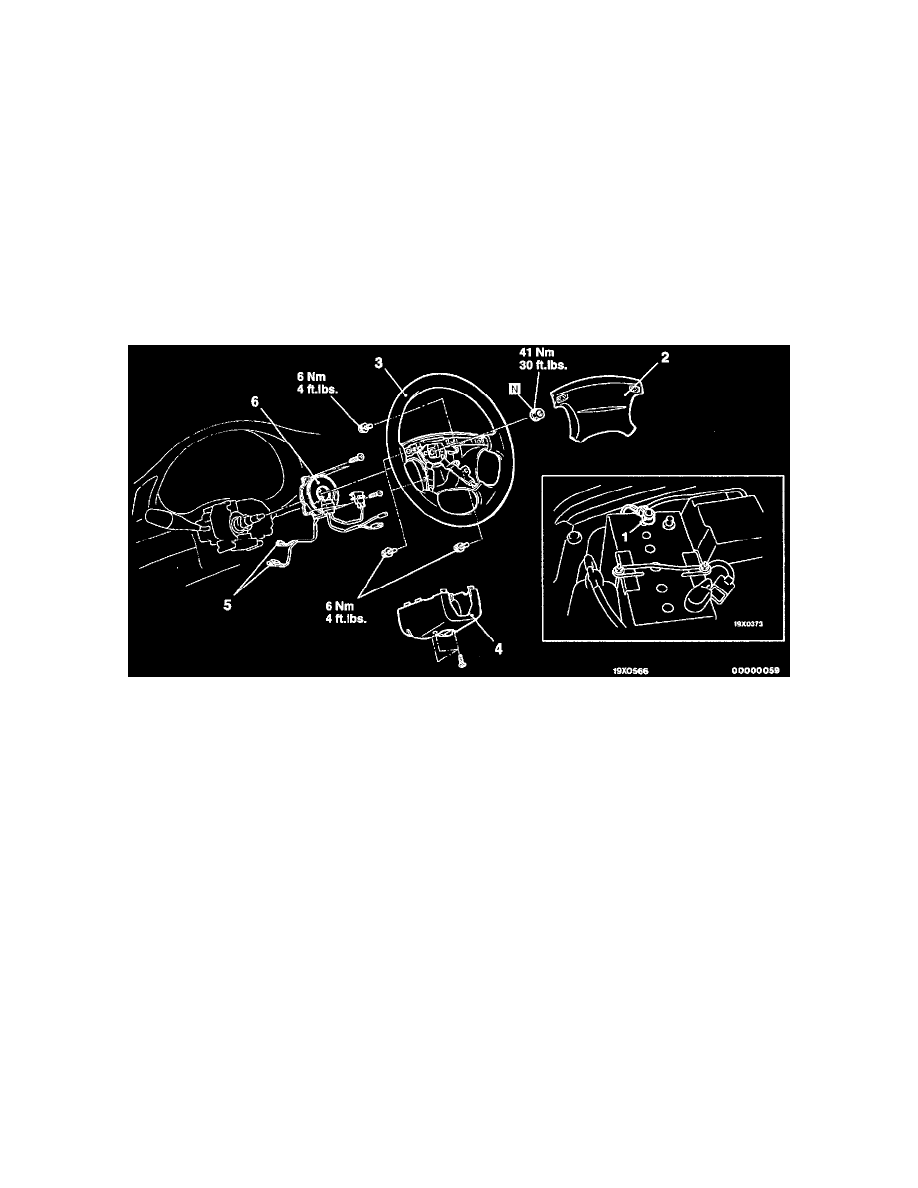
1. Negative (-) battery cable connection
2. Air bag module (Driver's side)
3. Steering wheel
4. Column cover lower
5. Clock spring and body wiring harness connection
6. Clock spring
-
Pre-installation inspection
Air Bag Module (Driver's Side) Removal Steps
-
Post-installation inspection
1. Negative (-) battery cable connection
2. Air bag module (Driver's side)
-
Pre-installation inspection
Air Bag Module (Front Passenger's Side)