
Eclipse FWD L4-1997cc 2.0L DOHC MFI (1997)
2.
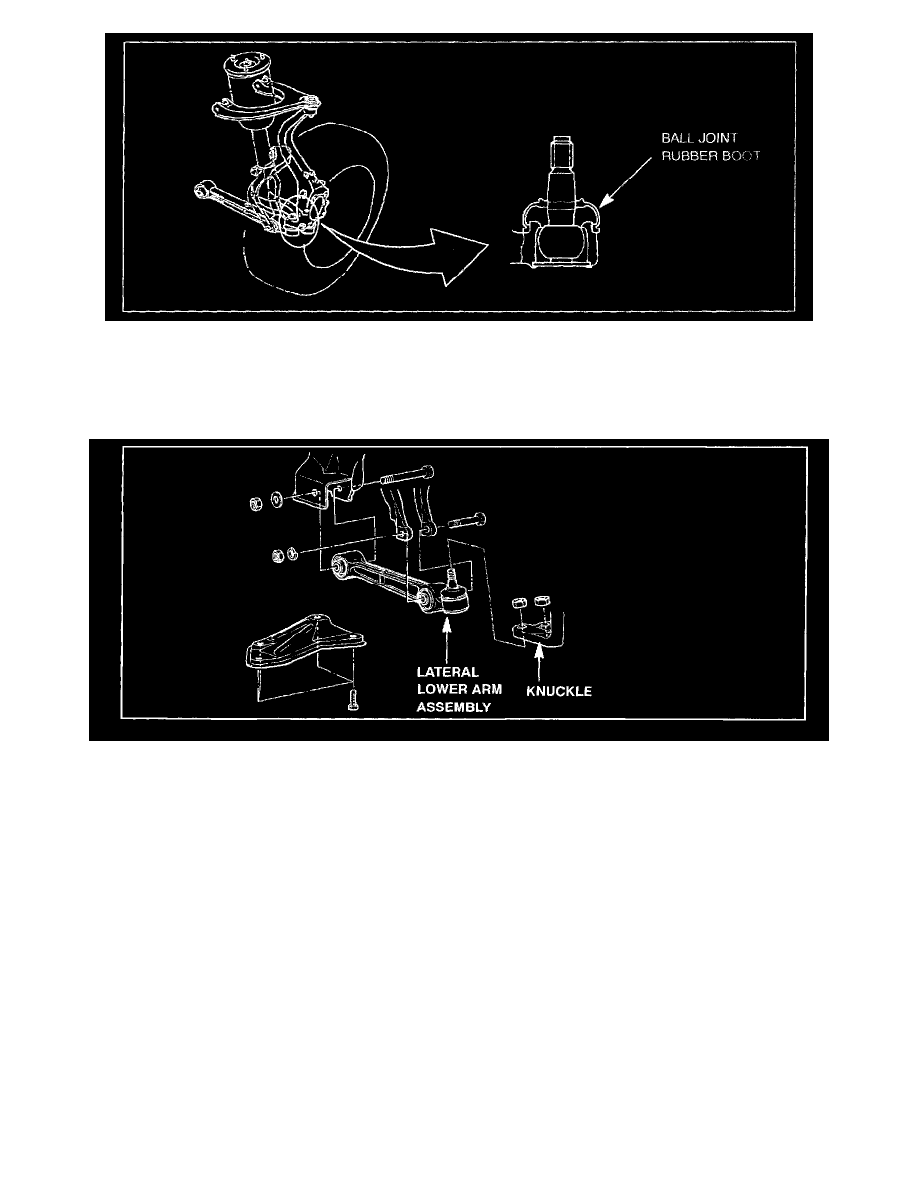
Inspect the lateral lower arm ball joint rubber boot on both sides for cracks and damage. Gently push the boot in with your fingers. Do not remove
any parts for the inspection. Damage to the boot is evident if any cuts or tearing are observed if grease comes out when it is pushed in, or if there
are any other signs of leakage.
a.
If the rubber boot is not damaged on either side of the vehicle, go to Step 4 or ball joint free play inspection.
b.
If the rubber boot is damaged, replace the lateral lower arm assembly, using the parts listed in the PARTS INFORMATION section of this
bulletin. Go to Step 5 for lateral lower arm replacement instructions.
3.
Measure the lower ball joint end cap diameter as shown. Note this measurement. (The free play specification is different for end caps 28 - 30 mm
diameter, than for end caps 32 - 35 mm diameter.)
a.
Lower the vehicle.
4.
Check the ball joint tree play as follows:
a.
Adjust the steering wheel so the wheels are in the straight ahead position.
b.
Remove the ignition key.
c.
Raise the vehicle.
d.
Remove both front tires. Then install two wheel nuts on each hub to secure the brake discs.
e.
Set up a dial indicator in one of the following ways:
f.
Adjust the dial indicator plunger to approximately the center of its travel.
g.
Adjust the vehicle height so that the wheel hub center is even with your shoulder.