
Eclipse RS L4-2350cc 2.4L SOHC MFI (2002)
<Heated oxygen sensor (front)>
1. Using the scan tool MB991502, observe HO(2)S reading. If values are unsatisfactory, or if Scan tool is not available, use the following procedure:
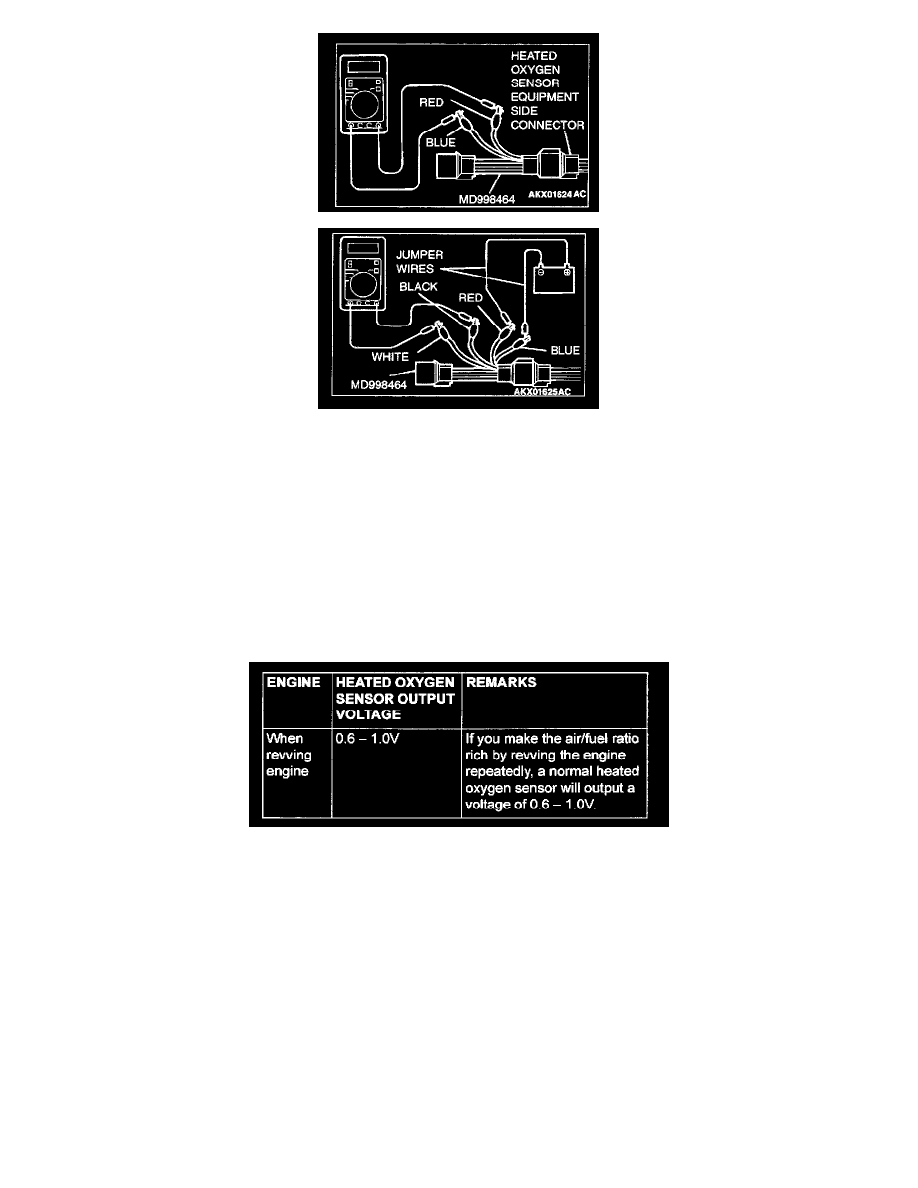
1. Disconnect the heated oxygen sensor connector and connect special tool MD998464 to the connector on the heated oxygen sensor side.
2. Make sure that there is continuity [4.5 - 8.0 Ohm, at 20 °C (68 °F)] between terminal 1 (red clip of special tool) and terminal 3 (blue clip of
special tool) on the heated oxygen sensor connector
3. If there is no continuity, replace the heated oxygen sensor.
4. Warm up the engine until engine coolant is 80 °C (176 °F) or higher.
CAUTION: Be very careful when connecting the jumper wires; incorrect connection can damage the heated oxygen sensor.
5. Use the jumper wires to connect terminal 1 (red clip) of the heated oxygen sensor connector to the positive battery terminal and terminal 3
(blue clip) to the negative battery terminal.
6. Connect a digital voltage meter between terminal 2 (black clip) and terminal 4 (white clip).
2. While repeatedly revving the engine, measure the heated oxygen sensor output voltage.
3. If the sensor is defective, replace the heated oxygen sensor.
NOTE: For removal and installation of the heated oxygen sensor, refer to Exhaust Pipe and Main Muffler.