
Eclipse RS L4-2350cc 2.4L SOHC MFI (2002)
following equation, and use a new bellows band to repeat steps (2) to (3).
W = 5.5 mm (0.22 inch) - A Example: if (A) is 1.3 mm (0.05 inch), (W) is 4.2 mm (0.17 inch).
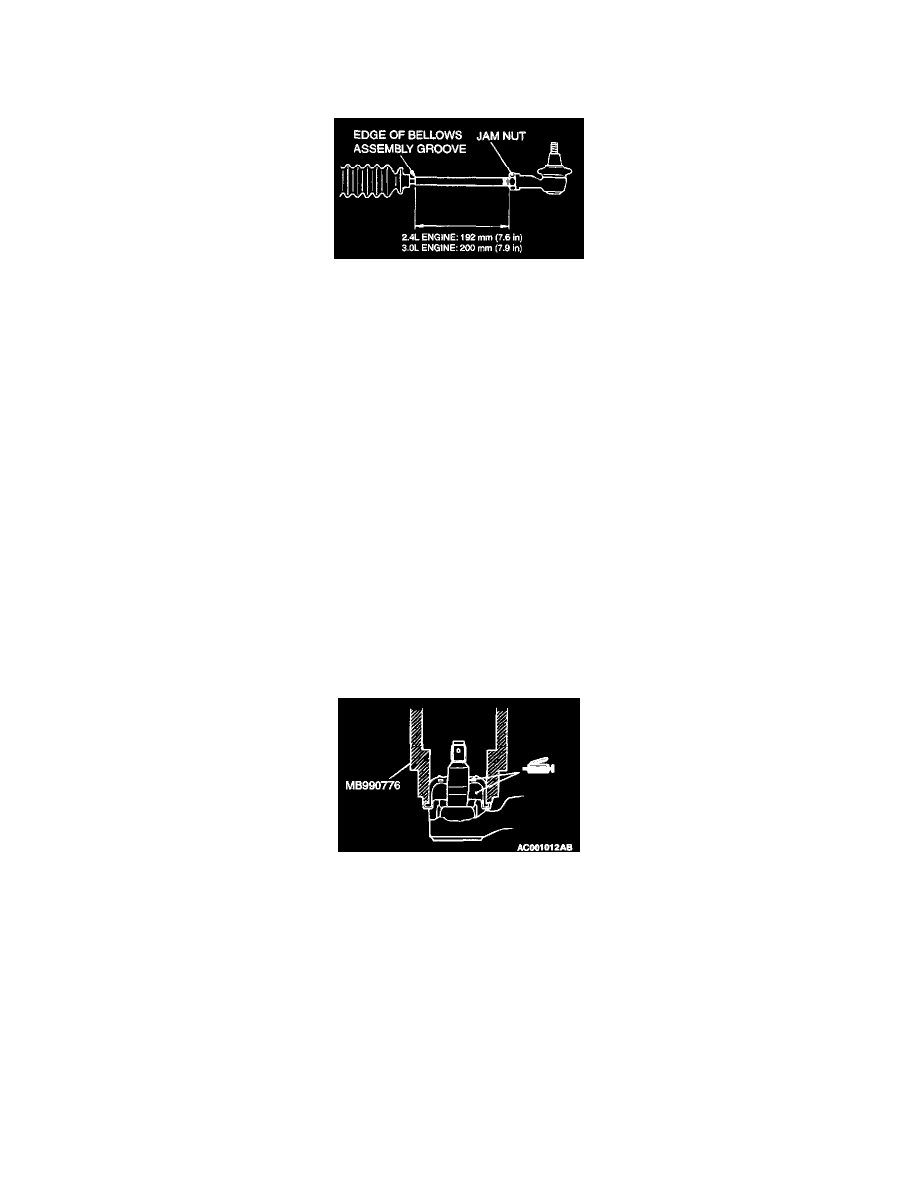
>>O<< TIE ROD END/TIE ROD END JAM NUT INSTALLATION
Screw in the tie rod end to achieve the right and left length as illustrated. Lock with the jam nut
INSPECTION
RACK
^
Check the rack tooth surfaces for damage or wear.
^
Check the oil seal contact surfaces for uneven wear.
^
Check the rack for bends.
PINION AND VALVE ASSEMBLY
^
Check the pinion gear tooth surfaces for damage or wear.
^
Check for worn or defective seal ring.
BEARING
^
Check for roughness or abnormal noise during bearing operation.
^
Check the bearing for play.
^
Check the needle roller bearings for roller slip-off.
OTHERS
^
Check the cylinder inner surface of the rack housing for damage.
^
Check the boots for damage, cracking or deterioration.
^
Check the rack support for uneven wear or dents.
^
Check the rack bushing for uneven wear or damage.
TIE ROD END BALL JOINT DUST COVER REPLACEMENT
If the dust cover is damaged accidentally during service work, replace the dust cover as follows:
1. Apply grease to the lip and inside of the dust cover.
2. Drive in the dust cover with special tool MB990776 until it is fully seated.
3. Check the dust cover for cracks or damage by pushing it with your finger.