
Eclipse RS FWD L4-1997cc 2.0L DOHC MFI (1997)
5.
The garnish is held in place with three built-in plastic tabs. Remove the garnish by carefully prying with a small flat blade screwdriver as shown.
6.
Install the new door trim defroster garnish, using the appropriate part number listed in the PARTS INFORMATION section in this bulletin.
! CAUTION
Tighten the garnish screws snugly. Do not overtighten. Overtightening may damage the garnish. DO NOT USE POWER TOOLS TO TIGHTEN
THE GARNISH SCREWS.
7.
Reinstall the two phillips-head screws.
8.
Reinstall the two plastic ducts and duct work to the door trim panel.
9.
Reinstall the door trim panel.
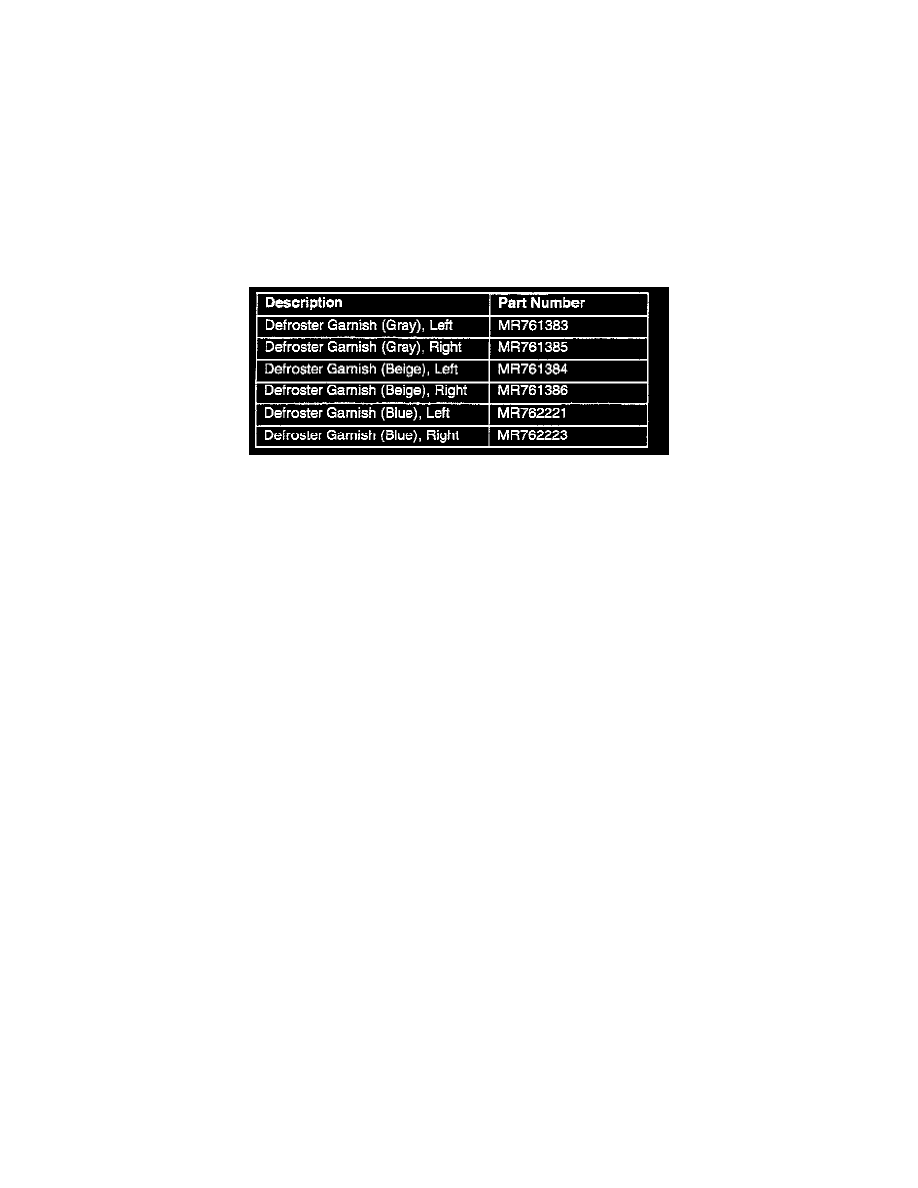
PARTS INFORMATION
WARRANTY INFORMATION
Defroster Garnish
Nature Code: 99D
Cause Code: 100
Labor Operation No. 52426000
Time Allowance: 0.2 hr.
Warranty Coverage: 36 months/36,000 miles.
Special Warranty Information: Normal warranty procedures apply.