
Eclipse RS FWD L4-1997cc 2.0L DOHC MFI (1997)
Synchronizer Hub: Service and Repair
DISASSEMBLY
Place synchronizer in a clean shop towel and wrap. Press on inner hub. Carefully open up shop towel and remove springs, balls, keys, hub, and
sleeve.
CLEAN
Do not attempt to clean the blocking rings in solvent. The friction material will become contaminated. Place synchronizer components in a suitable
holder and clean with solvent. Then let them air, dry.
INSPECTION
Proper inspections of components involved: Teeth, for wear, scuffed, nicked, burred or broken teeth keys, for wear or distortion Balls and springs,
for distortion, cracks or wear If any of these conditions exists in these components, replace as necessary.
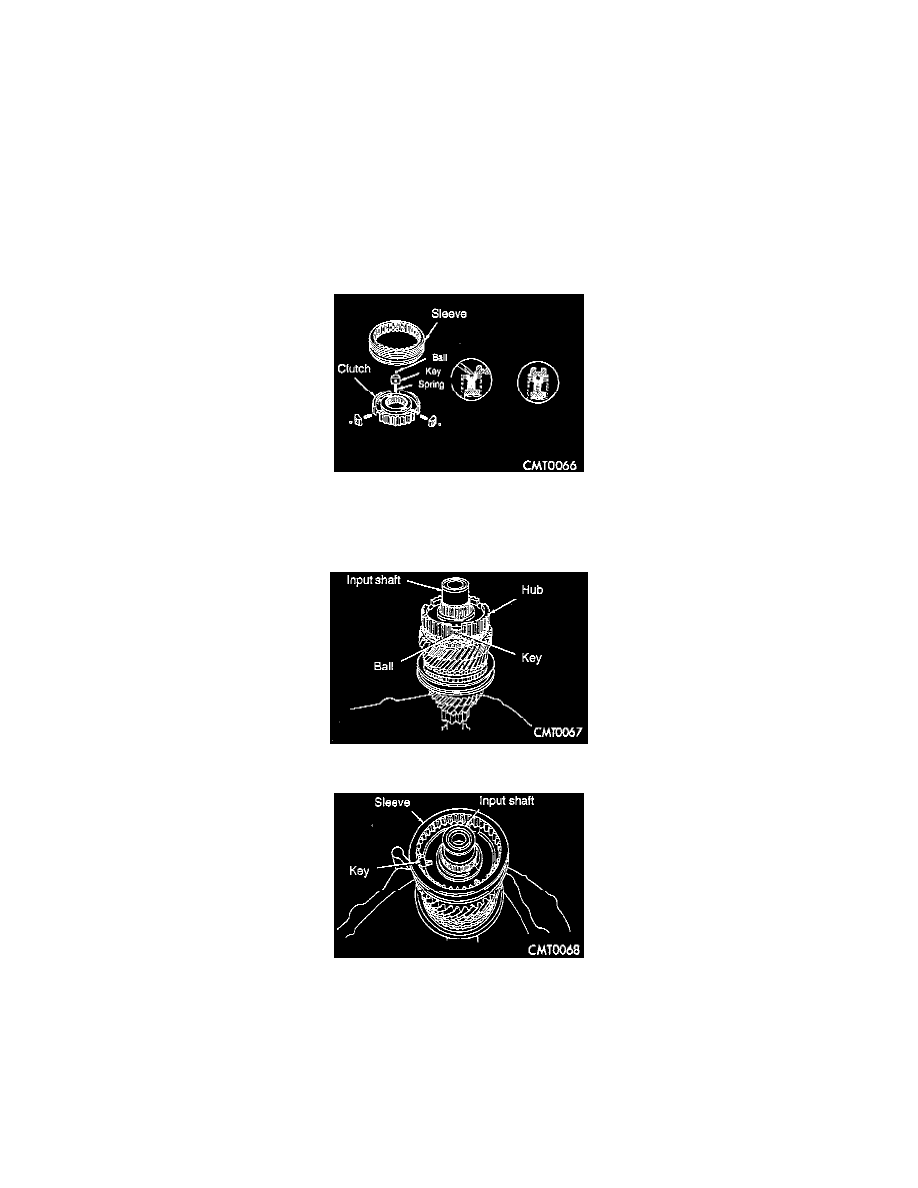
ASSEMBLY
1. Position synchronizer hub onto a suitable holding fixture (input shaft). The synchronizer hubs are directional. The hubs must be installed with the
U facing upward.
2. Install springs into hub slot.
3. Insert key into hub and spring.
4. Apply petroleum jelly to the hole in the key. Insert balls into each key.
5. Slide sleeve over the hub and depress balls as you carefully slip the sleeve into position.