
Eclipse Spyder FWD L4-2350cc 2.4L SOHC 16 Valve (1996)
1.
Remove the door sill scuff plate making sure you do not damage the tabs.
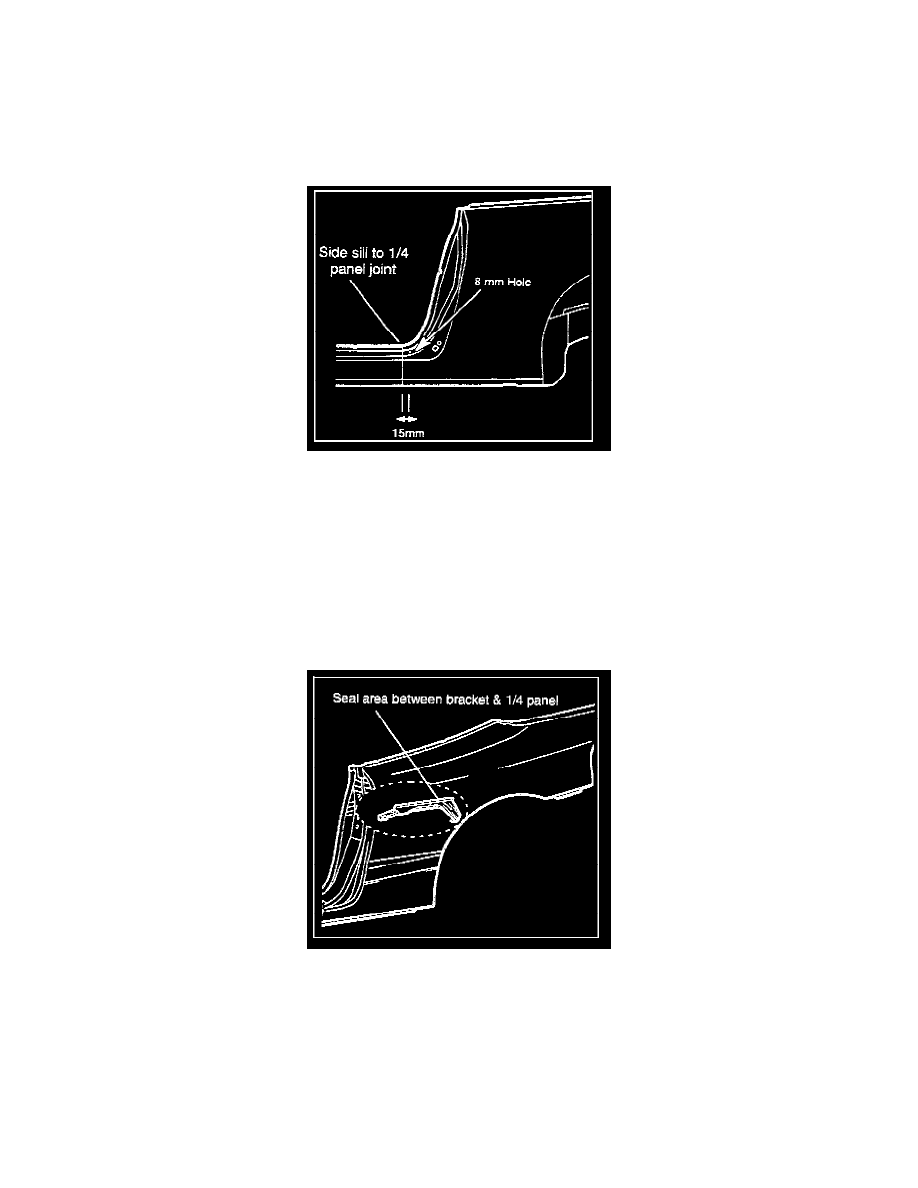
2.
Measure back 15 mm from the side sill - quarter-panel joint. In the center of the horizontal surface, drill an 8 mm hole through the first layer of the
quarter-panel.
NOTE:
The hole will be under the scuff plate and will not be visible after the scuff plate is installed.
3.
Through the drilled 8 mm hole, apply a plug weld to fuse the quarter-panel to the side sill.
4.
Paint over the surface of the weld.
5.
Install the scuff plate.
6.
Test drive the vehicle to verity repair.
^
Center of the quarter-panel (Sealing of Drain Trough)
1.
Open top to fully open.
2.
Reach into the quarter-panel from the top and locate by feel, the drain trough (quarter-panel support) bracket that is attached to the outer
quarter-panel.
3.
Apply sealer (RTV) along the top edge of the bracket so that it is sealed against the inside of the quarter-panel.
NOTE:
Make sure to let the RTV sealant cure for the time specified by the RTV manufacturer's instructions before test driving the vehicle.
4.
Test drive the vehicle to verity repair.