
Eclipse Spyder FWD L4-2350cc 2.4L SOHC 16 Valve (1996)
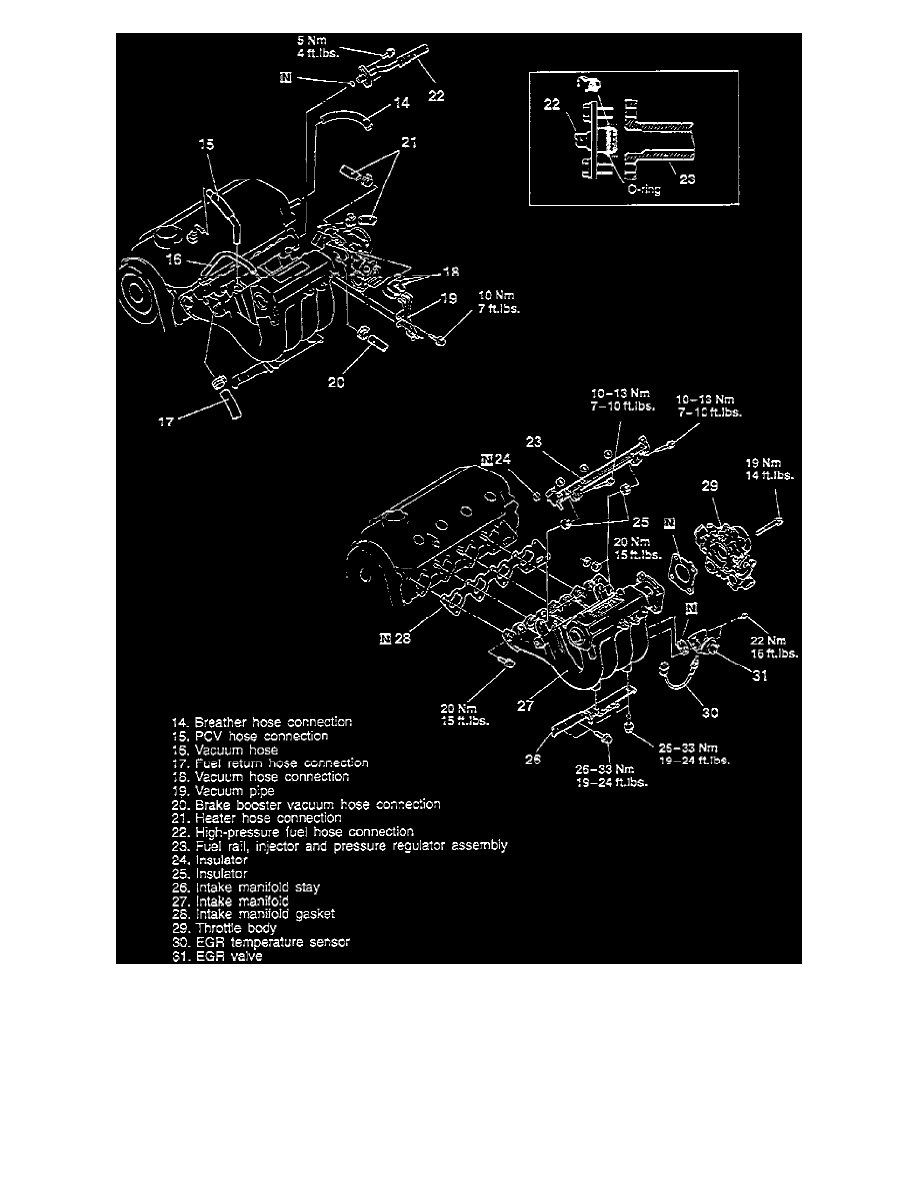
Fig. 7 Intake Manifold Replacement (Part 2 Of 2)
2. Remove intake manifold in numbered sequence shown, Fig. 7 and 8, then inspect cylinder head mating surface for distortion using a straightedge
and a feeler gauge. Distortion must be below 0.008 inch.
3. Reverse procedure to install. Tighten all bolts and nuts to specifications.