
Eclipse Spyder FWD L4-2350cc 2.4L SOHC 16 Valve (1996)
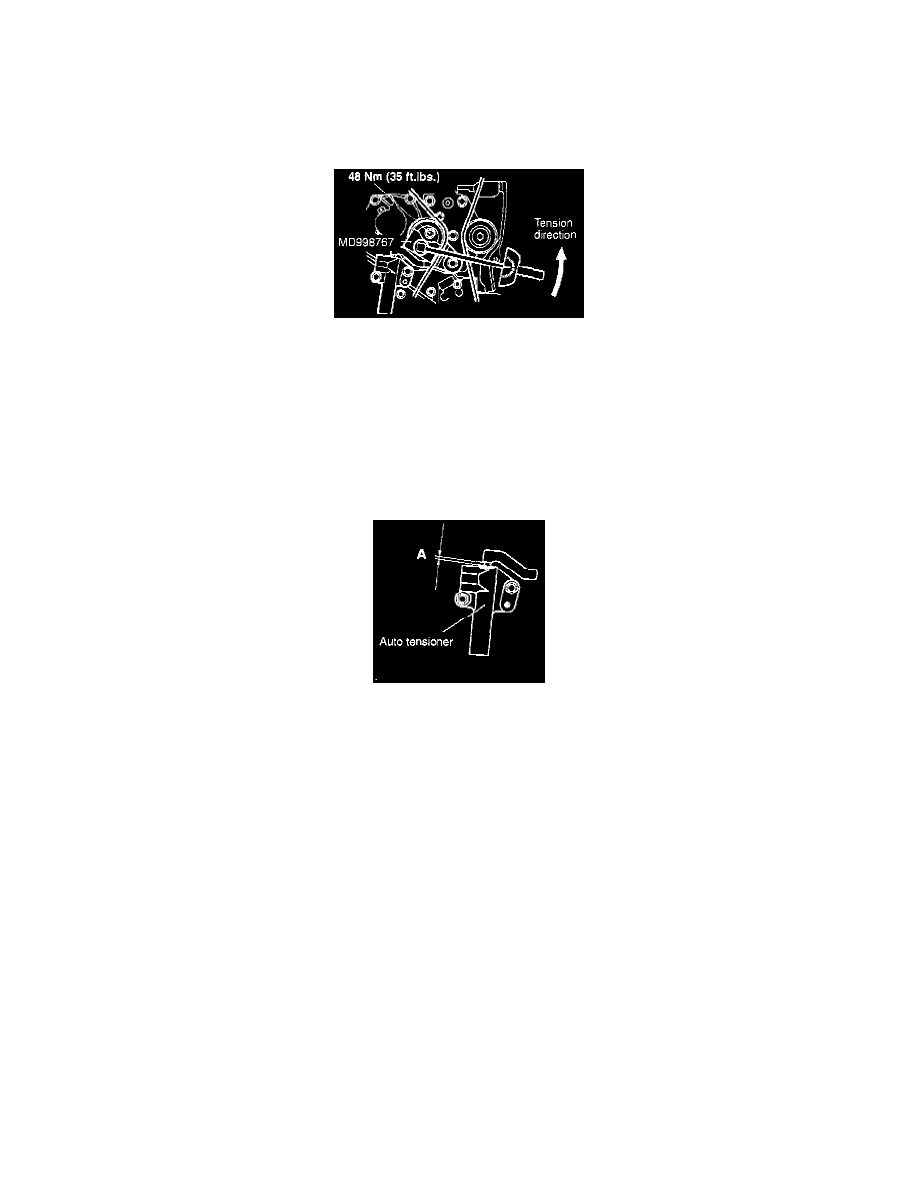
5. Screw the tool into the engine left support bracket until its end makes contact with the tensioner arm. At that point, screw the tool in some
more and then remove the set wire attached to the auto tensioner.
6. Remove the tool.
7. Tighten the center bolt to the specified torque.
Specified torque: 48 Nm (35 ft. lbs.)
>C< Timing Belt Tension Adjustment.
1. After turning the crankshaft 1/4 of a revolution counterclockwise, turn it clockwise until the timing marks are aligned.
2. Loosen the tension pulley fixing bolt, and then use the special tool and a torque wrench to tighten the fixing bolt to the specified torque while
applying tension to the timing belt.
Standard value:
3.5 Nm (2.6 ft. lbs.)
<Timing belt tension torque>
CAUTION: When tightening the fixing bolt, do not let the tension pulley turn with the bolt.
3. Turn the crankshaft two revolutions clockwise so that the timing marks are aligned. After leaving it for 15 minutes, measure the amount of
protrusion of the auto tensioner.
Standard value (A): 3.8 - 4.5 mm (0.150 - 0.177 inch)
4. If the amount of protrusion is outside the standard value, repeat the operation in steps (1) to (3).
5. Check again that the timing marks of each sprocket are aligned.