
Eclipse Spyder FWD L4-2350cc 2.4L SOHC 16 Valve (1996)
3.
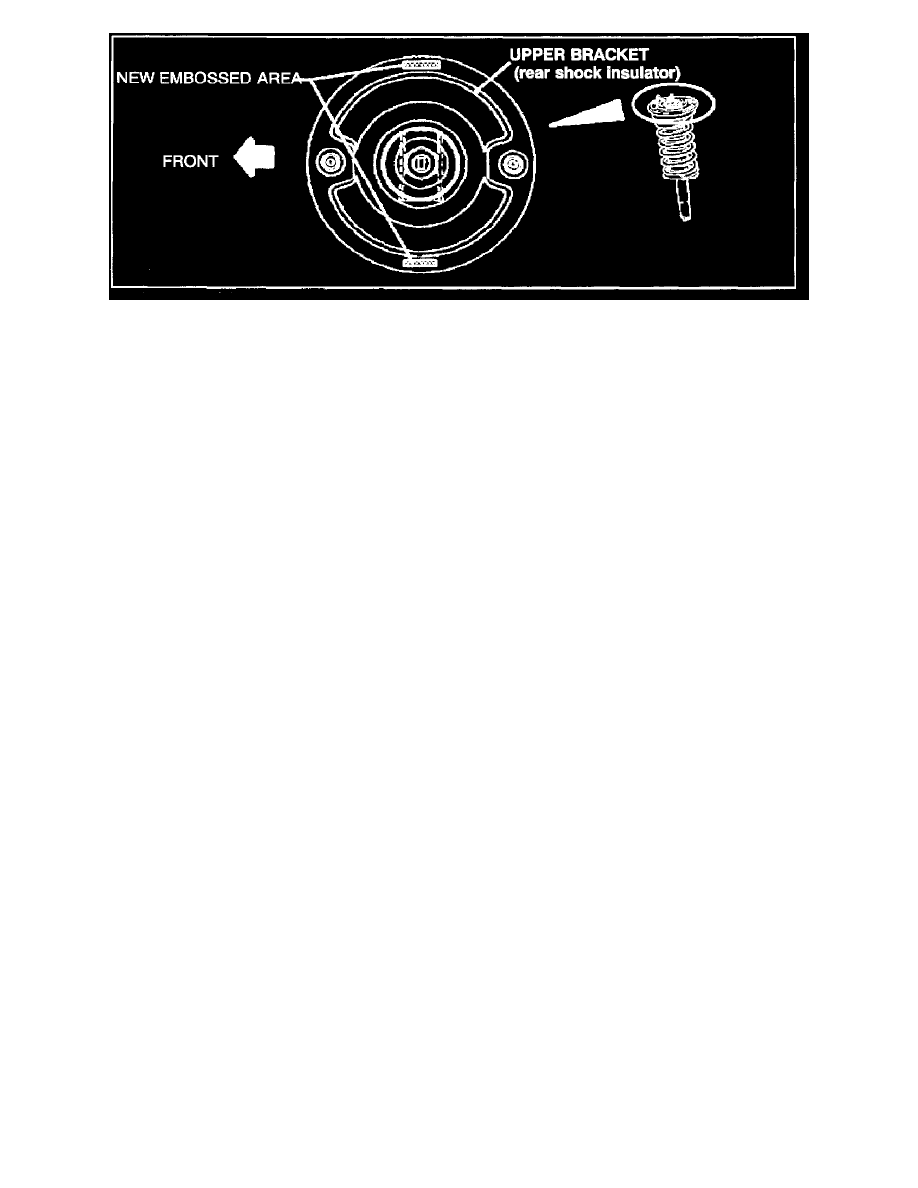
Replace the Upper Bracket Assembly (Rear Shock Insulator) with improved parts. Parts have been improved by adding an embossed (raised)
portion to the Upper Bracket Assembly at 90° angles to the mounting studs.
**NOTE:
Vehicles built from 1/27/98 through 7/31/98 should already have the new improved insulator (upper bracket). If so, do not replace it. Proceed with
step 4.
**4. replace the upper shock insulator bushings with the improved parts. The new bushings are silicone impregnated to reduce noise.
**5. Replace the collar with the improved collar. The inside diameter of the collar is smaller to eliminate any loose ness which may cause noise.
6.
Reassemble the Rear Strut Assembly by compressing the coil spring with the special tools required, then installing it onto the shock absorber.
7.
Align the edge of the coil spring to the stepped part of the shock absorber spring seat.
8.
Install the Upper Bracket Assembly, (insulator, bushings, collar) ensuring proper positioning of the shock absorber.
9.
Temporarily tighten the self-locking nut.
10.
Remove the special tools and tighten the self locking nut to the specified torque (22 Nm or 16 ft-lbs).
CAUTION
Do not use an impact wrench to tighten the self-locking nut.
11.
Lower the vehicle, then test drive to make sure the repair was successful.