
Eclipse Spyder GS-T FWD L4-1997cc 2.0L DOHC Turbo MFI (1997)
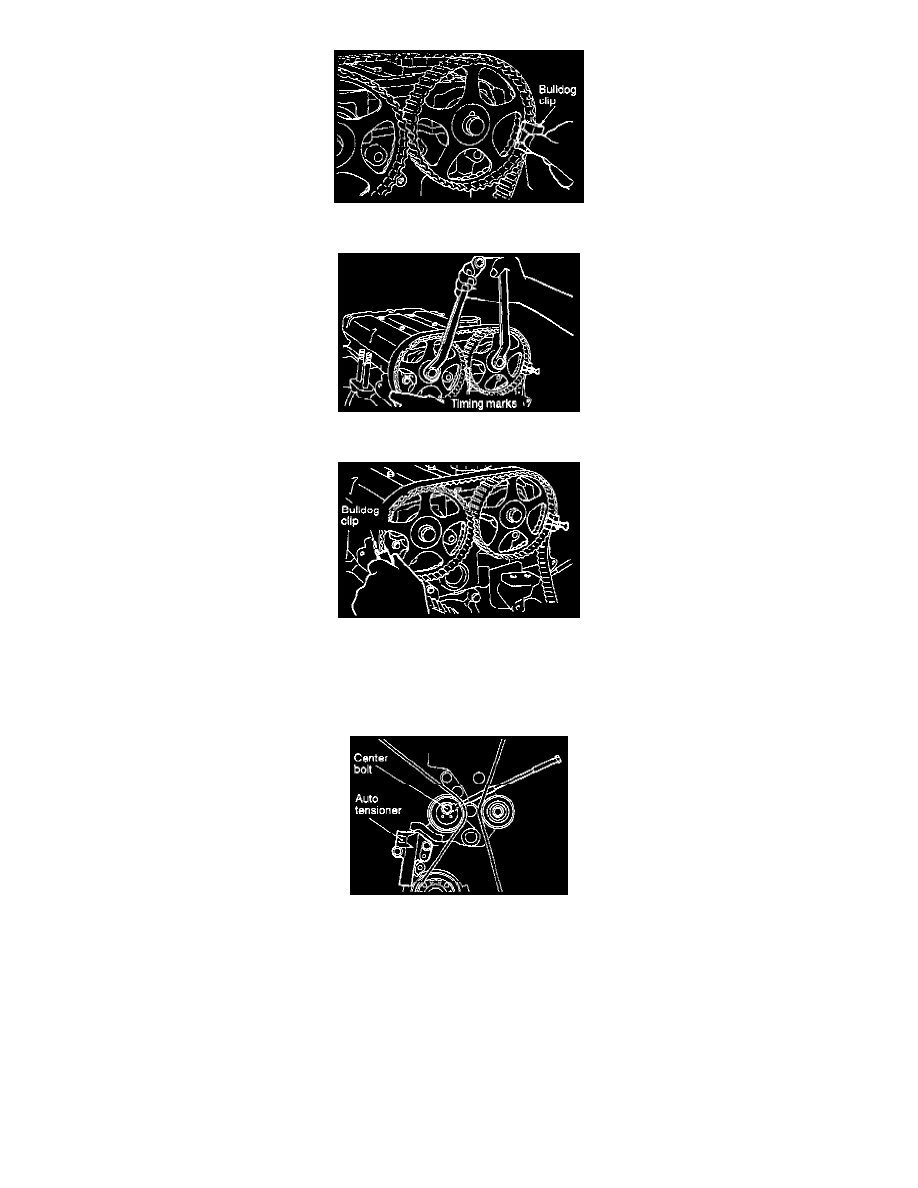
1. Install the timing belt around the intake side camshaft sprocket and fix it at indicated position by a bulldog clip.
2. Install the timing belt around the exhaust side sprocket, aligning the timing marks with the cylinder head top surface using two wrenches.
3. Fix the belt at indicated position by another bulldog clip.
4. Install the timing belt around the idler pulley, the oil pump sprocket, the crankshaft sprocket and the tensioner pulley in the order shown.
5. Remove the two bulldog clips.
4. Set the tension pulley so that the pin holes are at the bottom, press the tension pulley lightly against the timing belt.
5. Screw the tool into the engine left support bracket until its end makes contact with the tensioner arm. At that point, screw the tool in some
more and then remove the set wire attached to the auto tensioner.
6. Remove the tool.
7. Tighten the center bolt to the specified torque.
Specified torque: 48 Nm (35 ft.lbs.)