Eclipse Spyder GS L4-2350cc 2.4L SOHC MFI (2001)

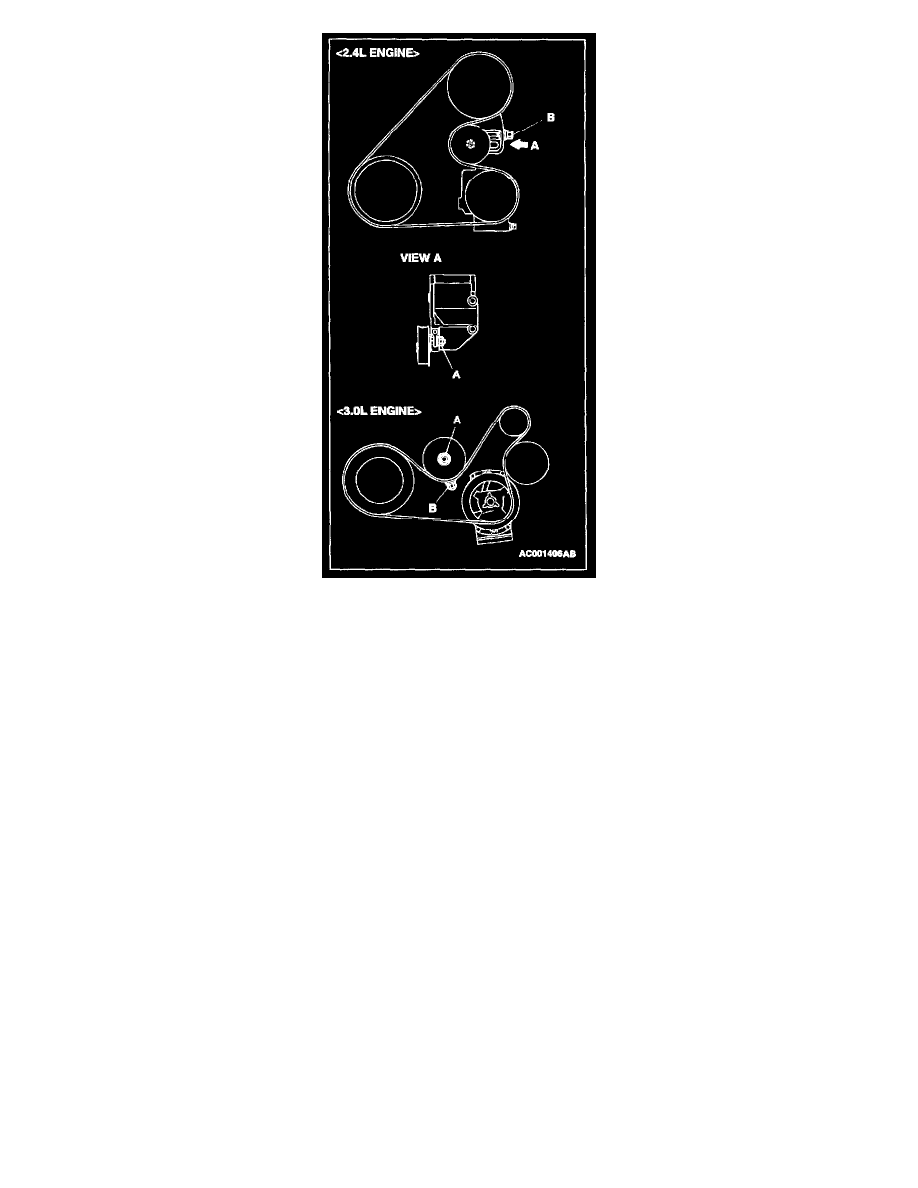
<<A>> DRIVE BELT REMOVAL
1. Loosen the nut "A" for holding.
2. Loosen the bolt "B" for adjustment.
3. Remove the drive belt.
<<B>> DISCHARGE HOSE AND SUCTION HOSE DISCONNECTION
CAUTION: Seal the hoses completely, otherwise the compressor oil and receiver will absorb water vapor easily, possibly damaging the compressor and
deteriorating performance.
Plug the disconnected hose and compressor nipple to prevent foreign matter from getting into them.
<<C>> COMPRESSOR REMOVAL
When removing the compressor, be careful not to spill the compressor oil.
INSTALLATION SERVICE POINT
>>A<< COMPRESSOR INSTALLATION
If a new compressor is installed, first adjust the amount of oil according to the procedures described below, and then install the compressor.
1. Measure the amount [X cu.cm (X fl. oz.)] of oil within the removed compressor.
2. Drain (from the new compressor) the amount of oil calculated according to the following formula, and then install the new compressor.
New compressor oil amount
100 cu.cm - X cu.cm = Y cu.cm (3.4 fl. oz. - X fl. oz. = V fl. oz.)
NOTE: Y cu.cm (Y fl. oz.) indicates the amount of oil in the refrigerant line, the condenser, the evaporator, etc.
NOTE: When replacing the following parts at the same times as the compressor, subtract the rated oil amount of the each part from Y cu.cm (Y
fl. oz.) and discharge from the new compressor.
Quantity:
