
Endeavor V6-3.8L SOHC (2004)
d. From inside the vehicle, push up on the rear center of the sunroof glass. Have someone advise when the rear corners of the glass are approx. 2mm
over flush to the roof. Torque the screws to 5 +/- 0.7 Nm (44 +/- 6 in/lb). DO NOT OVERTIGHTEN.
e. From above, have someone press down on the front center of the glass until it is approx. 2mm under flush to the roof. Torque the screws to 5 +/- 0.7
Nm (44 +/- 6 in/lb).
f. Cycle the sunroof in tilt and fully open modes.
g. Confirm flushness of the glass to the roof and re-adjust as necessary.
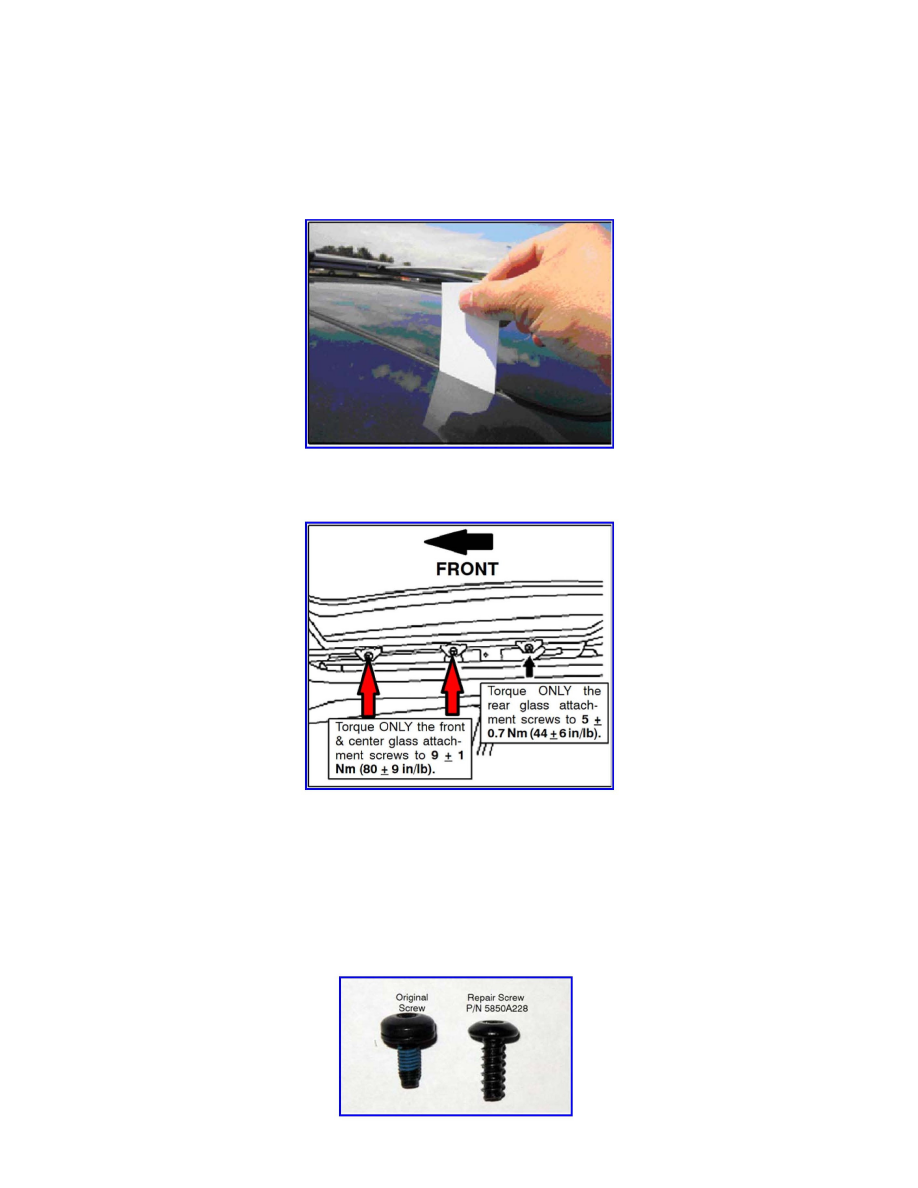
h. Insert a business card or similar material between the body and the sunroof seal. Compare the seal drag at various locations by pulling the card out
to ensure the sunroof is positioned appropriately. Drag should be even around the perimeter of the sunroof.
2. After the sunroof glass has been correctly set and the glass attachment screws torqued to the service manual specification (5 +/- 0.7 Nm, 44 +/- 6
in/lb), the front and center attachment screws should be torqued further to 9 +/- 1 Nm (80 +/- 9 in/lb).
3. The torque specification for the rear attachment screws is unchanged (5 +/- 0.7 Nm, 44 +/- 6 in/lb).
!! CAUTION !!
Do not torque the rear screws to the higher value. These screws should be torqued only to 5 +/- 0.7 Nm (44 +/- 6 in/lb).