
Endeavor V6-3.8L SOHC (2004)
Brake Pedal Assy: Testing and Inspection
BRAKE PEDAL CHECK AND ADJUSTMENT
BRAKE PEDAL HEIGHT
1. Turn up the carpet, etc. under the brake pedal.
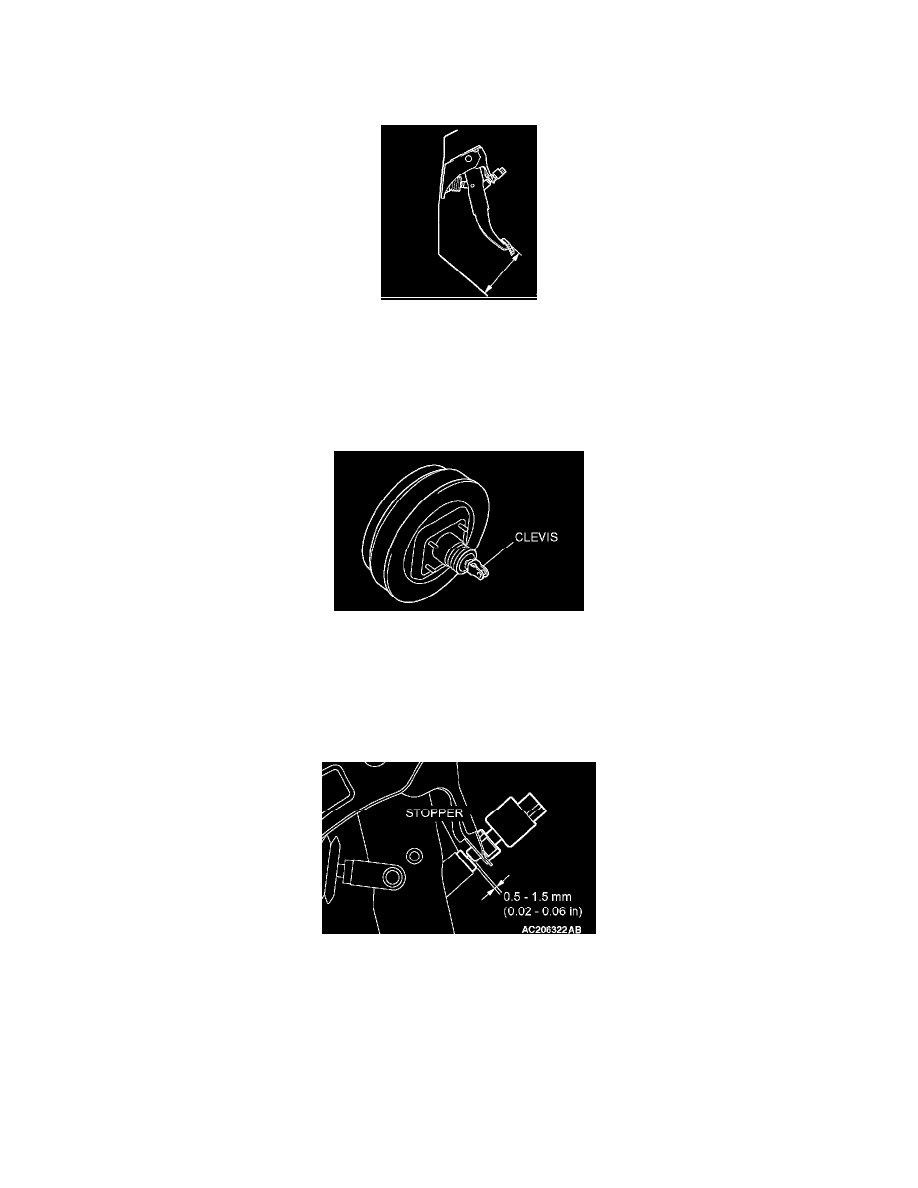
2. Measure the brake pedal height as illustrated.
Standard value: 181.2 - 184.2 mm (7.13 - 7.25 inches) [From the surface of dash panel to the face of pedal pad]
3. If the brake pedal height is not within the standard value, follow the procedure below.
1) Disconnect the stoplight switch connector.
2) Remove the brake booster.
NOTE: With the master cylinder and brake pipe connected, remove the brake booster only.
3) Adjust the brake pedal height by turning the clevis.
NOTE: When the clevis is turned 180 degrees, the pedal height is changed approximately 2.2 mm (0.09 inch).
4) Install the brake booster.
5) Measure the brake pedal height, and ensure that the measured value is within the specified value. When it is out of the specified value, repeat
Step 3) - (6).
6) Screw in the stop light switch until its thread contacts the stopper, and fix the stop light switch by turning it approximately one quarter of a turn
clockwise.
7) Check that the clearance between the stop light switch and the stopper is as shown.
CAUTION: Check that the stop light does not illuminate when the brake pedal is not depressed.
8) Connect the connector at the stop light switch.
4. Check the key interlock and shift lock mechanisms.
5. Return the carpet, etc. to its original position.
BRAKE PEDAL FREE PLAY