
Endeavor V6-3.8L SOHC (2004)
Brake Rotor/Disc: Testing and Inspection
Brake Disc Run-Out Check and Correction
BRAKE DISC RUN-OUT CHECK AND CORRECTION
1. Remove the brake assembly, and then hold it with wire.
2. Temporarily install the disc with the hub nut.
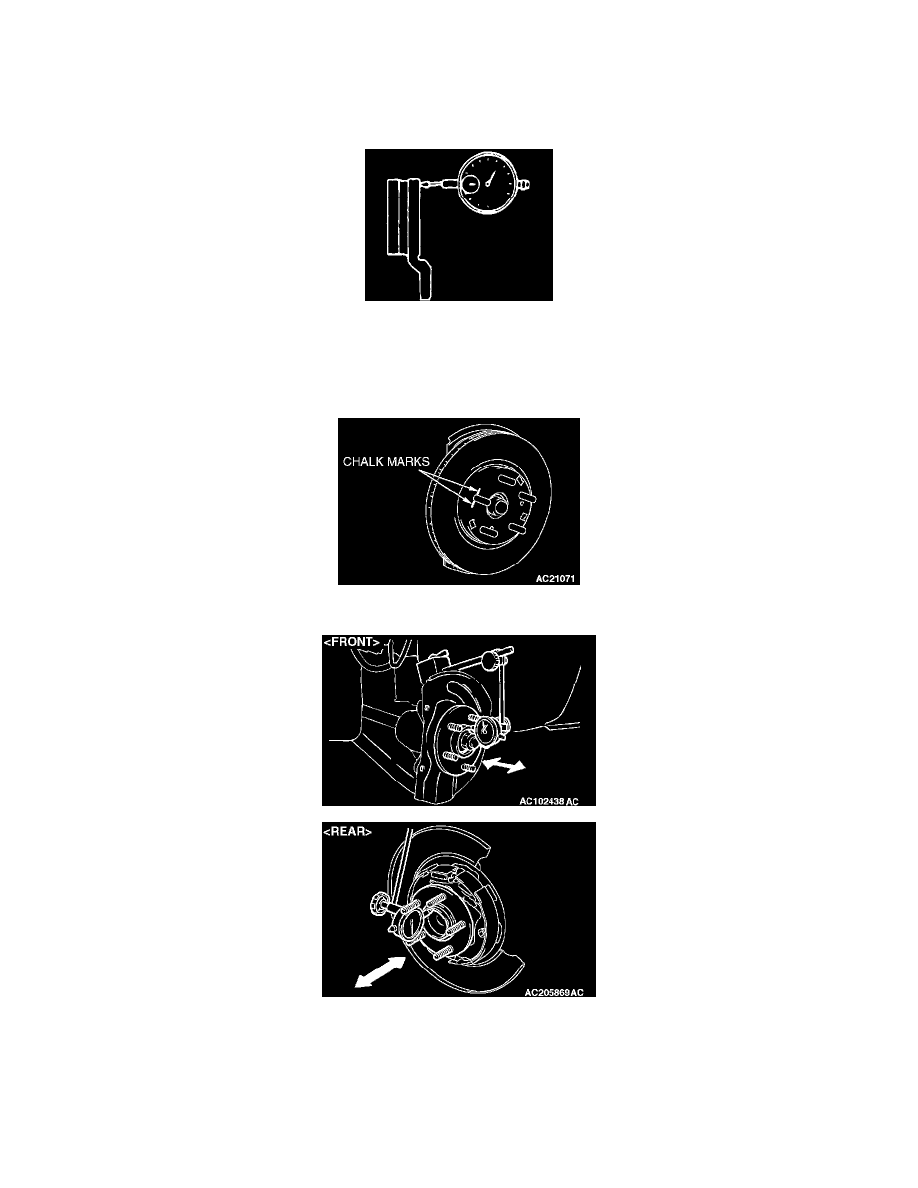
3. Place a dial gauge approximately 5 mm (0.2 inch) from the outer circumference of the brake disc, and measure the run-out of the disc.
Limit:
<Front brake disc>: 0.03 mm (0.0012 inch)
<Rear brake disc>: 0.08 mm (0.0031 inch)
4. If the brake disc run-out exceeds the limit, correct it as follows:
1) Chalk phase marks on the wheel stud and the brake disc, which run-out is excessive as shown.
2) Remove the brake disc. Then place a dial gauge as shown, and measure the end play while moving the hub in the axial direction.
Limit: 0.05 mm (0.002 inch)
3) If the end play exceeds the limit, replace the hub assembly.
4) If the end play does not exceed the limit, dephase the brake disc and secure it. Then recheck the brake disc run-out.
CAUTION:
^
After a new brake disc is installed, always grind the brake disc with on-the-car type brake lathe. If this step is not carried out, the brake disc
run-out exceeds the specified value, resulting in judder.