
Endeavor V6-3.8L SOHC (2004)
e. Rotate the pipe assembly downward. Pull the pipe rearward and down from between the crossmember and the body.
4. Remove any excess rubber gasket material from the wheel well side of the fuel filler opening.
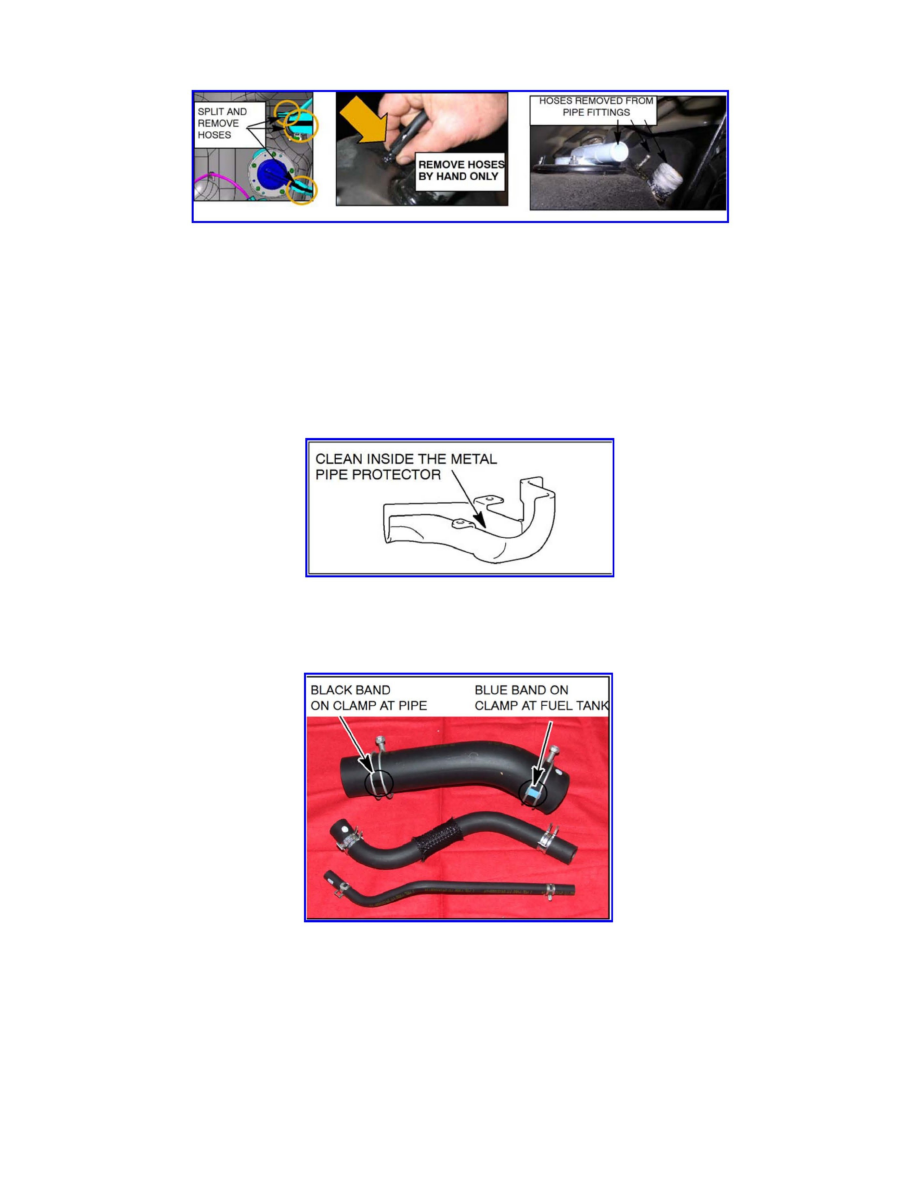
5. Remove the vapor hose, fuel filler hose, and fuel leveling valve hose from the fuel tank. For ease of removal, remove them in the order shown.
Split the hoses lengthwise as shown, then carefully remove them from the metal pipe fittings only by hand.
CAUTION!!
Carefully remove the hoses from the metal pipe fittings only by hand. Use extreme care to prevent damaging the plastic connection and the metal fittings
at the tank.
6. Clean any mud and debris from inside the metal fuel filler pipe protector, to clear the drain hole.
Fuel Filler Pipe Assembly Installation
7. Attach the new hose clamps onto both ends of the new vapor hose, fuel filler hose, and fuel leveling valve hose provided in the pipe replacement kit.
a. Install the new fuel filler hose clamp with the BLACK band at the filler pipe.
b. Install the new fuel filler hose clamp with the BLUE band at the fuel tank.
8. Install the three new hoses to the fuel tank in the order shown. Be sure the markings on the new hoses at the fuel tank are facing UP. Then reposition
the clamps securely.
NOTE:
Isopropyl alcohol can be used as a lubricant during hose installation.