
Endeavor V6-3.8L SOHC (2004)
1. Use special tools MB991237 and MB991238 to compress the coil spring.
WARNING: Do not use an impact wrench to remove the strut nut.
^
Vibration of the impact wrench will cause special tools MB991237 and MB991238 to slip and cause personal injury.
^
Vibration of the impact wrench will cause the valve inside the strut to dropout.
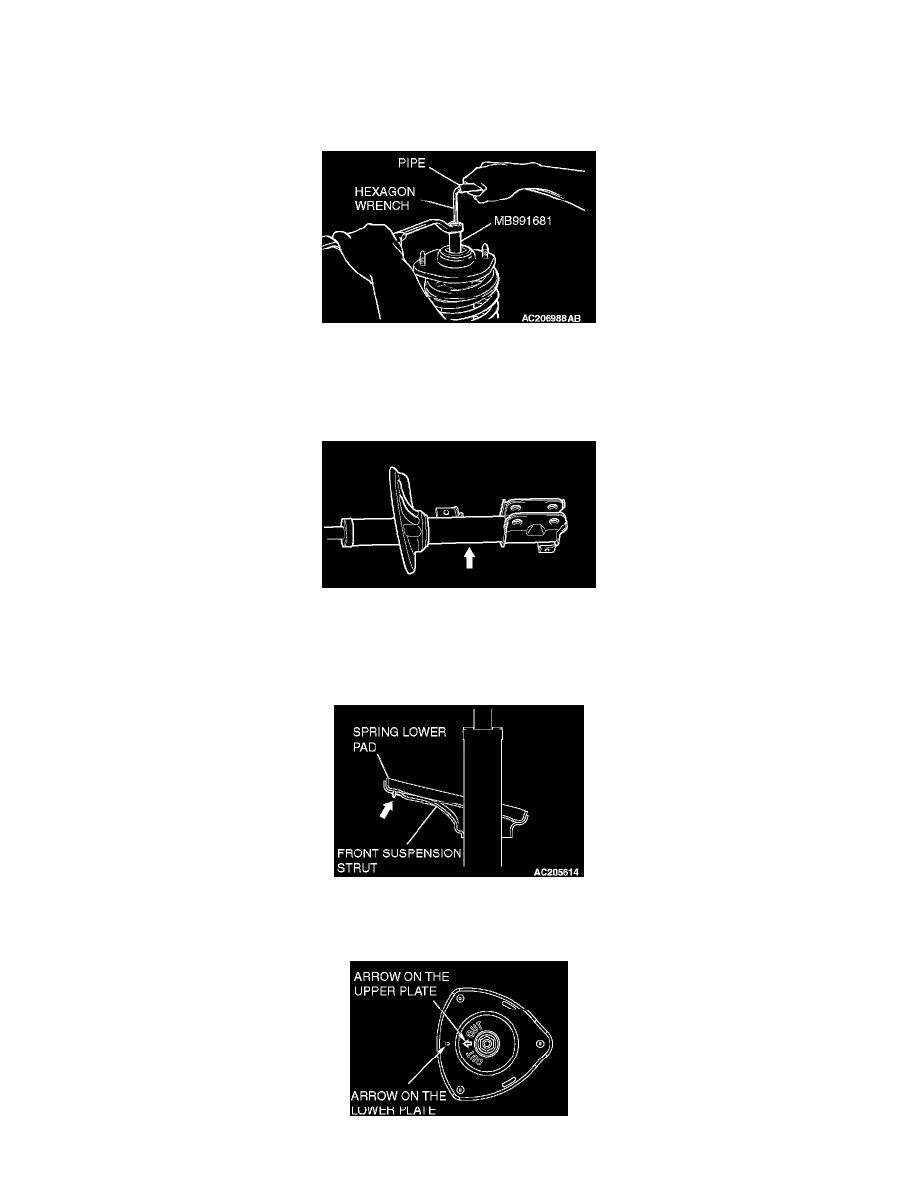
2. Use a hexagon wrench and a pipe to secure the strut, and then remove the strut nut using special tool MB991681.
<<B>> STRUT ASSEMBLY DISPOSAL
WARNING: Wear goggles when drilling to protect your eyes from flying metal debris.
The gas must be discharged from the strut assembly before discarding it. Place the assembly horizontally with its piston rod extended. Then drill a
hole of approximately 3 mm (0.1 inch) in diameter at the location shown in the illustration and discharge the gas.
ASSEMBLY SERVICE POINTS
>>A<< SPRING LOWER PAD INSTALLATION
Engage the three lugs of the spring lower pad into the holes on the front suspension strut as shown.
>>B<< STRUT INSULATOR INSTALLATION
If the upper plate and lower plate of the strut insulator have been disassembled, assemble them as shown.