
Expo AWD L4-2350cc 2.4L SOHC 16 Valve (1993)
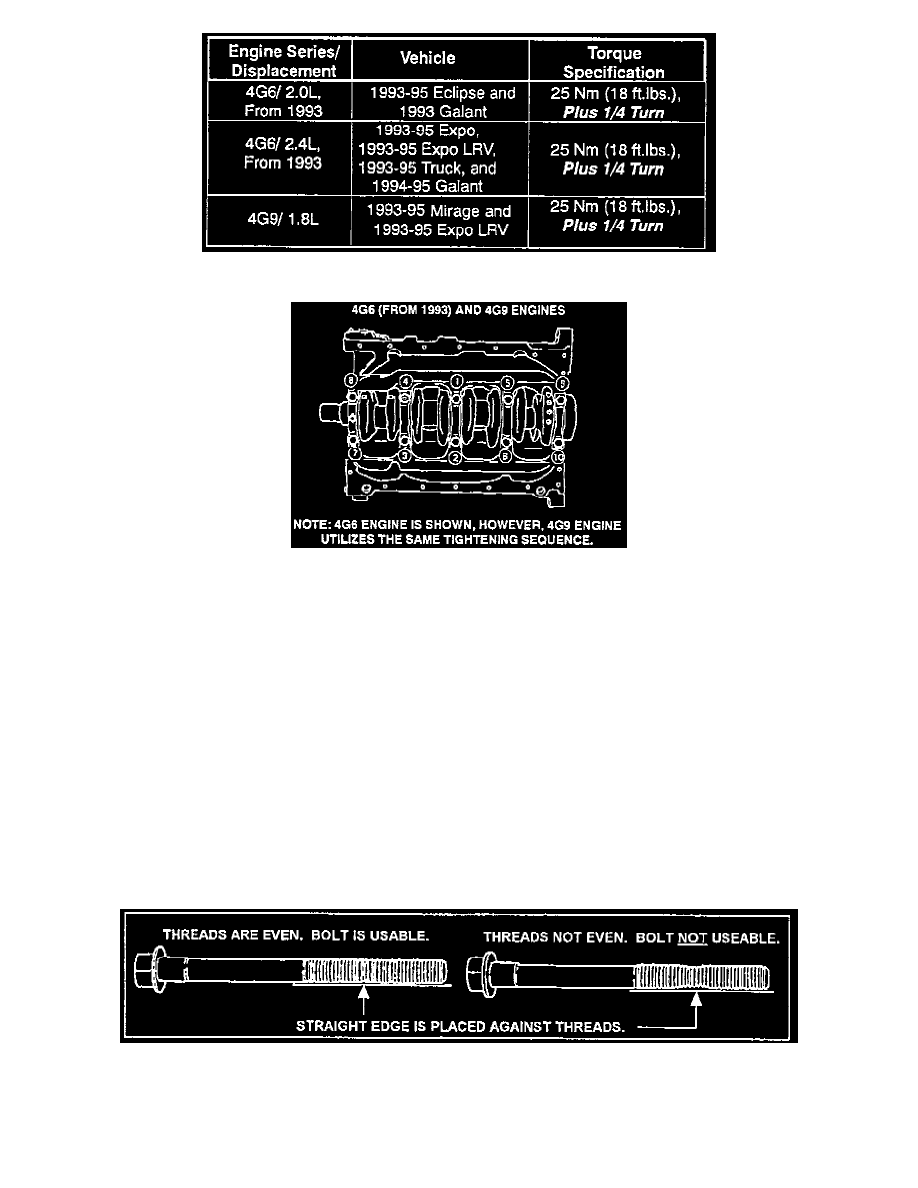
Main Bearing Bolt Tightening Torque for Elastic Bolts
Tightening Sequences for Elastic Main Bearing Bolts
Installation of Connecting Nuts
INSTALLATION OF CONNECTING ROD NUTS
Before installing the connecting rod nuts, check the connecting rod bolts for elongation as described in the steps below. Also, when installing connecting
rod nuts, lightly coat the threads of each nut with clean engine oil.
Connecting Rod Bolt Check
1.
Coat the threads of the connecting rod nut with clean engine oil.
2.
By hand, run each connecting rod nut down the thread of its respective bolt.
3.
If the connecting rod nut cannot run the length of the bolt threads without binding, replace the connecting rod bolt and or/nut, whichever is
damaged.
4.
Repeat Steps 1-3 for the rest of the connecting rod nuts.
5.
The 420A (2.0L) engine used on the 1995 Eclipse uses bolts only, not nuts and bolts. To check the connecting rod bolts on the 420A engine, lay a
straight edge against the bolt threads. If the threads are not even and level against the straight edge, replace the bolt. Refer to the illustration.
NOTE:
There is no specific tightening sequence for connecting rod nuts and bolts. Refer to the following chart for torque specifications.