
Expo LRV AWD L4-1834cc 1.8L SOHC 16 Valve (1992)
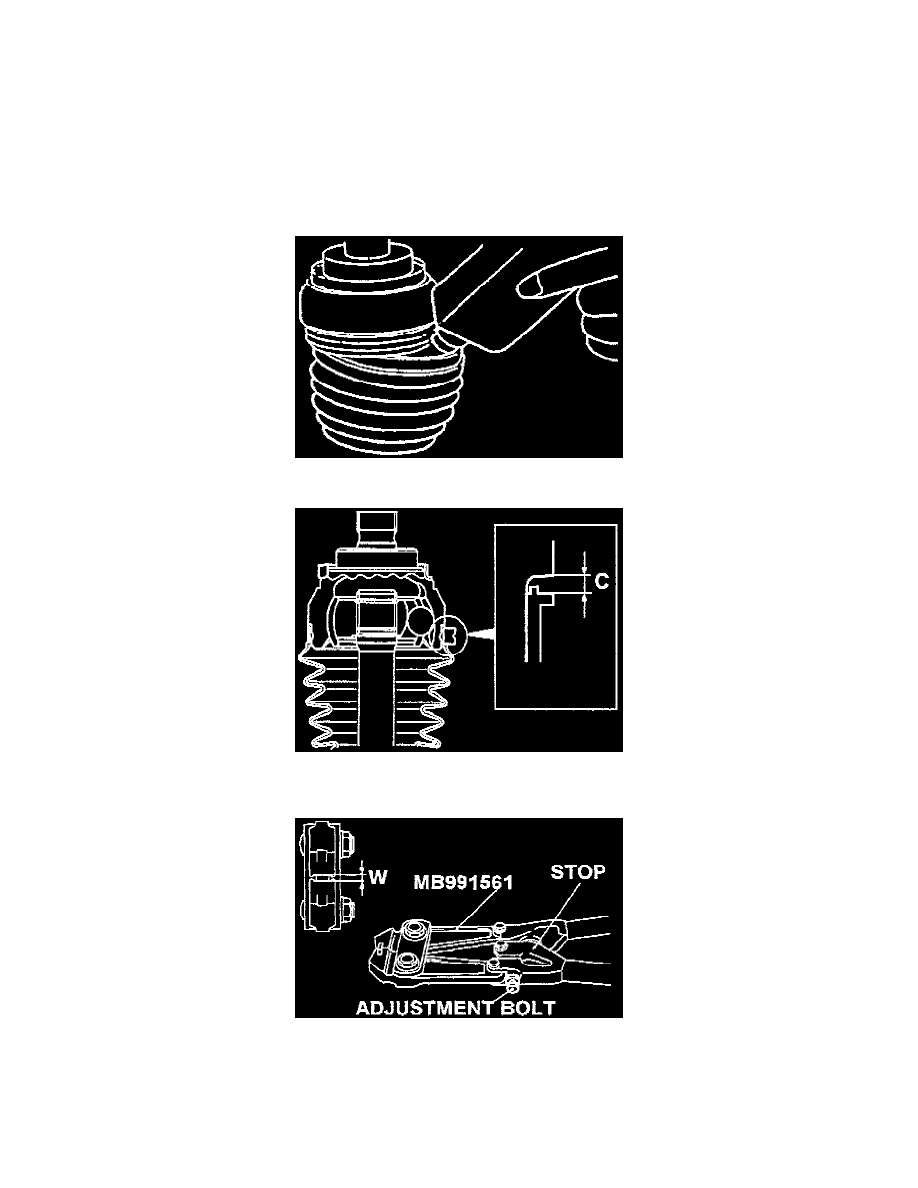
If (B) is less than 2.4 mm, remove the clamp, readjust (W) on the tool as shown in Step 5 using the following formula. Then, install a new clamp and
repeat Steps 6 and 7.
W = 5.5 - B
Example: When (B) = 2.3, then 5.6 - B (2.3) = W (3.2)
You would adjust the tool (W) dimension to 3.2 mm, then crimp the newly installed clamp.
9.
After crimping the clamp, make sure it is seated into the proper recess in the boot, and is not covering any other area on the boot. If it is not in the
proper place, remove it and install another clamp by repeating Steps 6 through 8.
10.
Fill the boot with the specified amount of grease provided with the boot kit.
11.
Install the large end of the boot onto the BJ housing so the clearance (C) between the boot and the stepped portion of the housing is 0.1 to 1.55
mm.
12.
Rotate the adjustment screw on the special tool so the clearance stop opening dimension (W on the illustration) is 3.2 mm.
NOTE:
If (W) is more than 3.2 mm, turn the adjustment screw clockwise. If (W) is less than 3.2 mm, turn the screw counterclockwise.